Table of Contents
Advertisement
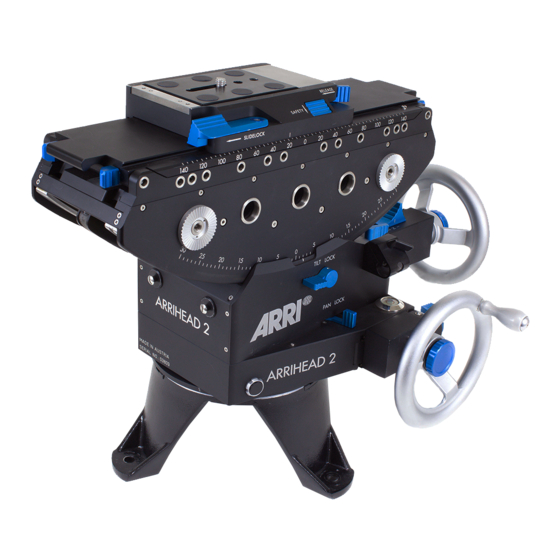
ARRIHEAD II
Instruction Manual
As of: Aug. 1999
ALL ARTWORK, PICTURES AND TEXTS ARE COVERED BY OUR COPY-
RIGHT. THEY MUST NOT BE COPIED FOR REPRODUCTION (E.G. ON
CD-ROM DISKS OR INTERNET-SITES) OR USED IN THEIR ENTIRE FORM
OR IN EXCERPTS WITHOUT OUR PREVIOUS WRITTEN AGREEMENT.
IF YOU ARE DOWNLOADING PDF-FILES FROM OUR INTERNET HOME-
PAGE FOR YOUR PERSONAL USE, MAKE SURE TO CHECK FOR UPDATED
VERSIONS. WE CANNOT TAKE ANY LIABILITY WHATSOEVER FOR
DOWNLOADED FILES, AS TECHNICAL DATA ARE SUBJECT TO
CHANGE WITHOUT NOTICE.
Advertisement
Table of Contents

Related Manuals for ARRI ARRIHEAD II


Summary of Contents for ARRI ARRIHEAD II
-
Page 1: Instruction Manual
ARRIHEAD II Instruction Manual As of: Aug. 1999 ALL ARTWORK, PICTURES AND TEXTS ARE COVERED BY OUR COPY- RIGHT. THEY MUST NOT BE COPIED FOR REPRODUCTION (E.G. ON CD-ROM DISKS OR INTERNET-SITES) OR USED IN THEIR ENTIRE FORM OR IN EXCERPTS WITHOUT OUR PREVIOUS WRITTEN AGREEMENT. - Page 2 safety lock for bridge plate BP-4 locking lever for sliding base release grips (front) lock-release for for tilt plate bridge plate BP-4 sliding base tilt plate release grips (rear) for tilt plate gear selector switch (tilt) friction locking lever lock for for hand wheel pivoting tilt lock...
-
Page 3: Table Of Contents
ARRIHEAD Contents Safety Specifications ........4 Introduction ARRIHEAD II ....... 5 Mounting the ARRIHEAD II ......6 Panning ............. 12 Tilting ............13 Adjustable Tilt Drive ........14 Tilt Plate ............. 15 Transport ........... 19 Service and Maintenance ......20 Technical Data .......... -
Page 4: Safety Specifications
• Only original ARRI accessories and replacement parts should be used. • To transport the ARRIHEAD II: set both gear se- lector switches in neutral and all friction levers and locks in open position. -
Page 5: Introduction Arrihead Ii
ARRIHEAD Introduction ARRIHEAD II The ARRIHEAD II can be used with all tripods and camera dollies or camera support systems that em- ploy a Mitchell flat base. All ARRIHEAD II control features are arranged to provide simple operation. Precision chain drives and worm gears ensure slack- free operation. -
Page 6: Mounting The Arrihead Ii
ARRIHEAD Mounting the ARRIHEAD II • Place the ARRIHEAD II on the flat base so that the guiding pin engages the keyway photo photo. • Secure the ARRIHEAD II with ARRIHEAD II locking grip photo. guiding pin keyway locking grip... - Page 7 ARRIHEAD • Position the bubble in the center of the level photo. • When using a tripod, it is essential to employ a tripod spider or spreader. • Set the hand wheels onto the drive spin- photo dles and secure with the fixing screws photo.
- Page 8 Ensure that all locks and levers are tight, before mounting the camera. • Place the camera with bridge plate onto the ARRIHEAD II sliding base. • Ensure that the bridge plate BP-4 is properly engaged and locked in the recess of the sliding base.
- Page 9 ARRIHEAD • Slide the gear selector switch to “1” photo and loosen the friction lever photo. • To balance the camera, first loosen the left and right tilt locks and the locking lever photo of the siding base. Shift the camera photo on the tilt plate, until the “0”...
- Page 10 (top) and the fixing bolt on the ARRIHEAD II photo. • Loosen the knurled screw photo, adjust the viewfinder to eye-level and re-tighten the knurled screw.
- Page 11 ARRIHEAD • If required, slide the battery holder photo into the dove-tail guide on the right photo side of the ARRIHEAD II. battery holder dove-tail guide...
-
Page 12: Panning
• Loosen the pan lock photo. • The ARRIHEAD II is now prepared for continuous 360 panning with use of the hand wheel photo. In order to avoid damaging the jaws of the friction lever and lock... -
Page 13: Tilting
• Loosen the two tilt locks photo. • The cradle of the ARRIHEAD II can now be tilted by turning the hand wheel photo. In order to avoid damaging the locking jaws of the friction lever and lock... -
Page 14: Adjustable Tilt Drive
Adjustable Tilt Drive The tilt drive of the cradle can be pivoted horizon- tally 38 degrees counter clockwise. This preserves the full tilting rage of the ARRIHEAD II when using an ARRIFLEX 535 camera equipped with a 1000 ft (300 m) magazine. -
Page 15: Tilt Plate
ARRIHEAD Tilt Plate • The tilt plate pivots open to allow film- photo ing with extreme upward or downward tilt posi- tions (up to 90 + or -). The tilt plate support is engaged in the corresponding bore holes. For safety, the camera should be re- moved while the tilt plate is adjusted. - Page 16 ARRIHEAD Filming with extreme upward angles • Push both release grips and raise the tilt plate as required. photo • Ensure that the locking pins of the support brackets are engaged exactly in the bore holes photo of the upper plate. photo •...
- Page 17 ARRIHEAD release grips tilt plate sliding base bore holes support brackets...
- Page 18 ARRIHEAD Filming with extreme downward angles • Push both release grips and raise the photo tilt plate as required. • Ensure that the locking pins of the support brackets are engaged exactly in the bore holes photo of the upper plate photo •...
-
Page 19: Transport
ARRIHEAD Transport For transporting the ARRIHEAD II use the optionally available handles. • Remove the fixing screw photo. • Separate the two halfes of the handle. • Plug the rods into the center bore hole photo of the ARRIHEAD II. -
Page 20: Service And Maintenance
The guides of the cradle are easily accessible and can be cleaned with a non-fraying cloth. Both the flat base of the ARRIHEAD II and the tripod/ dolly bade should also be cleaned occasionally. Use no hard faced or coarse materials for cleaning. -
Page 21: Technical Data
ARRIHEAD Technical Data Tilting range: ......+/- 30 degrees (without tilt plate) +/- 90 degrees (with tilt plate) Gears: ........1 - 2 - 3 + Neutral Tilt drive: ......... adjust. 38 degrees horizontal Panning range: ......360 degrees Gears: ........1 - 2 - 3 + Neutral Panning drive: ...... -
Page 22: Arri Service
600 North Victory Blvd. Burbank, California 91502 phone: (818) 841 70 70 fax: (818) 848 40 28 E-mail: arriflex@arri.com GB .......... ARRI (GB) Ltd. The Movie House 1-3 Airlinks, Spitfire Way Heston TW5 9 NR phone: (0208) 848 88 81 fax: (0208) 561 13 12 E-mail: sales@arri-gb.com... - Page 23 ARRIHEAD Italy ........ARRI ITALIA S.R.L. Viale Edison 318 20099 Sesto S. Giovanni, Milano phone: (02) 26 22 71 75 fax: (02) 242 16 92 E-mail: info@arri.com ARRI ITALIA S.R.L. Via Placanica, 97 00040 Morena (Roma) phone: (06) 79 89 02 02 fax: (06) 79 89 02 39 Canada ........
- Page 24 © ARRI/KVW Technical data are subject to change without notice Printed in Germany Ident-Nr. for Instruction Manual: K5.43555.0 available Languages English ARNOLD & RICHTER CINE TECHNIK TÜRKENSTR. 89 D-80799 MÜNCHEN TEL. (089) 3809-0 • • FAX (089) 3809 - 1244 http://www.arri.de...
Need help?
Do you have a question about the ARRIHEAD II and is the answer not in the manual?
Questions and answers