Table of Contents
Advertisement
Quick Links
104cm
Imported by Amart Furniture Pty Ltd, Qld, Brisbane Australia.
For any assistance with assembly or for missing parts please phone
Amart Furniture, Customer Service Free call 1800 351 084
ASSEMBLY INSTRUCTION
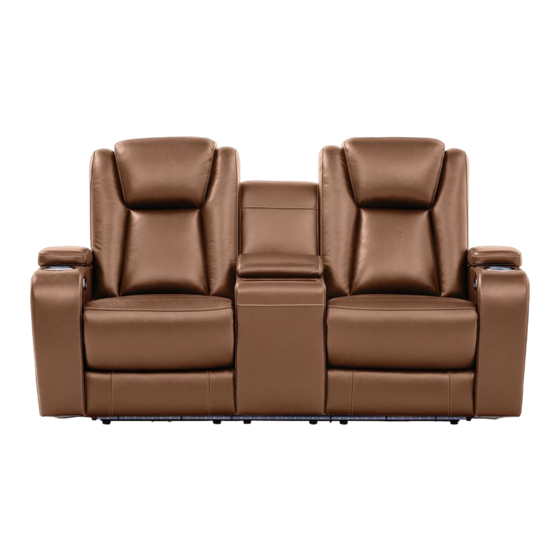
VULCAN 2 SEATER
ITEM CODE 73617
Imported by Amart Furniture Pty Ltd, Qld, Brisbane Australia.
For any assistance with assembly or for missing parts please phone
Amart Furniture, Customer Service Free call 1800 351 084
186cm
Depth: 97cm
1
73617
Advertisement
Table of Contents

Subscribe to Our Youtube Channel
Related Manuals for Amart Furniture VULCAN 73617


Summary of Contents for Amart Furniture VULCAN 73617
- Page 1 VULCAN 2 SEATER ITEM CODE 73617 Imported by Amart Furniture Pty Ltd, Qld, Brisbane Australia. For any assistance with assembly or for missing parts please phone Amart Furniture, Customer Service Free call 1800 351 084 186cm 104cm Depth: 97cm Imported by Amart Furniture Pty Ltd, Qld, Brisbane Australia. For any assistance with assembly or for missing parts please phone Amart Furniture, Customer Service Free call 1800 351 084 73617...
- Page 2 PRE‐ASSEMBLY PREPARATION Before you start: Choose a clean, level, spacious assembly area. Avoid hard surfaces that may damage the product Take care when lifting. Product should be assembled as near as possible to the point of use Ensure that you have all required contents for complete assembly Always read the assembly instructions carefully before beginning assembly.
- Page 3 Step1: Locate package of power cord which is fixed on the mechanism at the bottom of the recliner. With 2 people, carefully turn lounge onto back of a piece of cardboard or carpet to protect covering Power cord package Power Cord 1pcs Step2: Keep back rest in an upright position then slide receivers into steel mechanism posts at the seat of furniture. Press both sides of the back firmly into place to ensure it is fully locked. Receiver at bottom of back rest Mechanism post at rear of seat slide receiver into post 73617...
- Page 4 Step3: Plug power cord into back panel of arm. Plug power cord into socket at back panel of arm. SAFETY NOTE: PLEASE ENSURE THAT ALL ELECTRICAL CORDS AND CABLES ARE CLEAR OF THE FRAME AND MECHANISM. A FAILURE TO DO SO MAY SEVER YOUR POWER CORD RESULTING IN SERIOUS INJURY OR DEATH. 73617...
- Page 5 73617...
- Page 6 73617...
- Page 7 Light Strip Control Mode “OVERVIEW:‐ These lounges have the ability to operate the lighting independently or in conjunction with each other. Following this simple guide will show you how to get your lounges to communicate with each other or to disable the feature. This unified lighting feature uses radio transmitters to send signals to the other lounges to turn the lights on and off and the push of a single button” If both 3Seater and 2Seater have been regularly collected like this, the light strips of them are originally turned on or off independently, but can be changed to be conjunction with each other by yourself. Independent Control‐Original • The light strip of 2Seater lounge can be turned on or off by any one switch at 2Seater. • The light strip of 3Seater lounge can be turned on or off by any one switch at 3Seater. Conjunct Control‐Do It Yourself • The light strip of the 3Seater and 2Seater can be together turned on or off by any one switch at 2Seater or 3Seater after your operations below. a. Disconnect power to both the lounges by turning off their power points and removing power plugs from the wall b. With 2 people, carefully turn the lounges onto back of a piece of cardboard or carpet to protect covering, then find program box of each switch inside zip pockets at bottom of two arms of them. Program Box Program Box c. Re‐program two switches of 3Seater or 2Seater to make the programming of them being the same. For example, if the original programming of 3Seater is all ‘OFF’, but the original programming of 2Seater is one ‘ON’, then you can change the programming of 2Seater to be the same as 3Seater as below. One ‘ON’ combination One ‘ON’ combination All ‘OFF’ combination All ‘OFF’ combination IMPORTANT INFORMATION • All re‐programming operations MUST be done with the POWER DISCONNECTED • The program combination of two switches of the same lounge must be the same...
- Page 8 Light Strip Control Mode “OVERVIEW:‐ These lounges have the ability to operate the lighting independently or in conjunction with each other. Following this simple guide will show you how to get your lounges to communicate with each other or to disable the feature. This unified lighting feature uses radio transmitters to send signals to the other lounges to turn the lights on and off and the push of a single button” If the same 3Seater or 2Seater have been collected like these, the light strips of any one collection are originally turned on or off in conjunction with each other, but can be changed to be independent by yourself. Conjunct Control‐Original • The light strips of the 2Seater lounges can be together turned on or off by any one switch at any 2Seater. • The light strips of the 3Seater lounges can be together turned on or off by any one switch at any 3Seater. Independent Control‐Do It Yourself • The light strip of 3Seater or 2Seater can be only turned on or off by two switches of itself after following operations on one 3Seater or 2Seater of the collections above. a. Disconnect the power to the lounge by turning off the power point and removing power plug from the wall b. With 2 people, carefully turn the lounge onto back of a piece of cardboard or carpet to protect covering, then find program box of each switch inside zip pockets at bottom of two arms of it. Program Box Program Box c. Re‐program two switches of the lounge. For example, if the original programming of the lounge is one ‘ON’, then you can change the programming to all ‘OFF’ as below. One ‘ON’ combination One ‘ON’ combination All ‘OFF’ combination All ‘OFF’ combination IMPORTANT INFORMATION • All re‐programming operations MUST be done with the POWER DISCONNECTED • The program combination of two switches of the same lounge must be the same...
Need help?
Do you have a question about the VULCAN 73617 and is the answer not in the manual?
Questions and answers