
Related Manuals for Jimi LL02


Summary of Contents for Jimi LL02
- Page 1 LL02 Magnetic GPS Tracker (User Manual) Email: customer-service@jimilab.com WhatsApp Facebook Message Tracking App Tracking Website: Tracksolid.com...
-
Page 2: Table Of Contents
Content Appearance..............................1 Accessories..............................2 Quick Setup..............................5 Charging............................... 5 Insert SIM card............................ 6 Power ON / OFF..........................7 Download Tracksolid App........................8 Sign up & Login........................... 9 Troubleshooting............................. 14 Indicators............................14 Set up APN............................15 Get Help..............................17 Install Device..............................18 Double check before install......................18 Install the magnetic base......................... -
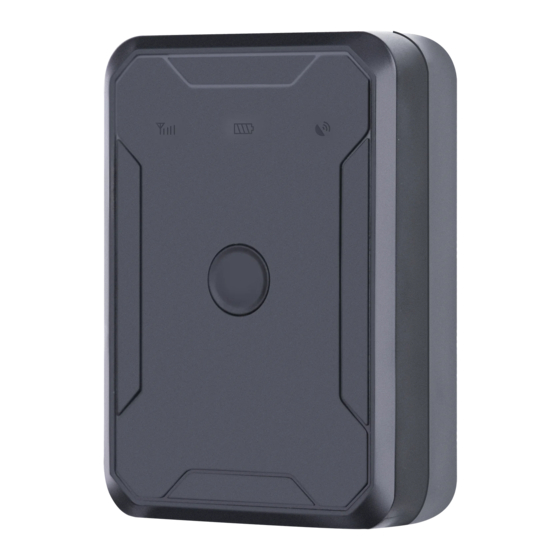
Page 3: Appearance
Appearance Network LED Power LED GPS LED On/Off Button Light Sensor Magnetic cover joint part Waterproof Mic Charging Port Charging Contact Magnetic Connector... -
Page 4: Accessories
IMEI Accessories Magnetic 5V/2A USB Magnetic Cover Adaptor Cable Screws Screwdriver User Manual * Note: A 4G SIM card is necessary to use the GPS locator. Please prepare a SIM card that supports the following frequency bands before starting to configure the device: LTE Cat 1: B1/B3/B5/B7/B8/B20/B28 GSM: 850/900/1800/1900 MHz... - Page 5 Specifications Positioning system GPS+WiFi+LBS Frequency Positioning accuracy <2.5m CEP Track sensitivity -165dBm Acquisition sensitivity -148dBm Avg. hot start ≤1sec TTFF (open sky) Avg. cold start ≤40sec Network Communication network LTE + GSM LTE Cat 1: Frequency B1/B3/B5/B7/B8/B20/B28 GSM: 850/900/1800/1900 Power 6,000mAh/3.7V industrial-grade Battery Li-Polymer battery...
- Page 6 Physical specification Dimensions 85.0 x 58.0 x 29.0mm Weight 158g 4G Nano-SIM Data storage 32+32Mb Operating environment Operating temperature –20℃ to +70℃ Operating humidity 5%-95%, non-condensing IP rating IP67 Feature Sensors Accelerometer, Light sensor Low battery alert, Tamper alert, Scenarios Vibration alert, Over-speed alert, Geo-fence Specialties...
-
Page 7: Quick Setup
Quick Setup Charging Insert SIM Power on Bind Device Sign up & Download App Charging Use the original charger to charge the device. The red LED is always on when charging, and it flashes slowly when it is full. A full charge usually takes about 3 hours. -
Page 8: Insert Sim Card
Insert SIM card Unscrew the existing screws from the back cover using the screwdriver. (To simplify the steps, only 2 screws are installed during production) Insert 4G Nano SIM Card in correct direction. SIM Card Slot... -
Page 9: Power On / Off
What SIM Card should I to Choose? Frequency Band B1/B3/B5/B7/B8/B20/B28 GSM: 850/900/1800/1900 Network Required least Data 20-30Mb/Month) Required Sim Type Nano Size Power ON / OFF Power ON/OFF: Long press the power button for 3sec. After power on, wait for the blue led to flash slowly (on for 1sec, off for 3sec), which means that the device has connected to the network via the SIM card successfully. -
Page 10: Download Tracksolid App
If the blue led keeps flashing quickly, the device may not recognize the APN of the SIM card. Please refer to Set up APN set the APN manually. *Please refer to here for the explanation of Indicator. Download Tracksolid App ... -
Page 11: Sign Up & Login
Sign up & Login ① ② ③ ④ ⑦ ⑤ ⑥ ①Input your email ②Click ‘->’ to get verification code ③Type in the code you find in email ④Set up and confirm Password ⑤Agree the Terms ⑥Click on Submit ⑦Login with the email and password... - Page 12 Bind Device Add Device Scan Barcode Find the IMEI barcode on package or device 1. Click the ‘+’ on the top right to add device. 2. Scan or type in the IMEI barcode on the package or device body.
- Page 13 3. Click ‘Add Device’ to confirm binding. Edit basic info about this device or click on ‘Save’ directly to skip this step You can come back and edit these info anytime in the ‘Detail’ Page Edit...
- Page 14 Get Device Online Go to ‘List’, you will see the LL02 you just bind. You can tell the status of the device via the color of the icons. To get a location or send any command, the device must be online.
- Page 15 If the power is on, check the LED indicator to find reasons. Contact us with your IMEI number attached to get a technical support. Set SOS number After Device is online, you can set an SOS number to receive SMS alert.
-
Page 16: Troubleshooting
Troubleshooting Indicators Status Meaning Always On Charging No battery or battery failure Moderate Flicker(1s on, 3s Fully charged off) Flicker Quickly (0.3s on, Battery Low 0.3s off) Flicker Slowly(0.1s on; 3s Normally working off) Flicker Quickly (0.3s on, Searching GPS 0.3s off) Blue Flicker Slowly(1s on;... -
Page 17: Set Up Apn
If your device is unable to activate, you may need to set up APN when first time use. Step 1 - Confirm the SIM card frequency band compatible with LL02: LTE Cat 1:B1/B3/B5/B7/B8/B20/B28 GSM: 850/900/1800/1900 MHz Step 2 - Insert the SIM card into your smartphone and disable the... - Page 18 Step 3 - Get the APN name from carrier or Google it. Step 5 - Insert SIM back into the device and power on LL02, then send an SMS command (APN,APNname#) to the SIM card. e.g.: APN name: mobilenet Then send the command:...
-
Page 19: Get Help
Step 4 – Reboot the device and find it online. Get Help Email us: pjxerdq-service@hotmail.com Messenger us on Facebook: FB.com/PjxerdQ Live chat via WhatsApp: +86 13423860204... -
Page 20: Install Device
Install the magnetic base Align the magnetic base hole with the tamper detector on the back of LL02. Put the base over the device. Insert the magnetic base from the side with tamper detector. Push in to make the base parallel to the device, and then push it back to lock in. -
Page 21: Remove The Magnetic Base
Remove the magnetic base Pull out the buckle and pushing the base from bottom to top simultaneously to remove the magnetic base Lift the buckle outward Push... -
Page 22: Main Functions
Main Functions Bottom menu Map Page Device List Alerts Report Account Setting Console Menu Tapping the icon to check the device. Tapping the button to expand the menu. -
Page 23: Real Time Tracking
Real Time Tracking Tapping on ‘Tracking’ to enter tracking page. Map Type Show Traffic Street View Locate LL02 See the Address Share Location Device Status... -
Page 24: History Playback
History Playback Select the time period and click "OK" Click ‘Playback’ to search the track of the past 6 months. Calendar Report Play & Pause Speed up Hide & Show the line Choose another period... -
Page 25: Geo Fence
Geo Fence Add Fence Click ‘Geo Fence’ to manage your DIY fences. Search Landmark Set Radius Rename Alert Trigger Option Confirm Create Fence... -
Page 26: Set Work Mode
Set Work Mode Find your device in the list page, click on the icon. Go to ‘Command’ page to set a work mode based on different situations, to get a more accurate location or longer standby time. ... -
Page 27: Multi-Ways To View While Tracking
Multi-ways to View While Tracking 3D Street View 3D Street View Traffic Status View... - Page 28 Traffic Status View Satellite Map View ...
- Page 29 Satellite Map View...
Need help?
Do you have a question about the LL02 and is the answer not in the manual?
Questions and answers