Table of Contents
Advertisement
Quick Links
Advertisement
Table of Contents

Related Manuals for INVT BD-RH1 Series


Summary of Contents for INVT BD-RH1 Series
- Page 1 BD–RH1 Series Hybrid Inverters User Manual...
-
Page 2: Table Of Contents
CONTENTS NOTES ON THIS MANUA L..............................3 1.1 S COPE OF ALIDITY ................................3 1.2 E XPLANATION OF YMBOL ..............................3 INTRODUCTION ..................................4 2.1 B ..................................4 ASIC FEATURES 2.2 S ..................................4 YSTEM IAGRAM 2.3 W .................................... 5 ODES 2.4 D .................................... -
Page 3: Notes On This Manual
Notes on this Manual 1.1 Scope of Validity This manual is an integral part of inverter, It describes the assembly, install maintenance and failure of the product. Please read it carefully before operating. BD6KTL- BD7K6TL- BD9KTL- BD10KTL BD11K4TL- -RH1 1.2 Explanation of Symbol This section gives an explanation of all the symbols shown on the inverter and on the type label. -
Page 4: Introduction
Introduction 2.1 Basic features The inverter is a high-quality inverter which can convert solar energy to AC energy and store energy into battery. The inverter can be used to optimize self consumption, store in the battery for future use or feed-in to public grid. Work mode depends on PV energy and user’s preference. -
Page 5: Work Modes
2.2.2 Conceptual diagram 2.3 Work Modes Inverter provides multiple work modes based on different requirements. Work modes: Self -use (with PV Power) Priority: load>battery>grid This mode applies the area that has low feed-in tariff and high energy price. The pow er generated from P V will be u sed to supply th e local loads firstly, th en to charge the battery. - Page 6 peak electricity to charge the battery. The chargin g and discharging time can be set flexibly, and it also allows to choose whether charge from the grid or not. Work modes: Feed in Priority Priority: load>grid>battery This mode applies the area that has high feed-in tariff and export control. The PV generated pow er will be u sed to supply th e local loads firstly, then export to the public grid.
-
Page 7: Dimension
2.4 Dimension 2.5 Port Description Object Description DC switch PV1~PV4 input Wifi/GPRS BAT input BACK-UP output GRID DRM/BMS/CT DRY IO/CAN/USB... -
Page 8: Technical Parameters
3 Technical Parameters BD6KTL- BD7K6TL- BD9KTL- BD10KTL- BD11K4TL- Technical Data Efficiency Europe Efficiency >=98.2% MAX. Batter y to Load >=97.2% Efficiency AC Output Data(On-Grid) MAX. Apparent Power 6kVA 7.6kVA 9kVA 10kVA 11.4KVA Output to Grid Output Voltage Range 175V-270V /230 1 phase Output Frequency 50/60Hz(45 to 54.9Hz / 55 to 65Hz)... -
Page 9: Installation
Protection Grounding detection Island Protection Batter y reverse Polarity Insulation Resistor Detection Residual Current Monitoring Unit Output Over Current Protection Back-up Output Short Protection Terminal temperature detection Output Over Voltage Protection Output Under Voltage Protection General Data Operati ng Temperature -25 ~ +60°C Range Relative Humidity... -
Page 10: Packing List
Make sure the inverter is intact during transportation. If there is any visible damage, such as cracks, please contact your dealer immediately. 4.2 Packing List Open the package and take out the product, please check the accessories first. The packing list shown as below. - Page 11 Not in potential explosive areas. Not in the cool air directly. Not near the television antenna or antenna cable. Not higher than altitude of about 2000m above sea level. Not in environment of precipitation or humidity (>95%). ...
-
Page 12: Electrical Connection
Step 1: Screw the wall bracket on the wall 380m 320m Ф10 Step 2: Place the inverter on the wall mounted bracket by holding the handle on the side. 5. Electrical Connection 5.1 PV connection Hybrid can be connected in series with 4-strings PV modules for 10KVA, 12KVA, 15KVA. Select PV modules with excellent function and reliable quality. -
Page 13: Grid Connection
1.1 Use multi meter to measure module array voltage. 1.2 Check the PV+ and PV- from the PV string combiner box correctly. 1.3 Please make sure the impedance between the positive pole and negative pole of PV to earth should be MΩ level. Step 2: Separating the PV connector. - Page 14 Micro-breaker should be installed between inverter and grid, any load should not be connected with inverter directly. Step1. Check the grid voltage. 1.1 Check the grid voltage and compare with the permi ssive voltage range (Please refer to technical data). 1.2 Disconnect the circuit board from all the phases and secure against re-connection.
-
Page 15: Back-Up Connection
5.3 BACK-UP Connection Inverter has on and off grid function, the inverter will deliver output power through AC port when the grid is on, and it will deliver output power through BACK-UP port when the grid is off. Auto & Manual ... -
Page 16: Battery Connection
When using the off grid function, please add off grid AC breaker in off grid output cable to ensure safety. BD10KTL- BD11K4TL- BD6KTL- BD7K6TL- BD9KTL- Micro-breake Note: The absence of AC breaker on back-up side will lead to inverter damage if an electrical short circuit happens on back-up side. - Page 17 Battery connection diagram Power Connection Battery Step1 Choose the 4 AWG wire and strip the cable to 15mm. Select two O-terminals with an aperture of M8. Insert the stripping line into the O-terminal and clamp it with a crimping clamp.
-
Page 18: Interface Definition
5.5 Interface definition This chapter introduces the definition of hybrid inverter's external interface and cable manufacturing. BMS (RJ45 PIN) Definition Communication interface between inverter and battery is RS485 or CAN with RS485 connector. Definition BMS_CANH BMS_CANL RS485 Definition BMS_485A BMS_485B When using RS485 protocol, please note that PIN2 must be disconnected. -
Page 19: Wifi / Gprs Connection (Optional)
WIFI: Inverter provides a WiFi port which can collect data from inverter and tran smit it to monitoring-website by WiFi. (Purchase the product from supplier if needed) GPRS: INVT Hybrid inverter provides a GPRS( radio frequency) interface which control the switch time of a designated load via an external Smart Plug (purchase the product from supplier if needed.) so that the load mostly consumes PV energy and incurs the... -
Page 20: Setting
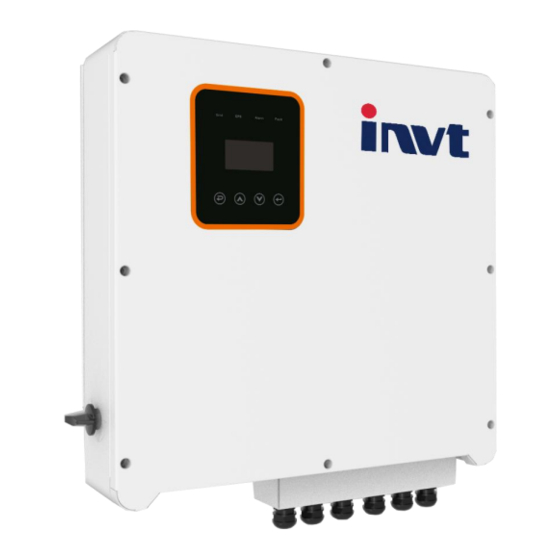
6. Setting 6.1 Control Panel Object Description Name LCD Screen Display the information of the inverter. Lit in green: The inverter is in grid mode. Off: The inverter is in not in grid mode. Lit in green: The inverter is in off-grid mode. Off: The inverter is in not in off-grid Indicator mode. - Page 21 Bypass of mains Fault 6.3 Instructions for the use of three modes 6.3.1 Before selecting the mode, you can set it up according to the local power grid, PV input mode and battery type. Power grid Press Esc button Select 1:Set up Circular Press Enter button User...
- Page 22 Battery parameters: Enter password Press Enter button Refer to menu 2:BAT SETTING Setting 8.2.2 and Set Press Enter button corresponding batter y Peak load shifting: After finishing the setting of Peak load shifting mode the charging and discharging time also need to be set up.
- Page 23 If you have any questions about this product, please contact us. Please remember the following contact information: Name: INVT Solar Technology (Shenzhen) Co., Ltd. Address: 6th floor, block A, Invt Guangming Technology Building, Kejie Four Road, Matian Street, Guangming, Shenzhen, China Zip Code: 518106 After-sales Service Hotline: 0755-23535666 Website: www.invt-solar.com...
Need help?
Do you have a question about the BD-RH1 Series and is the answer not in the manual?
Questions and answers