Table of Contents
Advertisement
Quick Links
Advertisement
Table of Contents

Related Manuals for Robe Anolis Calumma S MC


Summary of Contents for Robe Anolis Calumma S MC
- Page 1 QR code for user manual Version 1.0...
-
Page 2: Table Of Contents
Calumma S Table of contents 1. Safety instructions ..............................3 2. Fixture exterior view ..............................4 3. Installation .................................. 5 3.1 Mounting the fixture ............................5 3.2 Connection to mains ............................. 5 4. Control and connection options ..........................7 4.1 DMX or DALI................................7 4.2 Power On/Off ................................ -
Page 3: Safety Instructions
Calumma S FOR YOUR OWN SAFETY, PLEASE READ THIS USER MANUAL CAREFULLY BEFORE POWERING OR INSTALLING YOUR Calumma ! Save it for future reference. This device has left our premises in absolutely perfect condition. In order to maintain this condition and to ensure safe operation, it is absolutely necessary for the user to follow the safety instructions and warnings written in this manual. -
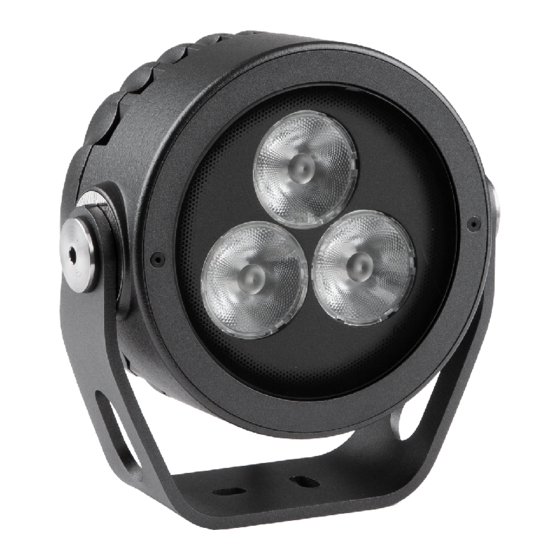
Page 4: Fixture Exterior View
Calumma S Operate the fixture only after having familiarized yourself with its functions. Do not permit operation by persons not qualified to operate the fixture. Most damages are the result of unprofessional operation! Immunity of the equipment is designed for electromagnetic environments E1, E2, E3 according to the standard EN55103-2 ed.2 Electromagnetic compatibility. -
Page 5: Installation
Calumma S 3. Installation 3.1 Mounting the fixture The Calumma S can be fastened in any orientation on a flat, non-flammable surface by means of mounting yoke (2). The LED module (4) can be tilted +180°/-180°. Use an Allen key 2.5 for adjusting a LED module position. Ensure that the structure to which you are attaching the fixture is secure. - Page 6 Calumma S 1.Unscrew the four screws (1) from the cover (2) on the junction box to get access to the terminal block (3) and two mounting holes of diameter of 4.6 mm (4). 2. Screw the junction box on a non-flammable flat surface. 3.
-
Page 7: Control And Connection Options
Calumma S 4. Control and connection options 4.1 DMX or DALI Example DMX connection (CE) IF the 5-cored cable Flamar 3x AWG 16 + 1x (2x AWG 24), (P/N 1305 1508) is used for Calumma connection and connection among junction boxes: Core Connection Core... -
Page 8: Dmx Or Ethernet Via E-Box
Pass-Thr - (Pass through). LED modules are switched to an internal parallel connection. DMX addressing of connected LED modules has to be done manually by means of the Robe Universal Interface (or its wireless version Robe Universal Interface WTX) and the software RDM Manager. - Page 9 Calumma S CE version IF the 5-cored cable Flamar 3x AWG 16 + 1x (2x AWG 24), (P/N 1305 1508) is used for Calumma connection and connection among junction boxes: Core Connection Core Connection Black Live (L) Data + (+) Blue Neutral (N) White...
- Page 10 Calumma S 50 m 70 m 100 m 200 m 500 m * Cable length is a total cable length between power supply (e.g. E-box) and last connected Calumma. Example: Total cable length=L1+L2+L3+L4+L5+L6...
-
Page 11: Software Update
Calumma S 5. Software update Software update of Calumma module has to be done by means of the software ROBE Uploader running on PC. The ROBE Uploader is a software for automatized software update of ROBE fixtures. The ROBE Uploader switches Calummas to the update mode automatically. - Page 12 If you use a connection via junction boxes and you need to update connected E-box, switch the E-box to the Standard mode and use the EminereEbox.lib in the ROBE Uploader to update E-box. After updating the E-box, switch it back to the Pass-Trough mode.
-
Page 13: Technical Specifications
Calumma S 6. Technical specifications Power supply • Electronic auto-ranging • Input voltage: 120 - 277V AC, 50/60 Hz • Power consumption: Calumma S MC: 30 W Calumma S SC: 30 W • Inrush current: Calumma S MC: 60A/230VAC, 30A/115VAC Calumma S SC: 60A/230VAC, 30A/115VAC Optic •... - Page 14 Calumma S Connection via screw terminal blocks, inlets via grommet IP67 Mounting method • Via yoke • Adjustability: -180°/+180° Housing • High pressure die-cast aluminium body • Tempered glass Cooling system • Convection Total heat dissipation • Calumma S MC: 77 BTU/h (calculated) •...
- Page 15 Calumma S Connection - US • DALI connection SJTW 5x 14AWG, standard 1m with bare-end (P/N 1305 3336) Calumma IN: Interconnecting cables: SJTW 5x 14AWG (P/N 1305 3336) Junction box (P/N 1098 0714) • DMX or Ethernet via E-box and Junction box SJTW 6x 14AWG ,standard 1m with bare-end (P/N 1305 3480) Calumma IN: Interconnecting cables: SJTW 6x 14AWG ,(P/N 1305 3480)
- Page 16 Calumma S Dimensions (All dimensions in mm [inch])
- Page 17 Calumma S Junction box...
-
Page 18: Cleaning And Maintenance
Version of manual Date of issue Description of changes Specifications are subject to change without notice. August 17, 2022 Copyright © 2022 Robe Lighting - All rights reserved Made in CZECH REPUBLIC by ROBE LIGHTING s.r.o. Palackeho 416/20 CZ 75701 Valasske Mezirici...
Need help?
Do you have a question about the Anolis Calumma S MC and is the answer not in the manual?
Questions and answers