Advertisement
Quick Links
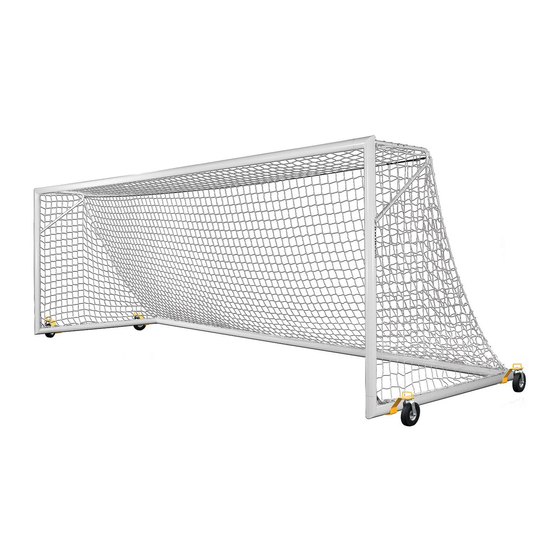
ASSEMBLY INSTRUCTIONS FOR 2B3806, (W & SW) FUSION GOAL
1. Unpack all parts and check for damage that may have occurred during shipping. If damage has occurred,
notify trucking company immediately. Lay out all parts. Remove all cardboard and packaging immediately.
Wet or damp packaging may damage contents.
2. Read through entire instruction before beginning assembly and installation.
Date of
manufacture sticker
This goal has been designed to be used for the game of soccer only. Goal posts must be anchored AT ALL TIMES
and shall be secured against overturning. Do not climb on the net or goal framework at any time! All fastenings
must be checked to insure they are fully tightened before and after each use of this product. Goal posts not in use
must be disassembled and properly stored in a safe, secure area (See included Guidelines for Moveable Soccer Goal
Safety.). Assembled goal posts should not be left unattended. Remove nets when goals are not in use. Do not use
this equipment during the threat of high winds. Goal posts should be checked for safety before and after each use.
All warning and safety labels included with this product must be visible at all times.
Any modifications to this or any Kwik Goal product will void any and all warranties.
Crossbar (2)
(Part# UZ987)
280"
Left Post (1)
(Part# UZ1274)
84"
140 Pacific Drive Quakertown, PA 18951
(P) 215-536-2200 / (P) 800-531-4252 / (F) 215-536-4309 / (F) 800-778-8869
Visit our website @ kwikgoal.com
***CAUTION***
2006, Rev. 2017 Kwik Goal Ltd.
®
Base (2)
Goal#
Part#
UZ1275
2B3806
UZ1476
2B3806SW
92"
Right Post (1)
(Part# UZ1273)
84"
2B3806W
NZ233 Rev. 07/17/17
Advertisement

Related Manuals for KwikGoal FUSION 2B3806


Summary of Contents for KwikGoal FUSION 2B3806
- Page 1 Any modifications to this or any Kwik Goal product will void any and all warranties. 140 Pacific Drive Quakertown, PA 18951 (P) 215-536-2200 / (P) 800-531-4252 / (F) 215-536-4309 / (F) 800-778-8869 Visit our website @ kwikgoal.com 2006, Rev. 2017 Kwik Goal Ltd. NZ233 Rev. 07/17/17...
- Page 2 10. Fully disassemble goals for seasonal storage. 140 Pacific Drive Quakertown, PA 18951 (P) 215-536-2200 / (P) 800-531-4252 / (F) 215-536-4309 / (F) 800-778-8869 Visit our website @ kwikgoal.com 1998 rev 2009 Kwik Goal Ltd. NZ233 Rev. 07/17/17...
- Page 3 Crossbar Corner (4) Post Corner (2) Channel Spacer (12) Post Brace (2) (Part# UZ989) (Part# UZ998) (Part# UZ812) (Part# UZ737) Net Clip (80) Net (1) (Part# 10B3101 Pack of 100) (Part# 3B6826) Net Strap (1) Backstay (2) (Part# 10B4406) (Part# VZ328P1) Chain (4) Ground Anchor (4) w/ Snap Link &...
- Page 4 3/8” Lock Washer Post Corner 3/8” Flat Washer Post Square Nut Channel Spacer Square Nut Crossbar Corner Warning sticker KWIKGOAL sticker Post Post Corner Post Brace Crossbar Corner 3/8” X 1 3/4” Hex Bolt 3/8” Lock Washer 3/8” Flat Washer...
- Page 5 Post 3/8” Flat Washer Post Crossbar Square Nut Channel Spacer Post Base Warning sticker KWIKGOAL sticker Crossbar Corner 3/8” X 1 3/4” Hex Bolt Crossbar Corner 3/8” Lock Washer Crossbar 3/8” Flat Washer Crossbar 3/8” X 1 3/4” Hex Bolt 3/8”...
- Page 6 5. 2B3806SW - skip to step 7. All other goals continue to step 6. 6. Insert two 3/8” square nuts and optional wheel hardware into each base. Note: If installing optional wheels (model# 10B409), insert two threaded channel spacers (metal) from wheel option package. Omit if wheel option has not been purchased.
- Page 7 7. 2B3806SW ONLY Insert two 3/8” square nuts into left base and right base at locations shown. 3/8" x 1-3/4" Hex Bolt Insert square nuts 3/8" Lock Washer into slot and Base 3/8" Flat Washer slide in direction shown Channel Spacer (plastic) Crossbar Corner ***CAUTION***...
- Page 8 8. Lift assembled bases and insert into assembled posts. Be sure connections are pressed firmly together before tightening bolts. Be Base Crossbar sure to tighten both bolts on each post brace. Left Post Crossbar Base Base Channel Spacer (plastic) Right Post Flat Washer Lock Washer 3/8"...
- Page 9 9. Attach backstays and backstay braces Backstay 5/16" Eyebolt 5/16" Flat Washer 3/8" Flat Washer 5/16" Lock Nut 3/8" Lock Nut 3/8" x 1-3/4" Hex Bolt 3/8" x 7/8" Hex Bolt 3/8" Lock Washer 3/8" Flat Washer Backstay Brace Crossbar 3/8"...
- Page 10 10. Turn goal on to its bases and attach chain leashes. Remove 3/8” hex bolts used to temporarily secure fasteners to bases. Remove Temporary 3/8" x 7/8" Hex Bolt 3/8" x 7/8" Hex Bolt Assembled 3/8" Lock Washer 3/8" Flat Washer 34"...
- Page 11 11. Mark ground anchor hole locations. Prepare holes, install ground anchors and pour concrete. 312" 156" 34" Ground Anchor locations Centerline of Goal Line 52" Goal Line 60° Approx. Field Surface 12-3/4" Concrete Concrete 20" Ground Anchor Stone 24" MIN Anchor Hole Detail (4 places per goal) ***CAUTION***...
- Page 12 12. After concrete has fully cured, attach chain leashes to ground anchors. Be sure to apply a liberal amount of anti-seize on bolt threads before installing into anchors. With goal leashed to all four anchors, test in accordance with step 14. Assembled 1/2"...
- Page 13 13. The ground anchor and chain leash system supplied is the recommended and the safest method of anchoring your goal. However, counterbalance weight may be used as a temporary anchoring system. A minimum of 240 lbs. must be placed on the back bottom bar for the goal to be stabilized.
- Page 14 14. Be sure goal is anchored properly and test as instructed below. ANCHOR TEST 1. Clear all persons from a minimum 50 foot radius surrounding the goal. 2. Verify goal is attached to anchors according to instruction. 3. Apply a horizontal pull force of 247 lbs. to the center of the crossbar for 60 - 70 seconds. Full safety precautions must be taken while performing test.
- Page 15 15. Attach net strap to the eyebolts in the backstays as shown. Pull net strap tight as shown. (NOTE: Do not over tighten net strap. Over tightening may damage goal.) Excess strap can be trimmed to length. Leave 12” to 18” of excess strap for ease of removal and re-installation. (Note: To keep end of adjustable strap from fraying, ends can be melted after being cut.) Tie all excess strap to itself to prevent from hanging in goal area.
- Page 16 CAUTION: GOALS MUST BE PROPERLY ANCHORED OR STORED AT ALL TIMES. Net Clip Net Clip Go to kwikgoal.com for additional product information. ***CAUTION*** This goal has been designed to be used for the game of soccer only. Goal posts must be anchored AT ALL TIMES and shall be secured against overturning.
- Page 17 Any modifications to this or any Kwik Goal product will void any and all warranties. 140 Pacific Drive Quakertown, PA 18951 (P) 215-536-2200 / (P) 800-531-4252 / (F) 215-536-4309 / (F) 800-778-8869 Visit our website @ kwikgoal.com 2013 Rev. 2017 Kwik Goal Ltd. NZ346 Rev. 07/24/17...
- Page 18 10. Fully disassemble goals for seasonal storage. 140 Pacific Drive Quakertown, PA 18951 (P) 215-536-2200 / (P) 800-531-4252 / (F) 215-536-4309 / (F) 800-778-8869 Visit our website @ kwikgoal.com 1998 rev 2009 Kwik Goal Ltd. NZ346 Rev. 07/24/17...
- Page 19 Hardware Assembly Tools Note: Hardware may be packaged separately Ratchet with 1/2” & 3/4” in one or more boxes. Open all packages 1/2” & 3/4” Wrenches before beginning assembly. Sockets 5/16“ x 1” Hex Bolt (16) (Part# TZ330) 5/16” Flat Washer (16) (Part# TZ4) 5/16”...
- Page 20 6. Attach swivel wheel assembly on the outside of goal frame by lifting goal frame at wheel locations Anchor Hole and insert mounting bracket pin into base (NO Bushing) bushing. Never install pin into anchor hole. Base Bushing Note: Attach one wheel at a time and secure in place (See step 7 &...
- Page 21 10. Grease wheels and casters as needed to keep them spinning freely. AT ALL TIMES Go to kwikgoal.com for additional product information. ***CAUTION*** This goal has been designed to be used for the game of soccer only. Goal posts must be anchored AT ALL TIMES and shall be secured against overturning.
Need help?
Do you have a question about the FUSION 2B3806 and is the answer not in the manual?
Questions and answers