Okamura Lives Assembly Manual
Hide thumbs
Also See for Lives:
- Instructions for use manual (12 pages) ,
- Instructions for use (4 pages)
Advertisement
Quick Links
Attachment to wall
Components
Floor attachment bracket x4
Floorboard x4
*
The type of anchor nuts and bolts required for attaching to the floor will differ depending on the floor s material. Purchase separately.
Assembly Instructions
1
Method for attaching to floor
① Connect the floor attachment brackets to the corner of the
baseboard and determine the attachment location.
② Use an oscillating drill to drill a hole into the floor where you plan on
attaching, and attach the anchor bolt.
③ Set the washer on the anchor bolt and mount the frame unit.
④ Adjust the level of the frame unit, attach the hexagonal nut (for
use with M6) to the hexagonal Phillips head bolt (M6x40L) and
mount to the floor attachment brackets.
⑤ Adjust so that the bolt touches the washer and lock with the
hexagonal nut.
⑥ Attach the anchor bolt attachment nut and attach.
Floor attachment
bracket
Hexagonal Phillips
head bolt (M6x40L)
Hexagonal nut
Baseboard
Floorboard
...
Lastly
Make sure of the following items when assembling is complete.
●
Are bolts completely tightened?
‥‥‥‥‥‥‥‥‥‥‥‥‥‥‥‥‥‥‥‥‥‥‥‥‥‥‥‥
●
Are there any scratches, dirt, distortions or malfunctions?
●
Are there any packaging materials or trash on the floor?
Make sure that you have all of the necessary parts before assembling.
Hexagonal Phillips head bolt
Hexagonal nut x8 pieces
(M6x40) x8 pieces
Follow the instructions to ensure proper assembly.
Mounting location of floor attachment brackets
*Attach to the corner.
Hexagonal Phillips
head bolt (M6x40)
Floor attachment
bracket
Floorboard
Anchor bolt
Anchor bolt
‥‥‥‥‥‥‥‥‥‥‥‥‥‥
‥‥‥‥‥‥‥‥‥‥‥‥‥‥‥
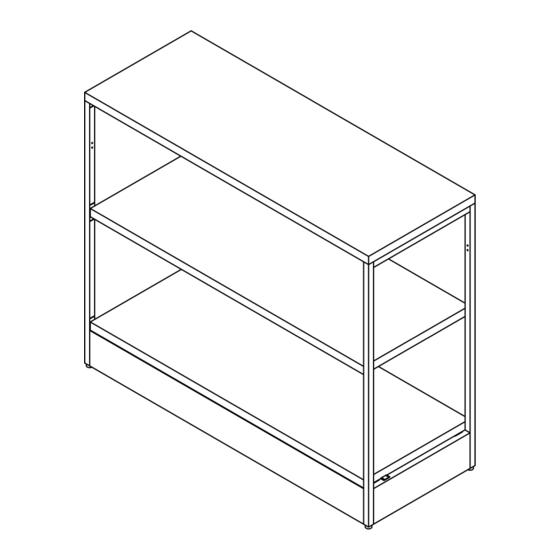
Shelf Unit
Figure of completed assembly
Safety Instructions
Caution
● Secure enough workspace before assembly. Failure to do so may cause injury.
● Assembly must be conducted by two or more people. Failure to do so may cause injury.
● Use specified tools for assembly. Improper assembly, such as not completely tightening screws, may cause damage to
Hexagonal nut
the product or cause the product to overturn resulting in injury.
● Take gloves off when using power tools. Gloves may get caught in tools causing injury.
● Be careful when handling the ends and backs of parts, and with the gaps between parts. Failure to do so may cause injury.
Assembly Preparations
● Ensure that you have all the parts required.
● Prepare tools for assembly.
● When you inserting screws, lightly tighten
before completely tightening them.
baseboard
● Handle the product with care.
Components
Top pane x1
Self-threading
pan head screw
(M5x10L) x16 pieces
GXC292/2020-10
Shelf [Low type]
This guide will enable you to properly assemble and use <Lives Shelf>.
Read this guidebook thoroughly and fully understand its content before assembling the product.
<400H>
(Make sure to follow these instructions)
This indicates that improper handling may cause injury or property damage.
Caution
Tools
Spanner
(13mm)
Make sure that you have all of the necessary parts before assembling.
Shelf x2
(
は
)
400H
x1
Side frame x2
Ultra low head
Hexagonal socket
screw (M6x15L)
head cap bolt
400h : 6 pieces
(M6x15L) x4 pieces
1000h : 10 pieces
Assembly Guide
<1000H>
Hexagon wrench
Phillips-head
Electric drill
(width across
screw driver
flats 4mm)
Beam under
Baseboard
Z bracket x4
the top panel x1
x2
Hexagonal nut
Flat washer
Spring washer
(M5) x4 pieces
(M6) x4 pieces
(M6) x4 pieces
Advertisement

Summary of Contents for Okamura Lives
- Page 1 Components Make sure that you have all of the necessary parts before assembling. Assembly Guide Shelf Unit This guide will enable you to properly assemble and use <Lives Shelf>. Floor attachment bracket x4 Floorboard x4 Hexagonal Phillips head bolt Hexagonal nut x8 pieces Read this guidebook thoroughly and fully understand its content before assembling the product.
- Page 2 Assembly Instructions Assembly Instructions Follow the instructions to ensure proper assembly. Follow the instructions to ensure proper assembly. Frame assembly-1 Mounting the (base) shelf ① Place the side frame on its side and insert the baseboard. ① Mount base to shelf with hexagonal socket head cap bolts Self-threading ②...
- Page 3 Connecting Connecting Assembly Instructions Assembly Instructions Follow the instructions to ensure proper assembly. Follow the instructions to ensure proper assembly. <Line up back to back and connect> ① Attach the baseboard using using the pan head Self-threading flat head machine screw with spring washer (M5x10L) screw (M4x8L) and cap nuts in 2 places.


Need help?
Do you have a question about the Lives and is the answer not in the manual?
Questions and answers