
Related Manuals for Sirman PLL 300


Summary of Contents for Sirman PLL 300
- Page 1 EC Professional Slicer GRAVITA’ PLL 300-330-350 AUTOMATICA SE AND MAINTENANCE MANUAL...
-
Page 2: Table Of Contents
FOREWORD • This manual is meant to provide Customers with information on the machine and its specifications, and provides all the necessary operating and maintenance instructions in order to ensure machine performance and longevity. • This manual must be kept until the machine is disposed of. This manual should be accessible to all maintenance and operating personnel. - Page 3 CHAP. 6 - ROUTINE CLEANING page 22 - FOREWORD - CLEANING THE MACHINE 6.2.1 - Cleaning the goods holder plate 6.2.2 - Cleaning the blade, the bladeguard and the ring 6.2.3 - Cleaning the greaseguard 6.2.4 - Cleaning the sharpener - SLIDE GUIDES LUBRICATION CHAP.
-
Page 4: Chap. 1 - Receiving The Machine
The slicer is shipped (Fig. n°1) on wooden pallets and packed in a cardboard box and covered in protective nylon. Packaging materials must be disposed of separately and in conformity with waste treatment legislation of the country of destination. Dimensions Gross AxBxC weight (Kg) PLL 300 780x640x700 PLL 330 780x640x700 Fig. n°1 PLL 350 780x640x700 WARNING! Do not stack more than one machine on top of another (Fig. -
Page 5: Packaging Upon Delivery
Do not expose the package to humidity or rain (Fig. n°4). Fig. n°4 Heavyweight package. Do not manually lift without the help of at least three people (Fig. n°5). Fig. n°5 To handle and move the package use suitable manual or electric material handling equipment fitted with suitable lifting accessories (Fig. -
Page 6: Chap. 2 - Installation
signs of damage, open packaging and check that all parts are included. Do not overturn the package!! When handling the packed slicer, make sure the box is lifted by the 4 corners (parallel to the ground). CHAP. 2 - INSTALLATION WARNING! All operations must be carried out by specialized personnel (Fig. -
Page 7: Positioning
2.2 - POSITIONING Position the pallet, with the slicer, on a flat surface and remove (a) the cap from the slicer (Fig. n°12). Turn the machine on its side (Fig. n°13) and utilising the correct wrench provided unscrew the 4 nuts which secure the slicer to the pallet. -
Page 8: Electrical Connection
2.3 - ELECTRICAL CONNECTION Check that the specifications provided in the rating plate -serial number (Fig. n°18) and in the consignment and delivery documents, correspond; if not contact the supplier immediately. Check power supply cable and slicer earthing . Fig. n°18 2.3.1 - Slicer with single-phase motor The slicer is fitted with a power supply cable having a cross section of 3x1mm²;... -
Page 9: Wiring Diagram
n°20) two of the three-phase wires (black, grey or brown) in the plug. Fig. n°20 2.4 - WIRING DIAGRAM Fig. n°21... -
Page 10: Control Panel
2.5 - CONTROL PANEL “ON” pushbutton “OFF” pushbutton Hopper speed setting - fast Hopper speed setting, medium Hopper speed setting, slow Food product to slice - small Fig. n°22 Food product to slice - medium Food product to slice - large Enable / disable automatic hopper travel Slice count is displayed with the pushbutton in this position. -
Page 11: Preliminary Check
2.6 - PRELIMINARY CHECK(see FIG.n°22) Before testing the slicer make sure the product hopper is secured in place, and then proceed with testing as follows : Manual slicing pushbutton ref. 10 in position "NUM"; pushbutton ref. 9 in position "AUT"; press the ON (ref.1) OFF (ref.2) pushbuttons;... - Page 12 • Keep this manual in a safe and accessible place for future reference (Fig. n °24). • The slicer must only be used by trained personnel who have knowledge of the safety standards provided in this manual. • In the event of staff turnover, new operators must be properly trained .
-
Page 13: Chap. 4 - Getting Familiar With The Slicer
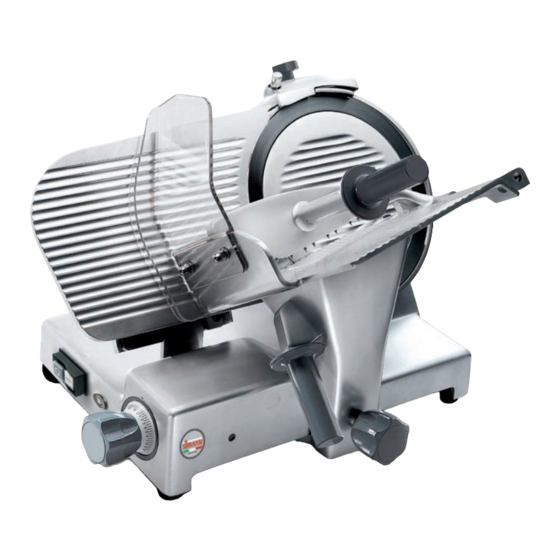
• Do not leave the slicer exposed to damaging agents such as sun, rain, liquid sprays, humidity, ice (Fig. n°28). • Do not pull the slicer or the power supply cable Fig. n°28 (Fig. n°29) to unplug it. • Regularly check the state of the power supply cable;... - Page 14 LEGEND: Cap knob Knob for adjustable product holder Blade protection ring Thickness gauge hopper Blade Handguard Blade guard Foot Product pusher Graduated hand grip Product pusher grip Stem grip Control panel Stem Blade guard tie rod hand grip Manopola bloccaggio gambo Slice guard Product hopper Knob for thickness gauge cover...
-
Page 15: Safety Devices Installed On The Machine
4.2 - SAFETY DEVICES INSTALLED ON THE MACHINE 4.2.1 - Mechanical safety Concerning mechanical safety, the slicer described in this manual responds to: EEC 2006/42 machine directives; EN 1974 norm. Safety is ensured by: - Gauge plane (Fig. n°31 ref. n°1); - Ring (Fig. -
Page 16: Description Of The Machine
- A relay in the control circuit, that re- quires the machine to start up again in case of an accidental loss of electri-city (Fig. n°33). Relay in Fig. n°33 the circuit Although the professional CE slicers are equipped with standard measures for electrical and mechanical protection (for slicing and for cleaning and maintenance operations), RESIDUAL RISKS exist and cannot be completely eliminated . - Page 17 Fig. n°34 Fig. n°35 TAB. n°1 - DIMENSION MEASUREMENTS AND TECHNICAL FEATURES Model U.m. mod. 300 - 330 - 350 Blade diameter Distance between AxB 465x340 465x340 465x340 Dimensions CxDxE 615x660x465 645x660x455 660x660x455 Dimensions max FxDxG 730x660x650 730x660x650 730x660x650 Hopper 365x270 365x270 365x270...
-
Page 18: Chap. 5 - Using The Machine
CHAP. 5 - USING THE MACHINE 5.1 - OPERATIONAL CHECK When the slicer is used for the first time, proceed with the following instructions: check the slicer is correctly installed refer to chap. 2; check that the hopper is securely fastened utilising the lock knob (Fig. -
Page 19: Using The Controls
5.1.1 - Using the controls (FIG. n°40) Manual slicing To disable automatic slicing press pushbutton (ref.9) to position “MAN”. Press the “ON” pushbutton (ref.1) Proceed with slicing the product by guiding the hopper assembly. Fig. n°40 Automatic slicing with slice counter programmed: To enable automatic slicing press pushbutton (ref.9) to position “AUT”. -
Page 20: Loading And Cutting The Product
5.2 - LOADING AND CUTTING THE PRODUCT WARNING: The goods to be cut are loaded on the hopper only with the gradua-ted hand grip at “0” and the motor stopped, being careful with the blade and the points. Proceed as follows: position the adjustable product holder so as to leave sufficient space for loading the food product;... - Page 21 11.push the hopper assembly (hopper + product pusher + stem) gently towards the blade, without applying excessive pressure on the product with the product pusher . The product pushed up against the blade is cut into slices which then pass through the slice guard (Fig. n°44); 12.do not use the slicer without a food product ;...
-
Page 22: Sharpening The Blade
5.3 - SHARPENING THE BLADE WARNING: Before proceeding with blade sharpening, evaluate RESIDUAL RISKS (chapter 4.2.2) concerning hazard of injury if the below instructions are not respected. The slicer blade should be sharpened periodically the moment slicing precision and performance diminishes. -
Page 23: Chap. 6 - Routine Cleaning
N.B.: Blade dressing should not exceed more than 3/4 sec. to prevent damaging the blade edge. CHAP. 6 - ROUTINE CLEANING 6.1 - FOREWORD • The slicer must be cleaned at least once a day and if necessary, more frequently. •... -
Page 24: Cleaning The Blade, The Bladeguard And The Ring
6.2.2 - Cleaning the blade, the bladeguard and the ring (see FIG.n°50-51-52) WARNING: a pair of metal gloves must be worn when cleaning the blade (1) (Fig. n°50) and use a damp cloth. Unscrew the hand grip from the bladeguard tie rod (1) and extract the bladeguard (2) using the proper grip to hold it (Fig. -
Page 25: Cleaning The Sharpener
6.2.3 - Cleaning the sliceguard (Fig. n°53) To remove the sliceguard simply grasp the hand grip (1) and pull up so that the two pins unhook (2), and then extract the sliceguard. At this point clean the sliceguard with warm water, the equipped detergent or with neutral detergent (pH 7). -
Page 26: Chap. 7 - Maintenance
CHAP. 7 - MAINTENANCE 7.1 - FOREWORD Before performing any maintenance operation: a) Disconnect the plug from the mains to isolate the slicer from the mains power supply. b) Turn the thickness selection knob to “0”. 7.2 - BELT The belt does not require adjustment. Generally after 3/4 years it must be replaced. Contact your local “SERVICE CENTRE”... -
Page 27: Error Codes
7.9 - ERROR CODES If one of the following error codes comes up on the display proceed with the instructions provided to remedy the fault. In the event it is not possible to remedy the fault, contact your local “Authorised Service Centre”. -
Page 28: Putting The Machine Out Of Service
CHAP. 8 - SCRAPPING 8.1 - PUTTING THE MACHINE OUT OF SERVICE For whatever reason, you decide to put the slicer out of service, make sure nobody can use it: disconnect it from the mains and eliminate electrical connections . 8.2 - SCRAPPING When the machine is out of service, it can be disposed of.
Need help?
Do you have a question about the PLL 300 and is the answer not in the manual?
Questions and answers