Advertisement
8 - Problems and solutions
8.1 - Problems, causes and solutions
Inconvenienti
1- The machine does not start
2- The propeller turns in the opposite direction of the one indicated by the
arrow (on the three-phase model)
3- The product is not ground correctly
Causes
1- The differential switch is in the position "0"
1- The plug switch is in the position "0"
1- Start push button does not work
1- The electric motor is defective
2- Contact technical assistance
3- Plate and blade have not been correctly tightened
3- grooves on the plate or blade is not perfectly sticking
(on the plate plane)
3- Outlet not perfectly introduced into the housing
Solutions
1- Put the switch at position "I"
1- Put the switch at position "I"
1- Contact technical assistance
1- Contact technical assistance
3- Correctly tighten the plate and blade
3- Replace the defective plate couple and the blade
3- Correctly introduce the outlet in the proper housing
28
MEAT MINCER
USE AND MAINTENANCE MANUAL
1
TC RIO 12
TC RIO 22
TC RIO 32
Advertisement

Related Manuals for Sirman TC RIO 12


Summary of Contents for Sirman TC RIO 12
-
Page 1: Use And Maintenance Manual
8 - Problems and solutions TC RIO 12 TC RIO 22 8.1 - Problems, causes and solutions TC RIO 32 Inconvenienti 1- The machine does not start 2- The propeller turns in the opposite direction of the one indicated by the... -
Page 2: Table Of Contents
8 Now the propeller, blade, plate, and ring nut can be reassembled. Index Delivery and warranty Foreward Keeping and using the manual Warranty 7 - Maintenance Machine description Foreseen use ATTENTION! Forbidden uses All cleaning and maintenance operations must only be carried out with the Machine data Protections and safety devices machine at a standstill and disconnected from the mains. - Page 3 Maintenance Lubrication Cleaning the machine Putting the machine out of service Problems and solutions Problems, causes and solutions. Fig. 6.2.1 6.3 - Using the meat grinder 1 Make sure the feed tension corresponds with the value shown on the technical plate. The tension indicator must be on to indicate it is connected.
-
Page 4: Delivery And Warranty 4
1 - Delivery and warranty 6 - Using the machine 1.1 - Foreward 6.1 - Prescriptions ATTENTION! ATTENTION! The symbols used in this manual are meant to draw the reader’s attention Only authorized personnel may use the machine. to dangerous points and operations that can endanger the personal safety Before beginning work, the operator must ensure that all the guards are in of the operator or risk damaging the machine. -
Page 5: Machine Description
The machine is delivered to the user under the warranty conditions in 5.3 - Checking the efficiency of the stop push button (fig. 5.3.1) force at the time of purchase. While the machine is connected to the electrical power supply and the Contact your supplier for any clarifications required. -
Page 6: Foreseen Use
Both the three-phase and single-phase motors are ventilated with the 5 - Start up and stop following advantages: - highly consistent yield and motor duration; 5.1 - Checking the correct electrical connection - increase in effective work time due to fewer interruptions; Put the plug into the electrical outlet;... -
Page 7: Machine Data
dangerous as the victim is a conductor in this case and touching him can mean being electrocuted. You should therefore disconnect contact directly from the power supply valve or, if this is not possible, distance the victim using insulating material (wooden or PVC sticks, fabric, leather, etc.). A doctor should be promptly called and the patient taken to the hospital. - Page 8 legislation of such countries. 4.3.2 - Moving the machine ATTENTION! Carefully handle the machine and avoid accidental drops that could Matr. __________ _______Watt seriously damage it. A. ______ Hz. _______ Volt To avoid pulling muscles when lifting the machine, bend your legs for _____ Kg.
- Page 9 4 - Testing, transport, delivery and installation 1.7.1 - Warning and danger signs (fig. 1.7.2) ATTENTION! 4.1 - Testing The machine you have purchased has been tested in our factories to ensure it functions well and is correctly set. Do not intervene on electrical components while the machine is connected During this testing, work trials with material identical to what the user will to the power supply.
-
Page 10: Protections And Safety Devices
1.8 - Protections and safety devices 3 - Controls and indicators ATTENTION! 3.1 - List of controls and indicators Before proceeding to using the machine make sure the safety devices are correctly positioned and intact. Make sure they are working properly at the beginning of every work shift. If there are anomalies notify the head of maintenance. -
Page 11: Working Position
2.5 - Electrical diagrams 1. Product outlet, with plate holes smaller than 8 mm. 2.5.1 - Single-phase electrical diagram at 220V In this case it is impossible to insert fingers inside the outlet. Upon request from the client, exit plates with holes having a diameter greater than 8 mm can be installed. - Page 12 1.8.1 - Meat outlet blockage lever (TC 12 - 22 RIO) Dimensions Net weight AxBxC TC RIO 12 435 x 395 x H410 TC RIO 22 435 x 395 x H410 APERTO OFFEN TC RIO 32 540 x 430 x H470...
- Page 13 1.8.2 - Rapid unblocking system (with knob lever) TC 32 RIO Motor Feed Hourly Outfitted production plates watt/hp kg/h. ø mm TC RIO 12 736/1 230-400V/50Hz TC RIO 22 1472/2 230-400V/50Hz TC RIO 32 2208/3 230-400V/50Hz Fig. 1.8.4 2.3 - Machine dimensions and weight The outlets on the models 32 are fastened with the rapid unblocking system.
-
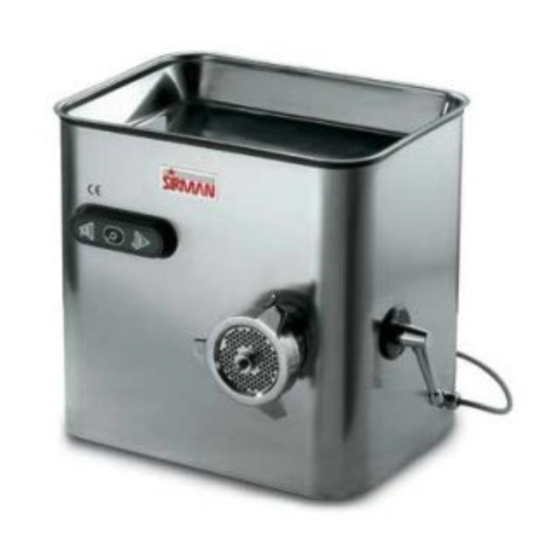
Page 14: Main Parts
1.9 - Working position 2 - Technical features The correct operator working position to optimize working with the 2.1 - Main parts machine is shown in fig. 1.9.1. To faciltate understanding the manual, the main machine parts are listed below and shown fig. 2.1.1. 1.
Need help?
Do you have a question about the TC RIO 12 and is the answer not in the manual?
Questions and answers