Table of Contents
Advertisement
Quick Links
Advertisement
Table of Contents

Subscribe to Our Youtube Channel
Related Manuals for ZKTeco LPRC200-4G


Summary of Contents for ZKTeco LPRC200-4G
- Page 1 USER MANUAL LPRC200-4G Version: 1.2 Date: July 2019...
- Page 2 This is subject to relevant laws prohibiting such restrictions. ZKTeco believes in development, and this product will be regularly updated, in that case we cannot guarantee exact consistency between the actual product and the written information in this manual.
- Page 3 ZKTeco owns all parts of this product including its accessories and software and reserves the right of final version. The information provided in this manual is in association with ZKTeco products. The performance data and software functions described in this user manual are for your reference only.
- Page 4 Since 1998, the founders of ZKTECO CO., LTD (ZKTeco) have been determined for independent research and development of biometric verification procedures and the productization of biometric verification SDK, which was initially widely applied in PC security and identity authentication fields.
-
Page 5: Table Of Contents
Table of Contents Safety Precautions......................................1 1. Overview ........................................2 1.1 About the Product ................................... 2 1.2 Features ........................................2 1.3 Appearance ......................................3 1.4 Port Definition ..................................... 3 2. Computer Connection Configuration ............................5 2.1 Software Environment................................... 5 2.2 Network and IP Address Configuration ..........................5 2.2.1 Default Parameter Settings .............................. - Page 6 3.4.7 Data Management ................................22 3.4.8 Push Configuration ................................22 3.4.9 4G Configuration ..................................23 3.4.10 P2P Configuration................................24 3.4.11 Network Settings .................................. 24 3.4.12 FTP Settings ..................................... 25 3.4.13 User Management ................................26 3.4.14 Firmware Upgrade ................................26 3.4.15 System Update ..................................27 3.4.16 Auto Reboot ....................................
-
Page 7: Safety Precautions
Clean the enclosure with a piece of soft cloth or a small amount of cleaning agent. Non-professional personnel are not allowed to open the device cover. If you have any technical questions regarding usage, contact certified or experienced technical personnel. LPRC200-4G User Manual... -
Page 8: Overview
Overview About the Product LPRC stands for License Plate Recognition Camera. The LPRC200-4G is a high-performance H.264/H.265-based license plate recognition camera and it has the properties of: Integrating HD imaging Image collection License plate recognition Image decompression Storage of data on an embedded intelligent platform. -
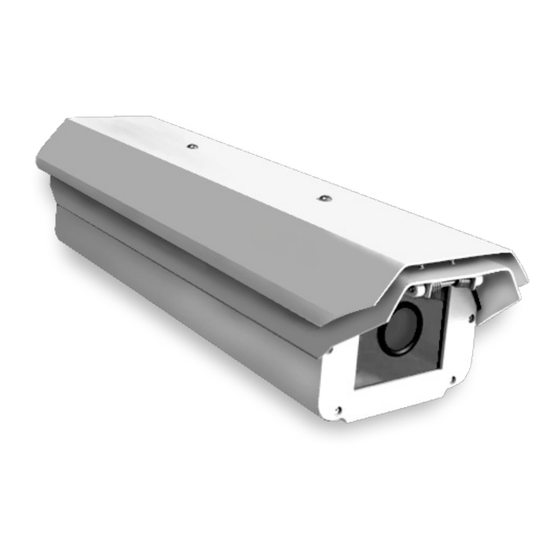
Page 9: Appearance
USB connection Used to connect the power adapter. The camera's power supply voltage is +12V 12V/3A DC. Do not use other power sources to prevent damage to the camera. COM1 Used for connecting barrier gate LPRC200-4G User Manual... - Page 10 RS485 transmission function used to connect the display screen and voice 485B1 module of parking system CLOSE Barrier switch status OPEN Audio Used to connect audio and microphone of the parking system Wiegand in WG1 IN Wiegand out Auxiliary input and external button connection AUX1 BUT1 LPRC200-4G User Manual...
-
Page 11: Computer Connection Configuration
Open the Start menu in the PC and type cmd in the search dialog box once the camera IP address is set. In the command prompt window, type Ping and camera IP address (e.g. Ping 192.168.0.18) to test the connectivity between the PC and camera. LPRC200-4G User Manual... - Page 12 Perform the following steps: Check whether hardware connection is correct. Check whether the TCP/IP addresses of the PC and the camera are in the same network segment. Check whether the ping command is disabled. LPRC200-4G User Manual...
-
Page 13: Camera Access Over A Web Browser
Click [Download Plugin] at the top left corner of the screen to download the WebLPRActiveXPlus.exe control, select the downloading path and click [Download]. After the downloading completes, access WebVideoActiveXPlus.exe to install it. The security prompt may be displayed during the installation. Click [Run] to continue the installation. LPRC200-4G User Manual... - Page 14 If default parameters are used, click [Apply] directly. If you need to modify the parameters, you can select [Next] to modify them. After changing the IP address, this wizard screen will no longer appear. LPRC200-4G User Manual...
- Page 15 Meanwhile, you can manually open the barrier gate, draw recognition area and virtual line on live video panel. Under live pictures, you can set lens debug, identify parameters and other features. LPRC200-4G User Manual...
-
Page 16: Live
Settings. The video is saved in a folder named year, month and day, and video named after recording time. example, video file titled CH01_main_20180703_142004. avi, and saved in the 20180703 folder, indicating the recording date is 2018-07-03, recording time is 14:20:04, while the local will automatically generate a LPRC200-4G User Manual... -
Page 17: File
You can enter year, month and day to search for the required picture or videos, depending on your needs. In the meantime, you can view videos, open images and download the recorded images from SD card to your laptop. LPRC200-4G User Manual... -
Page 18: Setup
Device Information: The basic parameters of the device, including device name, device type, serial number, firmware version, hardware version and format. Format: The analog output format, PAL or NTSC Click [Save] after setting the parameters. LPRC200-4G User Manual... -
Page 19: Time Settings
The text, date, time and color of video displayed in preview video can be set in the display setting interface. Click [Save] to examine the effect of the settings on the right, depending on the actual situation. LPRC200-4G User Manual... - Page 20 The setting range is 1 to 10. In the lower right corner of the interface, the display position of title text, date and time can be adjusted, and the color and font of text can also be set. LPRC200-4G User Manual...
-
Page 21: Streams
Constant: Images are transmitted over a fixed bandwidth. Bitrate: It shows the maximum limit of the bit rate, which can be individually entered. The further the bit rate, the further the energy use, and the further the picture quality. The LPRC200-4G User Manual... -
Page 22: Video Parameters
For example, if the start time is set as 06:00:00 and the end time is set as 18:00:00, then the camera's fill light does not work between 06:00:00 and 18:00:00, and the camera's fill light stays on from 18:00:01 to 05:59:59 of the next day. LPRC200-4G User Manual... - Page 23 Auto: The camera dynamically adjusts the light-board brightness by obtaining the current image brightness, exposure and gain, to achieve the optimal image accuracy with the LPRC200-4G User Manual...
-
Page 24: Intelligent Analysis
Upload Mode: The default is Upload by SDK. Output Filter: The default is Filter vehicle far away. Min/Max License Plate: The default is 60~500 pixels. Virtual line to trigger recognition: When a vehicle enters the virtual line, the recognized area of the LPRC200-4G User Manual... - Page 25 Barrier Open Duration (ms): It indicates the output duration of brake signals, which needs to be entered manually in the unit of millisecond (ms). LED Indication Duration(s): It is the duration of the Red or Green signal. Manual Verification: After passing the identification, manual confirmation is required before LPRC200-4G User Manual...
- Page 26 SD card). SD Management When the camera uses the SD card, this page shows the total capacity, used capacity and remaining capacity of the SD card. You can format and re-use the SD card. LPRC200-4G User Manual...
- Page 27 Repeated Plate Processing Interval (s): It is the processing time interval for the same license plate. Online mode: The device handles the charging and opening of the gate in offline mode if the interface does not display the real-time monitor screen. It is a default option and cannot be modified. LPRC200-4G User Manual...
-
Page 28: Data Management
Push Enable: Select the check box to enable this feature. Server Address: Enter the server address of the push configuration. Alternate Sever Address: When the push configuration main server address is invalid, the system LPRC200-4G User Manual... -
Page 29: Configuration
4G Status: The 4G status displays the information, about the dial method, connection status, network operator, signal strength and network status. When the connection state is not stable, click [Detect 4G] to detect the current network. Click [Save] after setting the parameters. LPRC200-4G User Manual... -
Page 30: P2P Configuration
SNMP: To monitor devices connected to the network for any conditions that cause administrative concern. Select the check box to apply this feature. Manager IP: Enter the corresponding SNMP host address. LPRC200-4G User Manual... -
Page 31: Ftp Settings
Enable: Select the check box to use this feature. Passive Mode: It is used for the data transfer security. It is a default option when FTP is not selected. Server Address: Enter the FTP server address. Port: Enter the corresponding port. LPRC200-4G User Manual... -
Page 32: User Management
• When the username or password is modified, it is required to log in again in order to update the change. 3.4.14 Firmware Upgrade To upgrade the camera firmware, click and select the firmware upgrade file in the LPRC200-4G User Manual... -
Page 33: System Update
It is used for network module program update. Click and select update file and click . After the update, restart the camera. Note: Avoid performing the System Update feature in the absence of qualified professionals. Ensure that the device is ON while performing this operation. LPRC200-4G User Manual... -
Page 34: Auto Reboot
3.4.17 Restore Export Config: Click first, set the file name and save directory in the dialog box, and then click "Directly Open " or "Download". LPRC200-4G User Manual... -
Page 35: Local Settings
, tick the parameters to be restored, and click "OK". Reboot: To restart the system. 3.4.18 Local Settings It is used to view or set the local configuration according to the actual situation. Click [Save], after setting the parameters. LPRC200-4G User Manual... -
Page 36: Log
It is used to search the recording history. You can filter the search list with options such as search type, start time, end time, and the number of log results per page. After selecting the possibilities, click [Search] to view the outcomes of the log. LPRC200-4G User Manual... - Page 37 LPRC200-4G User Manual...
-
Page 38: Faqs
How to view the firmware version of the camera? Log in the camera with the browser, click [Setup] -- [Intelligent Analysis], click the question mark in the upper right corner of the interface to query the version information. LPRC200-4G User Manual... - Page 39 ZK Building, Wuhe Road, Gangtou, Bantian, Buji Town, Longgang District, Shenzhen China 518129 Tel: +86 755-89602345 Fax: +86 755-89602394 www.zkteco.com LPRC200-4G User Manual Copyright©2019 ZKTECO CO., LTD. All rights reserved.
Need help?
Do you have a question about the LPRC200-4G and is the answer not in the manual?
Questions and answers