Table of Contents
Advertisement
Quick Links
QUICK START GUIDE
For a full explanation of all features and instructions, please refer to the User Guide (available for
download from www.oricom.com.au/support/).
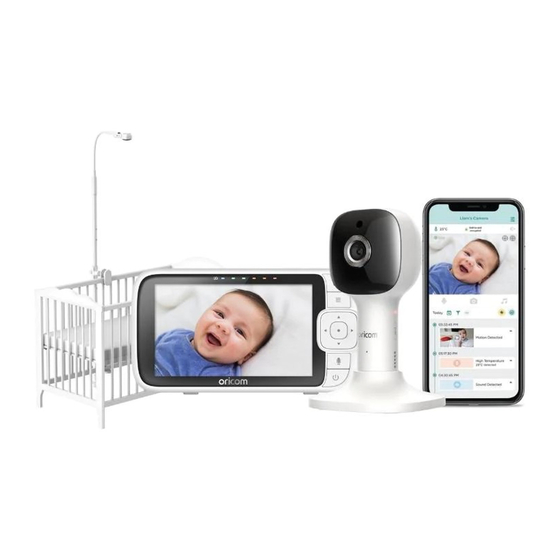
1. Contents Inside Box
Models:
OBH643P
OBH650P
Strangulation hazard. Children have STRANGLED in cords. Keep this cord out
of the reach of children (more than 1 metre away). Do not remove the tags
from the AC Adaptors. Only use the AC Adaptors provided.
Baby Unit
Magnetic Mount
(Camera)
Top Clamp
Bottom Clamp
WARNING:
Parent Unit
Power Adaptors
(Battery pre-installed)
Gooseneck
EN
x 2
Quick Start
Guide
4-Poles with
stand base
Advertisement
Table of Contents

Related Manuals for Oricom OBH643P


Summary of Contents for Oricom OBH643P
- Page 1 QUICK START GUIDE For a full explanation of all features and instructions, please refer to the User Guide (available for download from www.oricom.com.au/support/). 1. Contents Inside Box Models: OBH643P OBH650P Baby Unit Magnetic Mount Parent Unit Power Adaptors Quick Start...
-
Page 2: Setting Up Your Digital Video Baby Monitor
2. Setting up your Digital Video Baby Monitor A. Connecting the Power Supply for the Baby Unit • Insert the DC plug of the power adaptor into the DC socket on the back of the Baby Unit. • Connect the other end of the power adaptor to mains power. - Page 3 C. Connecting the Power Supply of the Parent Unit. A rechargeable battery inside the Parent Unit allows the parent unit to be used when not plugged into mains power. We recommend charging for at least 4 hours before first use, and when the Parent Unit indicates the battery is low.
- Page 4 D. Desktop Stand of the Parent Unit • The parent unit comes with a desktop stand attached to the back. • To place the parent unit on a desk, simply pull out the stand, as shown. NOTE Place the parent unit on a flat, even surface.
-
Page 5: Basic Operation Of The Keys
Press and hold with a small pin to reset the unit. Baby Unit Press and hold to pair with the parent unit or Hubble Wi-Fi® PAIR button Setup. IMPORTANT: Download the full User Guide for complete instruction and button location, from the Oricom website: oricom.com.au/support/. -
Page 6: Internet Viewing
® 4. Setting up the Camera Unit for Wi-Fi internet viewing A. Install HubbleClub for Partners. • Scan the QR code with your smart device and download the HubbleClub for Partners from the App Store for iOS devices or from the Google Play™ Store for Android™ devices. - Page 7 This cot mount has been designed to mount directly to most cots. Assemble and install the cot mount using the following steps. (To view an installation video visit oricom.com.au.) • Join the 4 poles and the support base together as shown in Fig. 1a and 1b.
- Page 8 • Place the bottom clamp below and securely against the lower rail, the stand base is spring loaded. Push the lower pole slightly downward before closing the bottom clamp and securing with knob. This is to allow the lower clamp to exert clamping pressure on the lower rail.
- Page 9 • Install the flexible gooseneck extension into the top pole. The gooseneck will click and lock into place when properly inserted. (Fig. 5a) • Holding the power adaptor plug up, insert the camera unit into the housing at the end of the flexible gooseneck extension, make sure the camera is magnetically secured in the gooseneck.
-
Page 10: Important Safety Information
6. Important Safety Information • Your Oricom baby monitor is designed to be an aid and should not be used as a substitute for responsible and proper adult supervision of a child. • The baby monitor has been designed to provide some added reassurance in the form of video/ sound transmission for those times when you are not in the same room as your baby provided you always stay within hearing range of the baby monitor during use. -
Page 11: General Information
In the event of a minor failure, Oricom reserves the right to choose to repair or replace the product. - Page 12 Oricom. Oricom will not be liable under this Express Warranty, and to the extent permitted by law will not be liable for any defect, loss, damage or injury arising out of or in connection with a: Failure by you to adhere to the warnings and follow the instructions set out in this user guide for the proper installation and use of the product;...
- Page 13 Please note that if a Customer Support Team member advises that your product does not qualify for return, this warranty does not apply to your product. Products that are authorised to be returned to Oricom in Australia must include all of the following: • A completed Return Authorisation form •...
- Page 14 Oricom Support - Australia For all product enquiries, troubleshooting or to discuss the range of Oricom products, feel free to contact Oricom or visit our website for answers to frequently asked questions.
Need help?
Do you have a question about the OBH643P and is the answer not in the manual?
Questions and answers