Table of Contents
Advertisement
Quick Links
QUICK START GUIDE
For a full explanation of all features and instructions, please refer to the User's Guide.
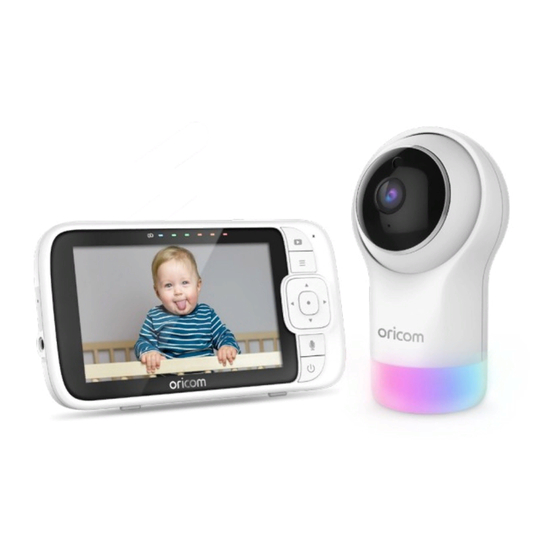
1. Setting up your Digital Video Baby Monitor
A. Connecting the Power Supply for the Baby Unit
Model:
OBH930
Strangulation hazard. Children have STRANGLED in cords. Keep
this cord out of the reach of children (more than 3 feet away). Never
use extension cords with AC Adapters. Only use the AC Adapters
provided.
WARNING:
• Insert the DC plug of the power adapter
into the DC socket on the back of the
Baby Unit.
• Connect the other end of the power
adapter to a suitable electrical outlet.
• The baby unit turns on and the power
indicator lights in green colour.
Note
Only use the supplied power adapter
(DC5V/1500mA).
EN
Advertisement
Table of Contents

Subscribe to Our Youtube Channel
Related Manuals for Oricom OBH930


Summary of Contents for Oricom OBH930
- Page 1 1. Setting up your Digital Video Baby Monitor A. Connecting the Power Supply for the Baby Unit Model: • Insert the DC plug of the power adapter OBH930 into the DC socket on the back of the Baby Unit. • Connect the other end of the power adapter to a suitable electrical outlet.
- Page 2 B. Connecting the Power Supply of the Parent Unit. A rechargeable battery (Lithium ion battery 3.8V 2100mAh) inside the Parent Unit allows you to move it without losing the link and picture from the Baby Unit. We recommend charging the for at least 16 hours before first use, and when the Parent Unit indicates the battery is low.
- Page 3 ® 2. Setting up the Camera Unit for Wi-Fi internet viewing A. Install HubbleClub by Hubble Connected App. • Scan the QR code with your smart device and download HubbleClub by Hubble Connected App from the App Store for iOS devices or from the Google Play™ Store for Android™...
- Page 4 3. Basic operation of the keys Parent unit ON/OFF button Press and hold to switch the Parent Unit ON/OFF. Vol+ and Vol- Press -/+ to select volume level of the Parent Unit. buttons Press to tilt the camera up or down. UP/DOWN buttons Press to adjust menu setting when menu is active.
- Page 5 In the event of a minor failure, Oricom reserves the right to choose to repair or replace the product.
- Page 6 Oricom. Oricom will not be liable under this Express Warranty, and to the extent permitted by law will not be liable for any defect, loss, damage or injury arising out of or in connection with a: Failure by you to adhere to the warnings and follow the instructions set out in this user guide for the proper installation and use of the product;...
- Page 7 Please note that if a Customer Support Team member advises that your product does not qualify for return, this warranty does not apply to your product. Products that are authorised to be returned to Oricom in Australia must include all of the following: • A completed Return Authorisation form •...
- Page 8 Oricom Support - Australia For all product enquiries, troubleshooting or to discuss the range of Oricom products, feel free to contact Oricom or visit our website for answers to frequently asked questions.
Need help?
Do you have a question about the OBH930 and is the answer not in the manual?
Questions and answers