Table of Contents
Advertisement
Quick Links
Advertisement
Table of Contents

Subscribe to Our Youtube Channel
Related Manuals for Hans Grohe Rainfinity 250 3-jet 04864700


Summary of Contents for Hans Grohe Rainfinity 250 3-jet 04864700
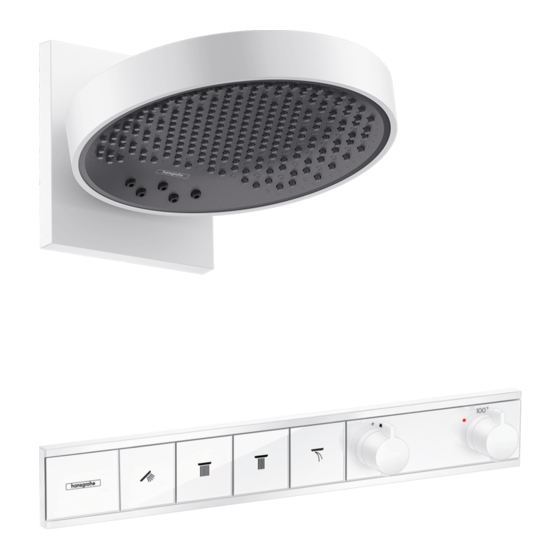
- Page 1 EN Installation / User Instructions / Warranty FR Instructions de montage / Mode d'emploi / Garantie ES Instrucciones de montaje / Manejo / Garantía Rainfinity™ 250 3-jet Showerhead with RainSelect™ Thermostatic Trim for 4 Functions 04864700 04863700...
-
Page 2: Technical Information
English Technical Information Water pressure Recommended 15 - 75 PSI (0.1 - 0.5 MPa) Maximum 145 PSI (1 MPa) Hot water temp. Recommended 120°-140° F (48° - 60° C)* Maximum 158°F (70° C)* Max. flow rate 04864700 1.75 GPM (6.6 l/min) 04863700 2.5 GPM (9.5 l/min) * Please know and follow all applicable local plumbing... -
Page 3: Données Techniques
Français Données techniques Pression d’eau recommandée 15 - 75 PSI (0.1 - 0.5 MPa) maximum 145 PSI (1 MPa) Température d'eau chaude recommandée 120°-140° F (48° - 60° C)* maximum 158°F (70° C)* Capacité nominale 04864700 1.75 GPM (6.6 l/min) 04863700 2.5 GPM (9.5 l/min) * Vous devez connaître et respecter tous les codes de... -
Page 4: Datos Tecnicos
Español Datos tecnicos Presión en servicio recomendada 15 - 75 PSI (0.1 - 0.5 MPa) max. 145 PSI (1 MPa) Temperatura del agua caliente recomendada 120°-140° F (48° - 60° C)* max. 158°F (70° C)* Caudal máximo 04864700 1.75 GPM (6.6 l/min) 04863700 2.5 GPM (9.5 l/min) * Debe conocer y cumplir todos los códigos locales aplica-... - Page 5 Rainfinity Showerhead 250 3-jet Showerhead with RainSelect Thermostatic Trim for 4 Functions 04864700 04863700 ⅝" (16 mm) 6¼" (158 mm) 6" (151 mm) Ø 9⅞" (250 mm) 10¾" (273 mm) 23½" (598 mm) 3⅜" 2¾" 2¾" 2¾" 2¾" 9" (228 mm) (86 mm) (70 mm) (70 mm)
-
Page 6: Installation / Installation / Instalación
Installation / Installation / Instalación Turn the water off at the main before beginning. Remove the insert from the RainSelect rough housing. Cut the housing so that it extends ¹⁄₁₆" - ⅛" (1–2 mm) outside the surface of the finished wall. Fermez l’eau à... - Page 7 4 mm (3.6 ft-lb 5 Nm) 17 mm 19 mm Lightly lubricate the O-rings Lubrifiez légèrement les joints to- Lubrique suavemente los retenes on the shutoff units, the volume riques sur les dispositifs d’arrêt, la anulares en las unidades de control cartridge, the thermostatic cartouche du régulateur de débit cierre, el cartucho de control de...
- Page 8 Position the fitting aid on the housing near the volume control. Measure the distance between the end of the stem and the outside edge of the fitting aid. Record this measurement (X). Placez l’aide au montage sur le compartiment à proximité...
- Page 9 Cut one of the stem extensions so that it is X + ⅞" (X + 23 mm) long. Cut the second stem extension so that it is X - ⅛" (X – 2 mm) long. Coupez l’une des rallonges de tige de manière à ⅞...
- Page 10 Install the screws on the Select adapter extensions. Install the extensions on the Select adapters. Install the springs and the adapters on the shutoffs. Installez les vis sur les rallonges d’adaptateur Select. Installez les rallonges sur les adaptateurs Select. Installez les ressorts et les adaptateurs sur les disposi- tifs d’arrêt.
- Page 11 Remove and discard the escutcheon cover. Retirez et jetez le couvercle d’écusson. Quite y descarte la cubierta del escudo. Install 10 more screws. Installez et serrez 10 des vis. Instale y ajuste 10 de los tornillos. 0.37 ft-lb 0.5 Nm...
- Page 12 Push the long stem extension into the volume control frame. Push the volume control frame into place. The +/- symbol should be on the lower left side. Poussez la rallonge de tige plus longue dans le cadre du régulateur de débit. Poussez le cadre du régulateur de débit en place.
- Page 13 Install the 38x2.5 O-ring so that it rests in the channel. 38 x 2.5 Installez le joint torique 38x2.5 afin qu’il repose dans le canal. Instale el retén anular de 38x2.5, para que se apoye en el canal. 38 x 2.5 Push the short stem extension into the thermostatic mixer frame.
- Page 14 Lightly lubricate the inside edge of the end cover. Push it into place. Lubrifiez légèrement le bord intérieur du couvercle d’extrémité. Poussez-le en place. Lubrique levemente el borde interno del extremo de la cubierta. Empújelo y colóquelo en su lugar. Lightly lubricate the inside edge of the thermostatic mixer / volume control cover.
- Page 15 Install the shaped seals so they are oriented as shown. Installez les joints formés afin qu’ils soient orientés de la façon indiquée. Instale los sellos con forma para que tengan la orien- tación que se muestra. Install the stop rings so they are oriented as shown. Installez les anneaux d’arrêt afin qu’ils soient orientés de la façon indiquée.
- Page 16 Install the bushings. Installez les bagues. Instale los bujes. Position the fit-up aid over one of the shut-off units. The opening should be over the Select adapter exten- sion screw. Placez l’aide à la fixation sur l’un des dispositifs d’arrêt. L’ouverture doit se trouver au-dessus de la vis de rallonge d’adaptateur Select.
- Page 17 Tighten/loosen the screw until the outside edge of the fit-up aid is even with (or no more than 1 mm in front of) the outside edge of the escutcheon. Serrez/desserrez la vis jusqu’à ce que le bord extérieur de l’aide à la fixation soit de niveau avec (ou à...
- Page 18 Install the symbol covers. Installez les couvercles de symbole. Instale las cubiertas de los símbolos. Turn the water on at the main. Test the handshower. Ouvrez l’eau à la valve principale. Testez la douchette. Abra el paso del agua en la entrada del suministro. Pruebe la ducha de mano.
- Page 19 Test the showerhead functions. Testez les fonctions de la pomme de douche. Pruebe las funciones del cabezal de ducha. Push the glide rings into the handles. Push the handles onto the stems. Tighten the screws. Install the screw covers. Poussez les anneaux de glissement dans les poignées.
- Page 20 Showerhead Installation / Installation / Instalación CAUTION: Turn the water off at the main open before beginning. ouvert abierto Use a 4 mm Allen wrench to open the stops on the iBox. Cut the plaster shield so that it extends ¹⁄₁₆" – ⅛" outside the finished wall.
- Page 21 Install the three M6x40 countersunk screws by hand. Installez les trois vis à tête fraisée M6x40 à la main. Instale los tres tornillos avellanados M6x40, ajustando con la mano. (M6x40) Remove the backing from the adhesive on the fitting 4 mm aid.
- Page 22 Remove the fitting aid. Lightly lubricate the O-rings on the swivel unit using white plumber’s grease. Retirez l’aide au montage. Lubrifiez légèrement les joints toriques sur l’unité de pivotement en utilisant de la graisse de plomberie blanche. Quite el dispositivo de conexión. Lubrique levemente los retenes anulares de la unidad basculante, utilizando grasa blanca para plomería.
- Page 23 Make sure that the swivel unit is at the lowest position. Place the escutcheon over the swivel unit. HINT: The opening on the escutcheon is not vertically centered. The shorter edge should be at the top. Assurez-vous que l’unité de pivotement se trouve à la position la plus basse.
- Page 24 Push the inlet of the showerhead over the supply tubes, then push upward so that the clips on the showerhead engage the swivel unit. Poussez le point d’entrée de la pomme de douche sur les tubes d’arrivée, puis poussez vers le haut afin que les clips sur la pomme de douche s’engagent dans l’unité...
- Page 25 Swivel the showerhead up and down. If the tension (the amount of force necessary to move the showerhead) is satisfactory, go to step16 . If the tension is unsatisfactory (the showerhead moves too easily or is too hard to move) go to step12. Faites pivoter la pomme de douche vers le haut et le bas.
- Page 26 If the tension is too loose, tighten the tension screws harder on the swivel unit using a 3mm Allen wrench. mais dificil If the tension is too tight, loosen the tension screws. más pasedo Si la tension n’est pas suffisante, serrez les vis de serrage sur l’unité...
- Page 27 Push the inlet of the showerhead over the supply tubes, then push upward so that the clips on the showerhead engage the swivel unit. Poussez le point d’entrée de la pomme de douche sur les tubes d’arrivée, puis poussez vers le haut afin que les clips sur la pomme de douche s’engagent dans l’unité...
- Page 28 Justify the handle / Réglez la poignée / Ajuste la manija Remove the thermostatic mixer handle. Turn the water on to the handshower. 2 mm Retirez la poignée du mélangeur thermostatique. Ouvrez l’eau de la pomme de douche. Retire la manija del mezclador termostático. Abra el paso del agua hacia la ducha de mano.
- Page 29 Set the High Temperature Limit Stop (optional) / Réglage de la butée limite d’eau chaude (en option) / Ajuste el tope de límite de alta temperatura (opcional) 2 mm 2 mm for example 112°F (44° C)
- Page 30 2 mm 2 mm...
- Page 31 Replacement Parts / Pièces détachées / Repuestos...
- Page 33 User Instructions / Instructions de service / Manejo OUVERT FERMÉ ABIERTO CERRAR press press again appuyez appuyez à presione nouveau presione nuevamente...
- Page 34 cold froid chaud chaud stop! frío caliente caliente >100°F 100°F Adjust the water volume / Réglage du débit d'eau / Ajustar caudal de agua...
-
Page 35: Maintenance / Entretien / Mantenimiento
Maintenance / Entretien / Mantenimiento 2 mm 2 mm 4 mm 17 mm 17 mm... - Page 36 97367000 96655000 97367000 96655000 17 mm 4 mm 17 mm 3.6 ft-lb 5.9 ft-lb 5 Nm 8 Nm...
- Page 37 2 mm 2 mm...
- Page 38 Cleaning the Showerhead / Nettoyer la pomme de douche / Limpiar el cabezal de la ducha Just clean: simply rub over the spray nozzles to QUI C K remove lime scale. CL EAN La propreté en toute simplicité: les dépôts formés sur les buses élastiques en silicone s’éliminent par un simple passage de la main.
- Page 39 click > 1 min...
- Page 40 Cleaning the showerhead filters / Nettoyage des filtres de pomme de douche / Limpiar los filtros de la ducha...
- Page 41 click > 1 min...
- Page 42 Adjust the showerhead tension / Réglez la tension de la pomme de douche / Ajuste la tensión del cabezal de ducha easier harder plus facile mais dificil más ligero más pasedo harder mais dificil más pasedo 3 mm easier plus facile más ligero...
- Page 43 click...
- Page 44 Optional Installation for reversed supplies / Installation facultative pour conduites inversées / Instalación opcional para suministros en orden inverso 2 mm 2 mm 4 mm...
- Page 45 180° 4 mm 3.6 ft-lb 5 Nm 0.37 ft-lb 0.5 Nm...
- Page 46 2 mm 2 mm...
-
Page 47: Maintenance
Entretien Maintenance • To assure proper operation of the thermostatic • Pour assurer le mouvement facile de l´élément mixer cartridge, it is necessary to occasionally run thermostatique, le thermostat devrait être placer it through its complete range of temperatures. de temps en temps en position très chaude et très froide. -
Page 48: Mantenimiento
Mantenimiento • Para garantizar el funcionamiento duradero del termostato, el mando del mismo debería girarse de vez en cuando del extremo frío al extremo caliente • Si el volumen del agua disminuye con el tiempo, primero inspeccione y limpie el cabezal de ducha (ver página 38). - Page 49 Troubleshooting - Mixing Valve Symptom Possible Cause Recommended Action Insufficient water – Supply pressure too low – Check water pressure. – Filters are dirty – Clean filter in front of the mixer and on the thermostatic cartridge. See page 35 –...
- Page 50 Dépannage - Mitigeur Symptôme Cause possible Action recommandée Pas assez d´eau – Pression d´alimentation – Contrôler la pression insuffisante – Filtres encrassés – Nettoyer les filtres devant le mitigeur thermostatique et sur la cartouche (voir page 35) – Joint-filtre de douchette encrassé –...
- Page 51 Localización de fallas - Mezclador Síntoma Causa posible Acción recomendada Sale poca agua – presión insuficiente – comprobar presión – Filtros sucios – Limpiar filtros en las uniones a las tomas de agua caliente y fría y en el cartucho termostático - ver página 35 –...
- Page 52 Cleaning Recommendation for Hansgrohe Products Modern bathroom faucets, kitchen faucets and shower products are made from different materials to comply with the needs of the market with regard to design and functionality. To avoid damage to the product, it is necessary to take proper care of it.
-
Page 53: Para Obtener Mejores Resultados
Important • Les residus de produits pour le corps comme les savons liquides, shampooings, gels de douche, teintures pour cheveux, parfums, apres-rasage et vernis a ongles peuvent causer des deteriorations. Rincez le produit avec de l’eau propre après chaque utilisation. •... - Page 55 Hansgrohe, Inc. Limited Warranty Offering our customers the highest quality at all times is a funda- • abuse, neglect or improper or incorrectly performed mental part of the Hansgrohe, Inc. company philosophy. We of- installation, maintenance or repair, including the use of fer consumers a limited warranty on our hansgrohe and AXOR abrasive or caustic cleaning agents or “no-rinse”...
- Page 56 TEAR, OUTDOOR USE, MISUSE (INCLUDING USE OF THE This warranty gives you specific legal rights, and you may also PRODUCT FOR AN UNINTENDED APPLICATION), FREEZING have other rights which vary from state to state. WATER, EXCESSIVE WATER PRESSURE, PIPE CORROSION IN PRODUCT I NSTRUC TIONS A ND QUE STIONS THE HOME IN WHICH THE PRODUCT IS INSTALLED, ABUSE, NEGLECT OR IMPROPER OR INCORRECTLY PERFORMED...
Need help?
Do you have a question about the Rainfinity 250 3-jet 04864700 and is the answer not in the manual?
Questions and answers