Table of Contents
Advertisement
Quick Links
Advertisement
Table of Contents

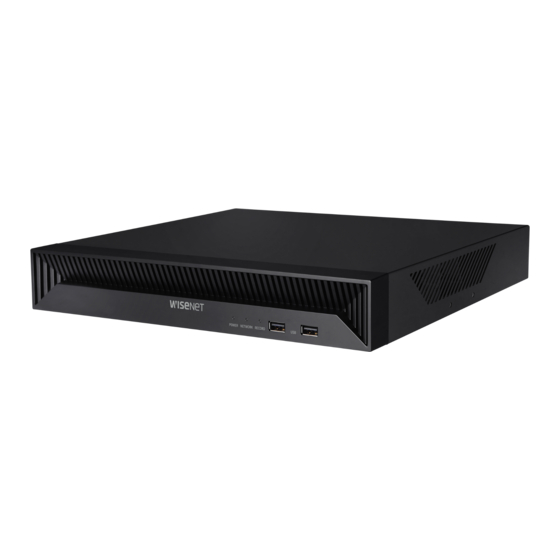
Related Manuals for Hanwha Techwin WISENET QRN-830S


Summary of Contents for Hanwha Techwin WISENET QRN-830S
- Page 1 NETWORK VIDEO RECORDER User Manual Wisenet NVR...
- Page 2 ❖ Design and specifications are subject to change without prior notice. You can download the latest version from the Hanwha Techwin web site. (www.hanwha-security.com) ❖ The initial administrator ID is “admin” and the password should be set when logging in for the first time.
-
Page 3: Overview
Monitor real time events that occur in Recorder, sensors, and cameras or search through logs Before using this product, check if the latest version of this software is installed. Go to Hanwha Techwin's website (http:// www.hanwha-security.com) to check the software version and download necessary files. - Page 4 overview CAuTION RISK OF EXPLOSION IF BATTERY IS REPLACED BY AN INCORRECT TYPE. DISPOSE OF USED BATTERIES ● ACCORDING TO THE INSTRUCTIONS. Do not ingest battery, Chemical Burn Hazard. ● This product contains a coin / button cell battery. If the coin / button cell battery is swallowed, it can cause ●...
-
Page 5: Table Of Contents
CONTENTS OVERVIEW Important Safety Instructions Real-Time Event Monitoring Product User Manual Description Check Event List Target Audience Event Search How to Use the Product Event Instant Viewer Contents Stop Alarm Output Camera Video Control Manual trigger gETTINg STARTED Starting the system Capture installation Wizard Instant Viewer... - Page 6 overview AI SEARCH Screen Layout of the AI Search Setting the Network IP & Port Person Search Face Search DDNS & P2P Vehicle Search IP Filtering LP Search HTTPS LPR SEARCH 802.1x E-mail PlAy Screen Layout of the Play SNMP Play Search Results DHCP Server Time Line Adjustment...
- Page 7 Changing the Pattern of Split Screen SEARCH VIEWER Screen Layout of the Search Viewer Changing Overall Channel Aspect Ratio Time Search Full Screen Mode Event search Setting up the Live Layout Text Search Check Layout List Bookmark Search Add Layout and Set Name Search Results Export Change of Layout Channel and Name Delete Layout...
- Page 8 overview SETuP VIEWER ExPORT VIEWER 106 Screen Layout of the Setup Viewer 121 SEC Backup Viewer 121 Recommended System Requirements 106 Setting the Camera 106 Channel setup 121 Screen Layout of the Backup Viewer 106 Camera setup 107 Profile Setup 108 Camera Password APPENDIx 123 Use Joystick...
-
Page 9: Getting Started
getting started STARTINg THE SySTEM INSTAllATION WIzARD As shown below, proceed through each step of the <Installation wizard>. 1. Connect the power cable of the recorder to the wall outlet. Install Wizard can only be accessed at factory reset. If you do not want to proceed, click <Exit>. 2. - Page 10 getting started Setting up the network 3. Set the administrator password on the <Recorder ID/PW> screen and click the <Next>. Each product supports a different number of network ports. If it supports two or more network ports, you can set Click <...
- Page 11 5. Set the date, time, and daylight saving time on the <Date & Time> screen, and then click the <Next>. 7. On the <Camera register> screen, select a camera to register from the searched camera list and click <Register>. Select a camera to register from the list and click <Change IP>. After completing camera register click <Next>.
-
Page 12: Shutting Down The System
getting started 9. On the <Easy connect> screen, a remote user can network a recorder in a dynamic IP system. SHuTTINg DOWN THE SySTEM Click <Enable> to test the connection to see if the current recorder can be connected remotely. When the connection is successful, a QR code is created. -
Page 13: Login
lOgIN To use the Recorder menu, you are required to login as a user that is authorized to access the applicable menu. 1. Select <login> at the top right of the screen. 2. The <login> window will appear. 3. Enter the user ID and password, then click <login>. ■... -
Page 14: Screen Layout Of The Live
live Shows the video of the camera connected to the recorder. Also, you can adjust the camera and check the network Item Description transfer status. Saves the recorded video of the selected channel in the designated path. SCREEN lAyOuT Of THE lIVE Clears the alarm in the event list and stops the alarm/beep sound for the system status when it is emitted. -
Page 15: Checking The System Status
Checking the System Status Item Description The icon at the top of the screen indicates the status of the system. Displayed if the server has firmware to update. It is displayed when the system is overloaded. ■ Limit the number of users remotely monitored by Web Viewer or VMS, or control the number of events displayed in the event list of the recorder. -
Page 16: Check Camera List
live Check Camera list Check Multichannel Cameras list For multichannel cameras registered with the Wisenet protocol, the channel information will be displayed under Displays the camera type, status, and name registered in the recorder. the model name of the multichannel camera. Registered channel (recording channel) Unregistered channel... -
Page 17: Live Screen Menu
live Screen Menu Icons on the live Screen After selecting the desired channel on the split mode, roll the mouse cursor over the screen to see the live screen You can check the status or operation with the icons on the live screen. menu. -
Page 18: Osd Information Display
live OSD Information Display Item Description You can show or hide the recording status, camera status, event display, etc. in the video window. Events from the recorder and camera are displayed in icons. Event Display To show or hide the OSD information, click < >... -
Page 19: Channel Information Display
Channel Information Display Check the Camera Status You can check the information of the video being recorded with each camera. You can check the status of all cameras connected to the recorder. To check the channel information, click < > at the bottom of the screen. To check the camera status, click <... - Page 20 live Record Status Network Status If you select <Record> in the <Status> menu, you can check the profile, record type, frame rate (Input/Record), Select <Network> in the <Status> menu to check the status of network bandwidth currently being received/ and bit rate (Limit/Input/Record) for each channel. transmitted.
-
Page 21: Channel Setting
CH10 CH11 CH12 CH13 CH14 CH15 CH16 Changing Overall Channel Aspect Ratio ● Enable: Turns on/off the power supply to the camera. – Checked ( ): Power supply available CH19 CH19 Video screen ratio for all channels can be changed in live split screen mode. CH10 CH10 CH11... -
Page 22: Full Screen Mode
live full Screen Mode SETTINg uP THE lIVE lAyOuT You can change to full screen mode, which has no top/bottom/left/right areas of the live screen. This section outlines how to select a series of channels based on their purpose/accessibility and monitor them in a single layout. -
Page 23: Add Layout And Set Name
Add layout and Set Name Dynamic layout You can set the size and position of the video assigned to the layout as desired. 1. Click < > to add a layout. ■ 2. Click < > to set the name for the added layout. The dynamic layout function can only be set on the primary monitor. - Page 24 live zooming In and Out of Videos Moving Videos You can enlarge or reduce the video by dragging a corner or vertex of the video in the desired direction. To move the video, click the video and then drag and drop it in the desired location. If you double-click the corner or vertex of the enlarged video area, the video will be reduced step by step.
-
Page 25: Play Layout Sequence
Play layout Sequence REAl-TIME EVENT MONITORINg You can automatically switch the layout list to a set time interval to view. Real-time events that occurred on the camera can be checked in the live video window and event list. ■ AI events are only available for products that support AI. ■... -
Page 26: Event Search
live Event Search Event Instant Viewer You can browse events by camera and event type. Select an event to check from the event list, and click < > to play the recorded video at the time the event occurred. To search for a specific event, click < >... -
Page 27: Camera Video Control
CAMERA VIDEO CONTROl Capture You can take a screenshot of the current video of a specific channel selected on the live screen. By using the function icon of the video window, you can easily use the functions of capture, video zoom, PTZ camera and thermal imaging camera. -
Page 28: Temperature Detection Mode
live Temperature Detection Mode PTz Mode For images that support the thermal imaging camera function, you can click the desired point to check the You can run PTZ control of the selected channel. temperature information. Select the desired channel and click < >. -
Page 29: Zoom In
zoom In Display Text You can zoom in or out the video via digital zoom. You can monitor texts regarding the sales record received from POS in real time. ■ Select the desired channel and click < >. This is executable when a text device is connected. ■... -
Page 30: Change Channel Aspect Ratio
live Change Channel Aspect Ratio Dewarping You can change the aspect ratio of each channel. You can correct distorted images from the fisheye camera by running dewarping. Select the desired channel and click < >. Select the channel you want and click < >. -
Page 31: Ptz Control
PTZ driver (physical device). ■ It only supports a network camera with Hanwha Techwin's PTZ function and a camera registered in the ONVIF. Group The group function enables you to group various presets before calling them in sequence. -
Page 32: Using Digital Ptz (D-Ptz) Function
live using Digital PTz (D-PTz) function To delete a registered preset 1. Click < >. 1. Register a camera that supports the D-PTZ profile. ■ 2. Click < >. <Delete preset> window will appear. In cameras that support the D-PTZ profile, you can use the D-PTZ function. 2. -
Page 33: Exporting The Recorded Video
ExPORTINg THE RECORDED VIDEO 3. After completing the export setup, select <Start>. ■ If there is no device to export, the <Start> button will be deactivated. You can search the storage device to be exported and export the recorded video of the desired time by layout or ■... -
Page 34: Screen Layout Of The Search
search TIME SEARCH You can search recorded video by various conditions such as time, event, and export. You can search the recorded data by the desired date and time conditions. SCREEN lAyOuT Of THE SEARCH ■ The time displayed will be based on the time zone and daylight saving time (DST) applied time zone, so it may be displayed differently depending on whether the data time zone recorded at the same time and daylight saving time (DST) is applied. -
Page 35: Event Search
EVENT SEARCH TExT SEARCH You can search for various events by channel. You can search the data input to the POS device connected to the recorder. 1. Select <Event search> in the <Search> menu. 1. Select <Text search> in the <Search> menu. 2. -
Page 36: Export Search
search ExPORT SEARCH ARb SEARCH You can search the exported data on the connected storage device. Only data saved in recorder file format when You can search auto-recovery backup data stored on ARB storage devices. exported will be retrieved. 1. Select <ARb search> in the <Search> menu. ■... -
Page 37: Bookmark Search
bOOKMARK SEARCH SMART SEARCH You can search for bookmarked data. You can search for events by selecting a region of interest, an exclusive region, or a virtual line from a recorded video at a specific time. ■ To use smart search, you need to set the area of the camera's “Motion Detection" or “IVA” to the entire area. However, if you want to search for cameras after Wisenet X series, you must select “Enable"... -
Page 38: Ai Search
AI search PERSON SEARCH If there is AI data recorded by the camera, you can search for images in various conditions such as people, faces, and vehicles. ■ In the recorded data, you can search for a person by any condition you want, such as gender, top/bottom color. This function is not supported in some models. -
Page 39: Face Search
fACE SEARCH VEHIClE SEARCH From the recorded data, you can search faces according to your desired conditions such as gender and age. You can search the vehicle by setting the vehicle type and color conditions from the recorded data. 1. Select <face search> in the <AI search> menu. 1. -
Page 40: Lp Search
AI search lP SEARCH lPR SEARCH You can search for vehicle license plates from the recorded data. You can search for the license plate number recognized in the recorded data. ■ LPR search is only available on recorder models that support AI recognition. 1. -
Page 41: Play
play You can play the recorded data and export the video you want during playback. Item Description SCREEN lAyOuT Of THE PlAy Playback control You can control video playback. Date/Time Set the date/time. Time line Move the playback position and display event data. You can change the number of channels displayed in the time line. -
Page 42: Play Search Results
play PlAy SEARCH RESulTS Play button Name and function Paused state Time line Adjustment You can move the playback position and zoom the time line in and out. Click the desired play position in the time line. ● The playback start position will be moved. ■... -
Page 43: Search Results Export
SEARCH RESulTS ExPORT You can export the search results to a file. 1. Click the < > button. 2. Select a layout and channel to export. 3. Select a start date/time and an end date/time. ■ If you changed the time zone of the recorder, select whether to apply DST. 4. -
Page 44: Setup
setup SETTINg THE CAMERA Sets the camera, recording, event, device, network, and system environment. You can access to the channel setup, camera settings, and profiles and camera password-related settings. SCREEN lAyOuT Of THE SETuP Setting the Channel You can register a network camera for each channel and make connection between. Setup >... - Page 45 When you change the camera ID/password in the camera web viewer, if the camera is already registered in Recorder, you also have to – Wisenet Multi-Channel : You can register Hanwha Techwin's multi directional cameras and multi-imager change the camera ID/password information registered in Recorder.
- Page 46 setup If you want to check the error details of camera registration ● Address type : Select an address type of the camera. ■ The supported address type may differ depending on the type of the connected product. If you failed to register a camera, the reason for the failure will be displayed. Connection failed due to unknown error.
-
Page 47: Setting The Camera Functions
Network Camera firmware upgrade Setting the Camera functions You can set the camera while viewing the live video of the selected camera. Setup > Camera > Camera setup Channel : Displays channel information. ● ■ ● Model : Displays the camera model information. You can use this feature in the following cases : 1. - Page 48 setup Setting the Profiles ● SSNR : Adjusts the brightness by reducing noise and minimizing afterimages even in dark places. ● Sens-up : Automatically adjusts the shutter speed according to the brightness of the current light. ● IRIS/Lens : Adjusts the brightness by automatically or manually adjusting the camera IRIS and lens. Setting the Recording Profile ●...
- Page 49 Setting the live Profile Setting the Remote Profile You can change the live transfer settings of the network camera. You can set the video profile transmitted to the network. Setup > Camera > Profile setup > live Setup > Camera > Profile setup > Remote ●...
- Page 50 setup Editing the Profiles Dewarping Setup Press the <Dewarping> button at the bottom of the <Detailed profile configuration> window to go to the You can change the video settings of a registered network camera for each channel. distortion correction setup popup window for each channel. Setup >...
- Page 51 How to set WiseStream Dynamic gOV/fPS setup Function to analyze the complexity of the video and effectively reduce the data size while maintaining the Dynamic GOV can be used to automatically change the length of GOV depending on the video condition. For quality.
-
Page 52: Setting Camera Password
setup Setting Camera Password SETTINg THE RECORDINg You can change the passwords of all registered cameras at once. You can setup scheduled recording, event recording and other recording related settings. You can register the camera’s ID and password. Record schedule Setup >... -
Page 53: Record Setup
■ Record Setup If a channel's data transfer exceeds defined allowed limit, then it may affect to other channels, and may force switching to <I-frame> recording even when the channel is configured to <Full frame> recording mode. For Key Frame recording channels, the icon for limited You can set the resolution and number of recordings for each channel when an event occurs or during a normal recording appears on the live screen's top side. -
Page 54: Setting The Event
setup SETTINg THE EVENT Event setup Sets whether or not to detect events (e.g. object detection, AI recognition, motion detection, intelligent video You can set the event-related settings such as whether or not an event is detected for each channel and whether an alarm occurs. - Page 55 AI recognition Motion Setup > Event > Event setup > AI recognition Setup > Event > Event setup > Motion ■ AI recognition function is only available for recorder models that support AI engine function. Motion detection : You can set whether to enable motion detection. ●...
- Page 56 setup Tampering Setup > Event > Event setup > IVA Setup > Event > Event setup > Tampering IVA : You can set whether to enable intelligent video analytics. Tampering detection : You can set whether to enable tampering detection. ●...
-
Page 57: Event Rule Setup
Event Rule Setup ● Event action : Displays the event action set in the event rule. Item Description You can set the event trigger and action rule to output an alarm when an event occurs. Record/Go to preset Setup > Event > Event rule setup Alarm output E-mail Transfer images to FTP server... -
Page 58: Alarm Input
setup 3. Set the details when the event rule setting window is displayed. Alarm Input ● Rule name : Enter the name of the event rule. You can set the operation of the alarm sensor. Event trigger : Click <+ Add trigger> to set the event trigger and channel. ●... -
Page 59: Schedule
Schedule SETTINg THE DEVICE When setting the event rule, you can set the operating time of the event action. You can make the detailed settings for devices such as storage device and monitors. Setup > Event > Schedule Storage Device You can set the storage device usage and check the setting status. - Page 60 setup ■ ● Storage Status : Displays the working status of a storage device. Click the <View> to display the storage status The ARB feature is available only when your video is saved in the SD card after registering your Wisenet camera using the Wisenet protocol. window.
- Page 61 Connecting the iSCSI Adding an iSCSI device This function is only available for products that support iSCSI. For products that support iSCSI, see page 4 “Products supporting each feature” of the Product Specification Manual. When connecting an iSCSI device to the recorder, you can search for the iSCSI device and connect and disconnect Setup >...
- Page 62 setup RAID mode setting RAID mode setting This function is only available for products that support RAID. For products that support RAID, see page 4 1. Click on the <Enable> or <Setup> button. “Products supporting each feature” of the Product Specification Manual. 2.
- Page 63 Distributed Recording S.M.A.R.T This function is only available for products that support distributed recording. For products that support You can check the connection status and details of the hard disk mounted in the recorder. distributed recording, see page 4 “Products supporting each feature” of the Product Specification Manual. Setup >...
-
Page 64: Monitor
setup Monitor Extended monitor setting This function is only available for products that support the use of an extended monitor. You can set the information displayed on the monitor as well as the output system. For products that support extended monitor, see page 4 “Products supporting each feature” of the Product Setup >... -
Page 65: Text
Screen position setup Text Some monitors many not display information (camera name, icon, time information, etc.) about the Recording, You can set the POS device setting to send text information and text event information. depending on the condition. Then, you can change the display position of the data. Device Settings You can make detailed settings for the POS device connected to the recorder. - Page 66 setup Registering a Text Device Text Event Settings You can set the text to receive an alarm when an event occurs. Setup > Device > Text > Event Total amount : Set the condition of the total amount to be notified when a text event occurs. Check whether ●...
-
Page 67: Setting The Network
SETTINg THE NETWORK Connecting and Setting the Network Networking may differ from the connection method, check your environment before setting the connection You can set various network functions, such as monitoring live video by connecting to a network from a remote location mode. -
Page 68: Ddns & P2P
setup Setting the DHCP IP Address of the broadband Router DDNS & P2P ● 1. To access the Broadband Router's configurations, open a web browser on the local PC that is connected to the A remote user can network a recorder using a DDNS address in a dynamic IP system. If you cannot connect with a Broadband Router and enter the router's address (ex : http://192.168.1.1). - Page 69 ■ Connecting to the Viewer In a double NAT environment or if the router's port is not configured, the DDNS status will be displayed as <Successful>, but the DDNS connection from the viewer to the recorder may fail. ■ You must be connected to an external network for a DDNS connection. (If there are two or more networks, be sure to connect an external To connect to the Wisenet mobile from your smartphone network to the network set as the <Default gateway>.) ■...
-
Page 70: Ip Filtering
setup IP filtering HTTPS You can prepare the list of IP addresses to allow or block access to a specific IP address. You can choose a secured connection system or install a certificate. Setup > Network > IP filtering Setup > Network > HTTPS ●... -
Page 71: 802.1X
802.1x When connecting to a network, you can select whether to use the 802.1x protocol and install a corresponding When an event occurs, it can be configured to send the event image to the FTP server. certificate. Setup > Network > fTP 802.1x is an authentication system between a server and a client, which prevents hacking, virus infection, and information leakage of transmitted and received network data. -
Page 72: E-Mail
setup E-mail Event Setting You can set the interval and type of the event that will be sent to the user. You can send an e-mail to a Recorder-registered user at a specific time interval, or if an event occurs. Setup >... -
Page 73: Snmp
SNMP DHCP Server The SNMP protocol allows system or network administrators to remotely monitor and configure the network You can set the internal DHCP server and assign an IP address to the network camera. devices. Network Setting Setup > Network > SNMP Setup >... -
Page 74: Failover
setup Checking the status To set troubleshooting You can check the IP address assigned to the current DHCP server, MAC address, and the connected network port 1. Set one recorder to <Standby> mode and the other recorder to <Active> mode. information. -
Page 75: Setting The System
In the case of standby mode SETTINg THE SySTEM ● Device list & status : Shows the status of the normal recorder currently connected to the standby recorder. To You can set the date, language, authority, etc. displayed when using the system, and query system information or log delete the normal recorder connected, click <Delete>... -
Page 76: User
setup user ● Holiday : A user can select specific dates as holidays according to their own preferences. Select a holiday from the calendar displayed by clicking <Setup>. You can manage users, such as adding or deleting users and granting different authorities for each user. –... - Page 77 user setting If you want to register a user You can create user groups and set authorities for each group. You can manage user information such as registering and deleting users in the created user group. Setup > System > user > user 1.
- Page 78 setup Restriction Settings If the user has restricted access Set user's restricted access or network restriction. If a general user selects a menu to which they do not have access, an access restriction confirmation window will be displayed. If all rights are restricted, only the accessible menu of the live screen menu will be displayed, and Items with restrictions will require logging in for use.
-
Page 79: System Management
System Management To upgrade the current software version You can check the current system version and update to a new version, export data, setting initialization, and more. Checking the System information You can check the current software version and MAC address before proceeding with the upgrade. Setup >... -
Page 80: Log
setup Settings Power down : If the power is off, the first alarm is generated. Select the <use the alarm output no. 1 when the ● device power is off> check box and click <Apply> to clear all alarms set for alarm output 1, and then selecting You can export the information set in the recorder to a storage device and apply the same information to other alarm 1 with another alarm out will not be possible. - Page 81 Checking the event log Checking the export log You can search recorded events including alarms, camera events and video loss. You can search the user who performed the export and the execution time and details (time, channel, device, file It also shows the log and its timestamp. type).
-
Page 82: What Is Web Viewer
starting web viewer WHAT IS WEb VIEWER? CONNECTINg WEb VIEWER Web Viewer is a software program with which the operator can access a remote Recorder for real-time monitoring, PTZ 1. Open your web browser and type the IP address or URL of Recorder into the URL address box. control (if configured) or search. -
Page 83: Set The Recorder Password
SET THE RECORDER PASSWORD 2. Set the camera password in factory reset on the <Camera ID/PW> screen. If ID/PW is already set in the camera, register the ID/PW and click <Next>. After factory reset, the password must be set for the recorder to access the web viewer. Enter the password of the admin account, and click <login>. - Page 84 starting web viewer 4. Set the daylight saving time on the <Time zone> screen, and then click <Next>. 6. On the <Easy connect> screen, a remote user can network a recorder in a dynamic IP system. Click <Enable> to test the connection to see if the current recorder can be connected remotely. When the connection is successful, a QR code is created.
-
Page 85: Screen Layout Of The Live Viewer
Shows a list of events that occurred on the camera. Layout list Displays the default layout and a list of created layouts. You are directly connected to the Hanwha Techwin homepage (www.hanwha-security.com). PTZ Control Controls the connected PTZ camera. Changes the color theme of Web Viewer. -
Page 86: Checking The System Status
live viewer CHECKINg THE SySTEM STATuS CHECKINg CAMERA lIST The icon at the top of the screen indicates the status of the system. Displays the camera type, status, and name registered in the recorder. Name Description live > list Displayed when a problem occurs with the pan or recording status. Displayed when an error occurs in the power supply. -
Page 87: Checking The All Camera Status
CHECKINg THE All CAMERA STATuS Network Status Click the < > button, followed by the <Network> tab. You can check the status of all cameras connected to the recorder. You can check the status of network bandwidth currently being received/transmitted. live Status Click the <... -
Page 88: Changing Overall Channel Aspect Ratio
live viewer CHANgINg THE PATTERN Of SPlIT SCREEN CHANgINg OVERAll CHANNEl ASPECT RATIO Click the < > button and select the desired split screen. Video screen ratio for all channels can be changed in live split screen mode. The selected split screen is applied to the video window. Click <... -
Page 89: Full Screen Mode
full SCREEN MODE SETTINg uP THE lIVE lAyOuT You can change to full screen mode, which has no top/bottom/left/right areas of the live screen. This section outlines how to select a series of channels based on their purpose/accessibility and monitor them in a single layout. -
Page 90: Change Of Layout Channel And Name
live viewer Change of layout Channel and Name REAl-TIME EVENT MONITORINg Real-time events that occurred on the camera can be checked in the live video window and event list. 1. Click < > after selecting a layout. ■ AI events are only available for products that support AI. 2. -
Page 91: Check Event List
Check Event list Event Instant Viewer When new events occur, the list of events will be updated accordingly. Select an event to check from the event list, and click < > to play the recorded video at the time the event ■... -
Page 92: Live Screen Menu
live viewer lIVE SCREEN MENu CAMERA VIDEO CONTROl After selecting the desired channel on the split mode, roll the mouse cursor over the screen to see the live screen menu. By using the function icon in the video window, you can easily enable functions such as screenshot, video rotation, and PTZ control. -
Page 93: Instant Viewer
Instant Viewer PTz Mode During monitoring, you can rewind 1 minute before playback. You can run PTZ control of the selected channel. Select the desired channel and click < >. Select the desired channel and click < >. The Instant Viewer screen appears. Enters the PTZ control mode. -
Page 94: Zoom In
live viewer zoom In Channel Aspect Ratio You can zoom in or out using the mouse wheel. You can change the aspect ratio of each channel. If you scroll up using the mouse wheel, the selected video screen is enlarged by 10%, and a thumbnail window is Select the desired channel and click <... -
Page 95: Ptz Control
PTz CONTROl using Digital PTz (D-PTz) function PTz Control Menu 1. Register a camera that supports the D-PTZ profile. ■ In cameras that support the D-PTZ profile, you can use the D-PTZ function. If the connected network camera is a PTZ camera, the < >... -
Page 96: Running Preset
live viewer To delete a registered preset ExPORTINg VIDEO You can export the recorded video by manually inputting the desired channel, date, and time. 1. Click < >. 2. Select the preset to delete, and click <Delete>. 1. Click the < >... -
Page 97: Screen Layout Of The Search Viewer
search viewer TIME SEARCH You can search and play the recorded video stored in the recorder by connecting the recorder remotely. You can search the recorded data by the desired date and time conditions. SCREEN lAyOuT Of THE SEARCH VIEWER ■... -
Page 98: Event Search
search viewer EVENT SEARCH TExT SEARCH You can search for various events by channel. You can search the data input to the POS device connected to the recorder. 1. Select <Event search> in the <Search> menu. 1. Select < Text search> in the <Search> menu. 2. -
Page 99: Bookmark Search
bOOKMARK SEARCH SEARCH RESulTS ExPORT You can search for bookmarked data. Search results of events, texts and bookmarks can be exported to a file. Example) bookmark search result export 1. Click < > in the search results list. 1. Select <bookmark Search> in the <Search> menu. 2. -
Page 100: Screen Layout Of The Ai Search Viewer
AI search viewer PERSON SEARCH If there is AI data recorded by the camera, you can search for images in various conditions such as people, faces, and vehicles. ■ In the recorded data, you can search for a person by any condition you want, such as gender, top/bottom color. This function is not supported in some models. -
Page 101: Face Search
fACE SEARCH VEHIClE SEARCH From the recorded data, you can search faces according to your desired conditions such as gender and age. You can search the vehicle by setting the vehicle type and color conditions from the recorded data. 1. Select <face search> in the <AI search> menu. 1. -
Page 102: Lp Search
AI search viewer lP SEARCH lPR SEARCH You can search for vehicle license plates from the recorded data. You can search for the license plate number recognized in the recorded data. ■ LPR search is only available on recorder models that support AI recognition. 1. -
Page 103: Search Results Export
SEARCH RESulTS ExPORT Search results such as people, faces, and vehicles can be exported to a file. Example) Person search results export 1. Click < > in the search results list. 2. Select the desired list and click <OK>. ■ The exported video is saved as .avi file in the download folder. -
Page 104: Play Search Results
play PlAy SEARCH RESulTS ExPORT VIDEO by SECTION SETuP You can play the recorded data and export the video you want during playback. You can select the desired section from the time line or search list during video playing and export it to a file. 1. -
Page 105: Play Button Name And Function
Play button Name and function Paused state Playback state Name Description Previous event Go to the previous event video. Previous frame Moves backward to the key frame (I-frame). Playback Play the video. Next frame Moves forward one frame or more. Next event Go to the next event video. -
Page 106: Setup Viewer
setup viewer SETTINg THE CAMERA You can configure the Recorder settings remotely on the network. You can check a list of cameras that are connected to the Recorder and configure the necessary settings. SCREEN lAyOuT Of THE SETuP VIEWER For details, refer to the "Setup > Setting the Camera" page in the Table of Contents. Channel setup You can register a network camera for each channel and make a connection between them. -
Page 107: Profile Setup
When you click the <Camera webviewer> button, a new camera web browser window is opened. Profile Setup ● – This is not supported if the camera is connected to the RTSP protocol. You can set the profile for a network camera. –... -
Page 108: Setting The Recording
setup viewer Remote SETTINg THE RECORDINg You can set the video profile transmitted to the network and the expansion monitor. For details, refer to the "Setup > Setting the Recording" page in the Table of Contents. Record Schedule If you set a recording schedule for a specific date and time, the recording will start at that specific time. Setup >... -
Page 109: Record Options
Record Options SETTINg THE EVENT You can set the hard disk recording option. For details, refer to the "Setup > Setting the Event" page in the Table of Contents. ■ You can set the recording duration separately for each channel. AI engine Setup >... - Page 110 setup viewer AI recognition Motion detection You can change the AI recognition event setup. You can change the settings for motion detection events. ■ ■ Settings and operating specifications may differ depending on the recorder model and camera. Detailed video analysis can be set by accessing the Camera webviewer. Mask detection You can change the mask detection event setup.
-
Page 111: Event Rule Setup
Tampering detection Alarm Input You can change the tampering detection event setup. You can set the operation of the alarm sensor. ■ This function is not supported in some models. Setup > Event > Alarm input Event Rule Setup You can set the event trigger and action rule to output an alarm when an event occurs. Setup >... -
Page 112: Schedule
setup viewer Schedule SETTINg THE DEVICE Whether to output an alarm can be scheduled according to the day and time. You can check a list of devices that are connected to the Recorder and configure the necessary settings. The initial setting will be an event sync, and an alarm will be sent only when an event occurs. For details, refer to the "Setup >... -
Page 113: Monitor
RAID S.M.A.R.T This function is only available for products that support RAID. You can check the connection status and details of the hard disk mounted in the recorder. You can set the RAID (Redundant Array of Independent Disks) mode. Monitor Distributed recording You can set the information displayed on the monitor as well as the output system. -
Page 114: Text
setup viewer Text SETTINg THE NETWORK You can set the POS device text display and event text settings. For details, refer to the "Setup > Setting the Network" page in the Table of Contents. Setup > Device > Text IP & Port Device A remote user can access the Recorder via the network to check the current mode and the IP address. -
Page 115: Ddns & P2P
DDNS & P2P HTTPS A remote user can network a recorder using a DDNS address in a dynamic IP system. If you cannot connect with a You can select a security connection system or install public certificates. dynamic IP, you can easily access using a P2P service. Setup >... -
Page 116: Ftp
setup viewer Event You can set the event interval and specify which events the server sends mails for. When an event occurs, you can create settings related to the FTP server to which images will be transferred. Setup > Network > fTP Recipient You can set groups and recipients to receive emails. -
Page 117: Snmp
SNMP Status You can check the IP and MAC currently used through the DHCP server, and the connected network port. Using the SNMP protocol, the system or network administrator can remotely monitoring the network devices and sets the environment. Setup > Network > SNMP DHCP Server You can set the network camera IP address and check the details by setting up a DHCP server. -
Page 118: Setting The System
setup viewer SETTINg THE SySTEM user You can manage users, such as adding or deleting users and granting different authorities for each user. You can configure the various settings of the Recorder system. For details, refer to the "Setup > Setting the System" page in the Table of Contents. Setup >... -
Page 119: System Management
Restriction settings Settings You can set the user permission. Using a storage device, you can apply the current configuration of Recorder to another Recorder. Press the Initialization button to return the network settings to their factory default state. Items in the <Exception>... - Page 120 setup viewer Event log The event log lists recorded events, such as sensor events, camera events, or image losses. Export log You can search the user who performed the export and the execution time and details (time, channel, device, file type).
- Page 121 export viewer SEC bACKuP VIEWER Screen layout of the backup Viewer You can play a file that is backed up in the format of SEC. Backup in SEC format produces backup data file, library file and self-executable viewer file. If you run the backup file viewer, the backup data file will be played. XRN-1620B2_CAM 01 Recommended System Requirements 2020-05-14 20 :54 :13...
- Page 122 export viewer Name Description Saves the current video's image as in an image file. Supports JPEG file format. Screen Printout Prints out the current screen. You should have installed the appropriate printer driver before you can print out the screen. A toggle button.
- Page 123 appendix uSE JOySTICK uSINg VIRTuAl KEybOARD The function is only available for the product that supports a joystick. For products that support joy stick, see page 4 "Products supporting each feature” of the Product Specification Manual. The SPC-2000 joystick is operated as follows : 1.
- Page 124 appendix TROublESHOOTINg Problem Action Problem Action The camera is not connected or the PC fails to connect to the ● Check if the network cable is connected properly. Live video will be slow or cut off. ● The frame number set for multiple data transmission set in camera or network environment product.
- Page 125 Problem Action Problem Action Exported data cannot be played on a PC or recorder. ● When setting the file format for exporting, first decide whether the device to be played is a PC ● If the sum of input data for each channel exceeds the limit, the alarm icon and the pop up In the live screen, the <...
Need help?
Do you have a question about the WISENET QRN-830S and is the answer not in the manual?
Questions and answers