
Related Manuals for Beninca ONE.2WB-MS


Summary of Contents for Beninca ONE.2WB-MS
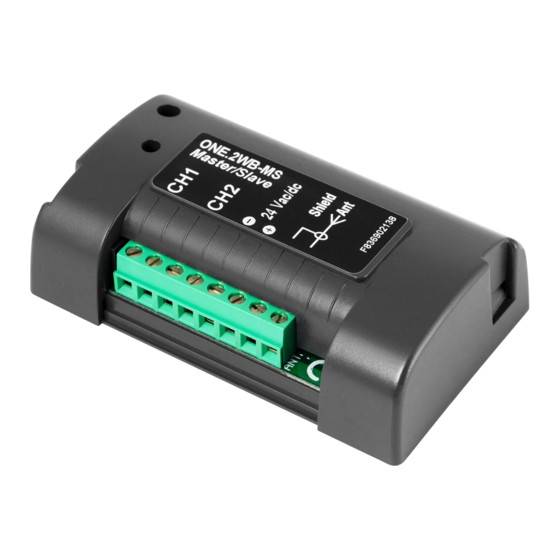
- Page 1 L854200205 10/2019 rev 0 ONE.2WB-MS UNIONE NAZIONALE COSTRUTTORI AUTOMATISMI PER CANCELLI, PORTE SERRANDE ED AFFINI...
- Page 2 ONE.2WB-MS *solo RR.2WBV RR.1WBV *only RR.2WBV � RR.2WBV *nur RR.2WBV ���� *uniquement RR.2WBV ���� � *sólo RR.2WBV *tylko RR.2WBV � ���� ���� � *solo RR.2WBV RR.1WBV *only RR.2WBV � � RR.2WBV *nur RR.2WBV �������� *uniquement RR.2WBV ���� ���� � �...
- Page 3 ITALIANO 2 Si accende il LED Rosso per 3s, quindi si spegne per 1s e si riaccende per Radioricevitori 433,92MHz bicanali multicodifica compatibili con il sistema Advantouch. 3 Premere, con il LED Rosso acceso, il pulsante del trasmettitore che si vuole associare al canale 1.
- Page 4 caso di inserimenti sequenziali è consigliabile scollegare momentaneamente Una volta generato un trasmettitore chiave, ci sono solo due modalità per l’antenna, si riduce così la portata della ricevente e la possibilità di ricevere memorizzazione nuovi trasmettitori: dei segnali di disturbo. Utilizzando il trasmettitore chiave durante la procedura di memorizzazione del nuovo trasmettitore, come descritto in seguito.
- Page 5 Procedura per inserire manualmente un telecomando utilizzando il - E’ possibile creare fino ad un massimo 3 trasmettitori chiave per trasmettitore chiave: un’unica ricevente. Nel caso di impianti con un numero elevato di utenti, Premere il pulsante P del ricevitore. è...
- Page 6 TABELLA 1 Fase LED Funzione Operazioni Spento Nessuna funzione Stato normale Premere il pulsante P Memorizzazione del Si accende il LED rosso, attendere 3s, il LED si spegne e si riaccende, premere entro 5s il tasto del Rosso 1° canale radio trasmettitore che si desidera associare al canale 1.* Premere entro 3s il pulsante P Memorizzazione del...
- Page 7 TABELLA 2 Fase LED Funzione Operazioni 1 lampeggio Impostazione modalità Se non si preme il pulsante P. dopo 5s, il canale vien ripristinato alla modalità di default: Impuslvo veloce impulsiva (1s di commutazione). Premere il pulsante P per almeno 3s Se non si preme il pulsante P, dopo 5s il LED inzia a lampeggiare, con frequenza di 1 lampeggio 2 lampeggi Selezione del tempo di...
- Page 8 ENGLISH up again for 5 secs. 433,92MHz Radioreceiver 2 channels, multiple decoding, compatible 3 While the red LED is on, press the button on the transmitter to associate with Advantouch system. with channel 1. 4 Other transmitters can be then be recorded by pressing a button within 5 The standard memory can contain 512 rolling-code, 433.92MHz, transmitters secs from recording the previous transmitter.
- Page 9 temporarily remove the antenna thereby reducing the receiver’s range and Marking the key transmitter will enable it to be identified even after some limiting disturbance. time. Use the “MASTER” adhesive labels supplied, also marking which receiver channel the radio remote control was associated with before N.B.: Once a programming mode has been entered, other modes cannot be becoming a master.
- Page 10 The receiver must have a key transmitter: The transmitter cloned by the key transmitter assumes the Press and hold the P button of the receiver for at least 15s until the characteristics (channel-associations) that the key transmitter originally GREEN LED flashes quickly. had.
- Page 11 TABLE 1 Mode LED Function Operations No function Normal status. Press the button P The red LED will light up, wait 3 secs, the LED will go out and light up again, press within 5 secs the Memorise channel 1 button on the transmitter to associate with channel 1.* Press within 3 secs the button P The green LED will light up, wait 3 secs, the LED will go out and light up again, press within 5 secs the...
- Page 12 TABLE 2 Mode LED Function Operation If the P button is not pressed within 5 secs the channel is reset to the default pulse mode (1 sec 1 rapid blink Set pulse mode switching). Press the button P for at least 3 secs If the P button is not pressed within 5 secs the LED will start blinking at a rate of 1 blink/sec 2 rapid blinks Select switching time...
- Page 13 DEUTSCH 1 Die Taste P des Empfängers drücken und loslassen. Funkempfänger 433,92 Mhz Zweikanal mit Mehrfachcodierung, 2 Die rote LED schaltet sich für die Dauer von 3 s ein, geht 1 lang aus und kompatibel mit dem System Advantouch schaltet sich für 5 s wieder ein. 3 Bei eingeschalteter roter LED die Taste des Senders drücken, der dem Der Standardspeicher kann bis zu maximal 512 Rolling-Code-Sender Kanal 1 zugeordnet werden soll.
- Page 14 * Nachdem die Taste des 1. Senders gedrückt wurde, wartet der Empfänger GENERIEREN EINES SCHLÜSSELSENDERS (MASTER) 5 s auf einen weiteren zu speichernden Sender. Auf diese Weise können In den Empfängern, die im ARC-Modus konfiguriert sind kann ein nacheinander alle dem gewünschten Kanal zuzuordnenden Sender „SCHLÜSSELSENDER”...
- Page 15 Verfahren zur manuellen Eingabe einer Fernbedienung mit dem Es können maximal 3 Schlüsselsender für einen einzelnen Schlüsselsender: Empfänger erstellt werden. Bei Systemen mit einer hohen Anzahl von Die P-Taste des Empfängers drücken. Benutzern empfiehlt es sich, mindestens einen Ersatzschlüsselsender Die ORANGENE LED blinkt schnell in Erwartung auf die Sendung des anzulegen.
- Page 16 TABELLE 1 Phase LED Funktion Operationen Keine Funktion Normaler Status. Die Taste P drücken Speicherung des 1. Die rote LED schaltet sich ein, 3 s warten, die LED schaltet sich aus und wieder ein, innerhalb von 5 s Funkkanals die Taste des Senders drücken, der dem Kanal 1 zugeordnet werden soll.* Innerhalb von 3 s die Taste P drücken Speicherung des 2.
- Page 17 TABELLE 2 Phase LED Funktion Operationen 1 schnelles Wird die Taste P nicht gedrückt, wird der Kanal nach 5 s erneut auf Default-Modus gestellt: Eingabe Impulsmodus Blinksignal Impulsmodus (1 s des Umschaltens). Die Taste P mindestens 3 s lang drücken Wird die Taste P nicht gedrückt, beginnt die LED nach 5 s einmal pro Sekunde zu blinken, bis 2 schnelle Wahl der Umschaltzeit...
- Page 18 FRANÇAIS pendant 5 s. Radio récepteurs 433,92MHz bicanal multi-codification compatibles 3 Presser, avec la LED Rouge allumée, la touche de l’émetteur que l’on veut avec le système Advantouch associer au canal 1. La mémoire standard peut contenir un maximum de 512 émetteurs à 4 D’autres émetteurs peuvent être mémorisés ensuite en pressant une code variable.
- Page 19 phase de programmation. Dans le cas de mémorisations séquentielles, il est émetteur, comme décrit plus loin. conseillé de déconnecter momentanément l’antenne, on réduit ainsi la portée Par clonage de l’émetteur clé, en utilisant un émetteur de la série “AK”. du récepteur et la possibilité de recevoir des signaux parasites. Cette fonction est particulièrement utile pour augmenter la sécurité...
- Page 20 passe à la gestion des mémorisations au moyen de la touche et/ou des Tous les modèles d’émetteurs ARC peuvent assumer la fonction configurations des temps. d’émetteur clé. Mémoriser le ou les émetteur/s comme l’indique le paragraphe La fonction est disponible uniquement en modalité ARC (le premier “Programmation”.
- Page 21 TABLEAU 1 Phase LED Fonction Opérations Éteinte. Aucune fonction État normal. Presser la touche P Mémorisation du 1 La LED Rouge s’allume, attendre 3 s, la LED s’éteint et se rallume, presser encore 5 s la touche de Rouge canal radio l’émetteur que l’on souhaite associer au canal 1.* Presser dans les 3 s qui suivent la touche P Mémorisation du 2...
- Page 22 TABLEAU 2 Phase LED Fonction Opérations 1 clignotement Paramétrage mode par Si on n’appuie pas sur la touche P, au bout de 5 s le canal est rétabli dans le mode par défaut : Par rapide impulsions impulsions (1 s de commutation). Presser la touche P pendant au moins 3 s Si on n’appuie pas sur la touche P, au bout de 5 s la LED commence à...
- Page 23 ESPAÑOL 2 Se enciende el LED rojo por 3 segundos, luego se apaga por 1 segundo y Radioreceptoras 433,92MHz bicanal multi-codificación, compatibles se enciende otra vez por 5 segundos. con el sistema Advantouch 3 Pulsar, con el LED rojo encendido, el botón del transmisor que se desea asociar al canal 1.
- Page 24 deseado. Al pasar los 5 segundos de espera, el receptor sale de la fase Utilizando el transmisor de llave durante el procedimiento de de programación. En el caso de inserciones secuenciales, es conveniente memorización del nuevo transmisor, como se describe a continuación. desconectar la antena momentáneamente, pues así...
- Page 25 Si se recibe correctamente el transmisor CLAVE, se desbloquea Cualquier modelo de transmisor ARC puede asumir la función de la unidad receptora y se pasa a la gestión de las memorizaciones transmisor clave. mediante botón y/o de las configuraciones de los tiempos. La función está...
- Page 26 TABLA 1 Fase LED Función Operaciones Apagado Ninguna función Estado normal. Pulsar el botón P Memorización del 1° Se enciende el LED rojo, esperar 3 segs., el LED se apaga y se enciende otra vez, pulsar dentro de 5 Rojo canal radio segs.
- Page 27 TABLA 2 Fase Función Operaciones 1 destello Programación modo por Si no se pulsa el botón P, al cabo de 5 segundos se restablece por defecto la modalidad por impulsos rápido impulsos del canal (1 seg. de conmutación). Pulsar el botón P por al menos 3 segs. Si no se pulsa el botón P, al cabo de 5 segundos el LED comienza a parpadear con frecuencia de 1 2 destellos Selección del tiempo de...
- Page 28 POLSKI procedurę uproszczoną: Radiodbiorniki 433,92MHz dwukanałowe wielokodowe kompatybilne z 1 Nacisnąć przycisk P odbiornika po czym zwolnić go. systemem Advantouch 2 Zaświeci się na 3sek Czerwony LED, po czym zgaśnie on na 1sek i ponownie zaświeci się na 5sek. Pamięć standardowa może pomieścić maksymum 512 modułów transmisyjnych 3 Nacisnąć, podczas świecącego się...
- Page 29 P z przerwami nie dłuższymi niż 3sek pomiędzy jednym naciśnięciem a drugim. TWORZENIE NADAJNIKÓW Z KLUCZYKIEM (MASTER) Po wybraniu odpowiedniej fazy, odczekać przez około 3/4sek, sygnalizujący LED Odbiorniki skonfigurowane w trybie ARC mają możliwość stworzenia wskaże wejście do programu (zob. kolumna “Czynności”). „NADAJNIKA Z KLUCZYKIEM”, którego funkcja polega na ochronie W Tabeli 1 wskazane są...
- Page 30 Tylko zapisany przycisk przyjmuje funkcję klucza. Istnieje możliwość utworzenia maksymalnie 3 pilotów z funkcją klucza dla jednego odbiornika. W przypadku instalacji, z których Ręczne programowanie pilota przy użyciu pilota z funkcją klucza: korzysta wielu użytkowników, zalecamy utworzyć przynajmniej jeden Nacisnąć przycisk P na odbiorniku. zapasowy pilot z funkcją...
- Page 31 TABELA 1 Faza Funkcja Czynności Zgaszony Bez funkcji Stan normalny. Wcisnąć przycisk Utrwalanie w pamięci Zaświeci się Czerwony LED, odczekać3sek, LED zgaśnie i ponownie się zaświeci, nacisnąć w Czerwony 1-go kanału radiowego przeciągu5sek przycisk modułu transmisyjnego wybranego do zestawienia z kanałem 1.* Nacisnąć...
- Page 32 TABELA 2 Faza Funkcja Czynności 1 mignięcie Nastawienie Jeśli przycisk P nie zostanie wciśnięty, to po 5sek zostanie przywrócone dla kanału default: szybkie układu impulsowego Impulsowe (1sek komutacji). Wcisnąć przycisk Pna co najmniej 3 sek Jeśli przycisk P nie zostanie wciśnięty, to po 5sek LED rozpocznie miganie z częstotliwością 1 2 mignięcia Wybieranie czasu światła na sekundę, w oczekiwaniu na wciśnięcie przycisku P.
- Page 33 The most recent and complete certificate of conformity is available il sito: www.beninca.com oppure può essere richiesto presso: consulting the site: www.beninca.com or can be requested from: Automatismi Benincà S.p.A - Sandrigo VI - Italy. Automatismi Benincà SpA - Sandrigo VI - ITALY.
- Page 34 Le certificat de conformité le plus récent et complet est disponible en der Internetseite: www.beninca.com erhältlich oder kann bei folgender consultant le site : www.beninca.com ou peut être demandé à : Adresse angefordert werden: Automatismi Benincà SpA - Sandrigo VI - ITALIE.
- Page 35 El certificado de conformidad más reciente y completo está disponible Najbardziej aktualny i kompletny certyfikat zgodności jest dostępny na consultando el sito: www.beninca.com o se puede solicitar a: stronie: www.beninca.com lub można się po niego zwrócić do: Automatismi Benincà SpA - Sandrigo VI - ITALY.
- Page 36 Caratteristiche Tecniche - Technical Characteristics - Technische Charakteristiken ONE.2WB-MS Caractéristiques techniques - Características técnicas - Dane techniczne Frequenza / Frequency / Frequenz / Fréquence / Frecuencia / Częstotliwoś 433,92 MHz Alimentazione / Power supply / Versorgung / Alimentation / Alimentación / Zasilanie 21÷28 Vac - 12÷28 Vdc...
Need help?
Do you have a question about the ONE.2WB-MS and is the answer not in the manual?
Questions and answers