Table of Contents
Advertisement
Quick Links
Advertisement
Table of Contents

Related Manuals for NI NI-9157


Summary of Contents for NI NI-9157
- Page 1 NI-9157/9159 User Manual Specifications 2022-07-01...
- Page 2 NI 9157/9159 Specifications........
-
Page 3: Safety Guidelines
6. DIP Switches This document describes how to connect the NI 9157/9159 to a MXI-Express host and one or more other chassis, and how to use the features of the NI 9157/9159. This document also contains specifications for the NI 9157/9159. - Page 4 Safety Guidelines for Hazardous Locations The NI 9157/9159 is suitable for use in Class I, Division 2, Groups A, B, C, D, T4 hazardous locations; Class I, Zone 2, AEx nA IIC T4 Gc and Ex nA IIC T4 Gc hazardous locations;...
- Page 5 Special Conditions for Hazardous Locations Use in Europe and Internationally The NI 9157/9159 has been evaluated as Ex nA IIC T4 Gc equipment under DEMKO 07ATEX 0626664X and is IECEx UL 14.0089X certified. Each device is marked II 3G and is suitable for use in Zone 2 hazardous locations, in ambient temperatures of 0 °C ≤...
- Page 6 NI Industrial Controller ■ Note The NI 9157/9159 requires a host system with a PCI Express clock that complies with the PCI Express Specification. The NI 9157/9159 may not be compatible with systems using noncompliant clocks, particularly clocks with peak frequencies higher than 100 MHz. For...
- Page 7 Visit ni.com/info and enter the Info Code rdsoftwareversion to determine which software you need to use the NI 9157/9159. Mounting the NI 9157/9159 You can mount the chassis horizontally on a 35 mm DIN rail or on a flat, vertical, metallic surface such as a panel or wall. The maximum allowable ambient temperature for operation is 55 °C.
- Page 8 Allow 50.8 mm (2 in.) in front of modules for cabling clearance for ■ common connectors, such as the 10-terminal, detachable screw terminal connector. Figure 3. NI 9157/9159, Bottom View with Dimensions 29 mm (1.14 in.) Cabling Clearance 50.8 mm (2 in.) 63.5 mm...
- Page 9 Use the DIN rail mounting method if you already have a DIN rail configuration or if you need to be able to remove the chassis quickly. You can order the NI 9916 DIN rail mount kit if you want to mount the chassis on a DIN rail. You need one clip for mounting the chassis on a standard 35 mm DIN rail.
- Page 10 NI-9157/9159 User Manual and Specifications Figure 6. Installing the DIN Rail Clip on the NI 9157/9159 2. Insert one edge of the DIN rail into the deeper opening of the DIN rail clip. Figure 7. One Edge of the DIN Rail Inserted in a Clip 1.
- Page 11 Panel or wall mounting is the best method for applications that are subject to high shock and vibration. You can use the NI 9907 panel mount kit to mount the NI 9157/9159 on a flat surface. Complete the following steps.
-
Page 12: Installing C Series Modules
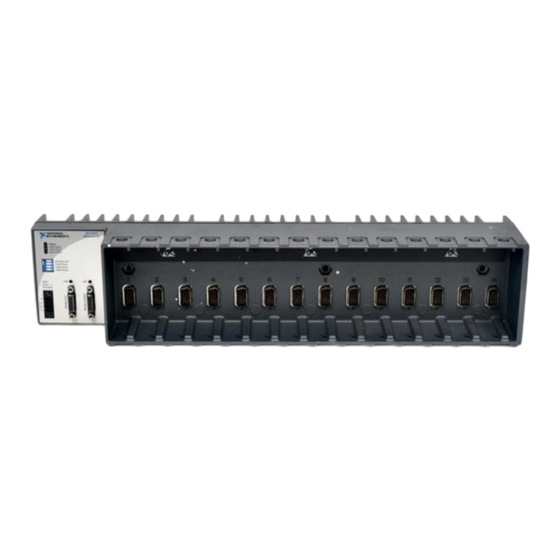
Panel or wall mounting is the best method for high shock and vibration applications. If you do not have the NI 9907 panel mount kit and do not require the portability that the NI 9907 affords, you can mount the NI 9157/9159 directly on a flat surface using the three mounting holes. - Page 13 NI-9157/9159 User Manual and Specifications Figure 11. C Series I/O Module, Front and Side View with Dimensions 88.1 mm (3.47 in.) 22.9 mm 70.7 mm (0.90 in.) (2.78 in.) Complete the following steps to install a C Series I/O module in the chassis.
-
Page 14: Wiring Power To The Chassis
The NI 9157/9159 requires an external power supply that meets the specifications. The NI 9157/9159 filters and regulates the supplied power and provides power for all of the I/O modules. You must connect a power supply to at least one pair of V and C terminals. - Page 15 Connecting One or More NI 9157/9159 Chassis to the MXI- Express Host System or a Target Complete the following steps to connect one or more NI 9157/9159 chassis to a MXI-Express host system or a target. 1. Make sure the MXI-Express host system is set up and configured as described in the MXI-Express (x1) Series User Manual.
- Page 16 Autoload VI on device powerup Loads the FPGA bit stream from flash memory to the FPGA when the chassis powers on. If you want the NI 9157/9159 to autoload and run a VI at powerup, you must also configure the VI to autoload before you compile it. For more information about autoloading VIs, refer to the LabVIEW FPGA Module Help.
-
Page 17: Powering Down The Mxi-Express System
Powering Down the MXI-Express System Always power down the host system before powering down any connected NI 9157/9159 chassis. When the host system is powered down, the order in which the NI 9157/9159 chassis are powered down is not important. -
Page 18: Understanding Led Indications
USER FPGA3 POWER LED The POWER LED is lit while the NI 9157/9159 is powered on. This LED is a bi-color LED. When the chassis is powered from V1, the POWER LED is lit green. When the chassis is powered from V2, the POWER LED is lit yellow. - Page 19 Caution Do not operate the NI 9157/9159 in a manner not specified in this document. Product misuse can result in a hazard. You can compromise the safety protection built into the product if the product is damaged in any way.
-
Page 20: Power Requirements
Power Requirements Caution You must use the NI 9157/9159 with a 9 VDC to 30 VDC output, UL Listed limited power source (LPS) supply. The power supply must bear the UL Listed and LPS marks. The power supply must also meet any safety and compliance requirements for the country of use. -
Page 21: Physical Characteristics
I/O modules you are using. Keep in mind that the resulting total power consumption is a maximum value and that the NI 9157/9159 may require less power in your application. For more information about the I/O module power requirements, refer to the module operating instructions. -
Page 22: Safety Voltages
Notice Do not connect the NI 9157/9159 to signals or use for measurements within Measurement Categories II, III, or IV. Note Measurement Categories CAT I and CAT O are equivalent. These test and measurement circuits are for other circuits not intended for direct ni.com... -
Page 23: Hazardous Locations
NI-9157/9159 User Manual and Specifications connection to the MAINS building installations of Measurement Categories CAT II, CAT III, or CAT IV. Hazardous Locations U.S. (UL) Class I, Division 2, Groups A, B, C, D, T4; Class I, Zone 2, AEx nA IIC... -
Page 24: Electromagnetic Compatibility
■ Product Certifications and Declarations Refer to the product Declaration of Conformity (DoC) for additional regulatory compliance information. To obtain product certifications and the DoC for NI products, visit ni.com/product-certifications, search by model number, and click the appropriate link. Shock and Vibration To meet these specifications, you must panel mount the system. -
Page 25: Environmental Management
NI is committed to designing and manufacturing products in an environmentally responsible manner. NI recognizes that eliminating certain hazardous substances from our products is beneficial to the environment and to NI customers. For additional environmental information, refer to the Engineering a Healthy Planet web page at ni.com/environment. - Page 26 • Waste Electrical and Electronic Equipment (WEEE)—At the end of the product life cycle, all NI products must be disposed of according to local laws and regulations. For more information about how to recycle NI products in your region, visit ni.com/...
Need help?
Do you have a question about the NI-9157 and is the answer not in the manual?
Questions and answers