Table of Contents
Advertisement
Quick Links
USER MANUAL AND SPECIFICATIONS
NI cRIO-9101/9102/9103/9104
CompactRIO Reconfigurable Embedded Chassis
Figure 1. CompactRIO Eight-Slot and Four-Slot Reconfigurable Embedded Systems
2
1
1. Controller
2. Eight-Slot Reconfigurable Embedded Chassis
(cRIO-9102/9104)
This document describes how to install an NI cRIO-9101, cRIO-9102, cRIO-9103, or
cRIO-9104. In this document the NI cRIO-9101, cRIO-9102, cRIO-9103, and cRIO-9104 are
inclusively referred to as the cRIO-910x.
Safety Guidelines
Caution
Product misuse can result in a hazard. You can compromise the safety protection
built into the product if the product is damaged in any way. If the product is
damaged, return it to NI for repair.
Safety Guidelines for Hazardous Locations
The chassis is suitable for use in Class I, Division 2, Groups A, B, C, D, T4 hazardous
locations; Class I, Zone 2, AEx nA IIC T4 and Ex nA IIC T4 hazardous locations; and
nonhazardous locations only. Follow these guidelines if you are installing the chassis in a
3
Do not operate the chassis in a manner not specified in this document.
4
1
3. C Series I/O Module
4. Four-Slot Reconfigurable Embedded Chassis
(cRIO-9101/9103)
3
Advertisement
Table of Contents

Related Manuals for NI cRIO-9101


Summary of Contents for NI cRIO-9101
- Page 1 2. Eight-Slot Reconfigurable Embedded Chassis 4. Four-Slot Reconfigurable Embedded Chassis (cRIO-9102/9104) (cRIO-9101/9103) This document describes how to install an NI cRIO-9101, cRIO-9102, cRIO-9103, or cRIO-9104. In this document the NI cRIO-9101, cRIO-9102, cRIO-9103, and cRIO-9104 are inclusively referred to as the cRIO-910x. Safety Guidelines Caution Do not operate the chassis in a manner not specified in this document.
-
Page 2: Electromagnetic Compatibility Guidelines
To minimize interference with radio and television reception and prevent unacceptable performance degradation, install and use this product in strict accordance with the instructions in the product documentation. 2 | ni.com | NI cRIO-9101/9102/9103/9104... - Page 3 CompactRIO system: • Windows computer with LabVIEW and NI-RIO software installed • ni.com/gettingstarted—learn how to install, set up, and configure your CompactRIO hardware and learn the basics of LabVIEW software. • LabVIEW Help—access information about LabVIEW programming concepts, step-by- step instructions for using LabVIEW, and reference information about LabVIEW VIs, functions, palettes, menus, tools, properties, methods, events, dialog boxes, and so on.
- Page 4 Using a number 2 Phillips screwdriver, tighten the two captive screws on the front of the controller to 1.3 N · m (11.5 lb · in.) of torque. 4 | ni.com | NI cRIO-9101/9102/9103/9104...
- Page 5 C Series modules with other connector types. Note Go to ni.com/dimensions for more information about the dimensions of the CompactRIO system, including detailed dimensional drawings. The following figures show the dimensions of the four- and eight-slot chassis. NI cRIO-9101/9102/9103/9104 | © National Instruments | 5...
- Page 6 Figure 4. Eight-Slot Reconfigurable Embedded Chassis with the Controller and I/O Modules Installed, Bottom View with Dimensions Cabling Clearance 50.8 mm (2 in.) Minimum 140 mm (5.50 in.) 88.1 mm (3.47 in.) 274 mm (10.79 in.) 4.1 mm (0.16 in.) 6 | ni.com | NI cRIO-9101/9102/9103/9104...
- Page 7 Complete the following steps to mount the chassis on a panel. Align the chassis on the panel. Bolt or screw the chassis to the panel using two M4 or number 10 panhead screws. NI does not provide the screws with the chassis.
-
Page 8: Mounting The Chassis On A Din Rail
You can order the NI 9912 DIN rail mount kit if you want to mount a four-slot CompactRIO chassis on a DIN rail, or the NI 9915 DIN rail mount kit if you want to mount an eight-slot CompactRIO chassis on a DIN rail. You need one clip for mounting the chassis on a standard 35 mm DIN rail. - Page 9 Figure 9. Fastening the DIN Rail Clip to a Four-Slot Chassis Figure 10. Fastening the DIN Rail Clip to an Eight-Slot Chassis Insert one edge of the DIN rail into the deeper opening of the DIN rail clip. NI cRIO-9101/9102/9103/9104 | © National Instruments | 9...
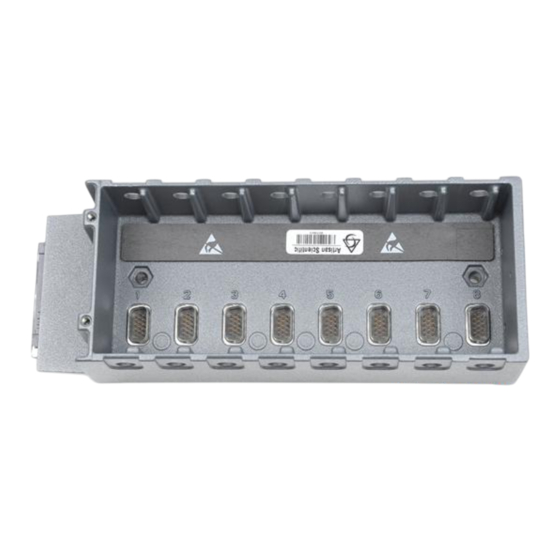
- Page 10 I/O modules. Align the I/O module with an I/O module slot in the chassis. The module slots are labeled 1 to 8, left to right. 10 | ni.com | NI cRIO-9101/9102/9103/9104...
- Page 11 Squeeze the latches on both sides of the module and pull the module out of the chassis. Connecting the Chassis to Earth Ground You must connect the panhead screw at the end of the chassis to ground using shielded cables. NI cRIO-9101/9102/9103/9104 | © National Instruments | 11...
-
Page 12: Where To Go From Here
950 ps Power Requirements These power requirements are for a fully loaded chassis and exclude the power requirements of the controller and the I/O modules in the chassis. For more information about the controller 12 | ni.com | NI cRIO-9101/9102/9103/9104... -
Page 13: Physical Characteristics
-40 °C to 85 °C (IEC 60068-2-1, IEC 60068-2-2) Ingress protection IP40 Operating humidity (IEC 60068-2-78) 10% RH to 90% RH, noncondensing Storage humidity (IEC 60068-2-78) 5% RH to 95% RH, noncondensing NI cRIO-9101/9102/9103/9104 | © National Instruments | 13... -
Page 14: Shock And Vibration
IEC 60079-0: Ed 6, IEC 60079-15; Ed 4 • UL 60079-0; Ed 5, UL 60079-15; Ed 3 • CSA 60079-0:2011, CSA 60079-15:2012 Note For UL and other safety certifications, refer to the product label or the Online Product Certification section. 14 | ni.com | NI cRIO-9101/9102/9103/9104... -
Page 15: Electromagnetic Compatibility
For additional environmental information, refer to the Minimize Our Environmental Impact web page at ni.com/environment. This page contains the environmental regulations and directives with which NI complies, as well as other environmental information not included in this document. Waste Electrical and Electronic Equipment (WEEE) -
Page 16: Worldwide Support And Services
. You can find information about end-user license agreements (EULAs) ni.com/patents and third-party legal notices in the readme file for your NI product. Refer to the Export Compliance Information at ni.com/ for the NI global trade compliance policy and how to obtain relevant HTS codes, ECCNs, and other legal/export-compliance import/export data.
Need help?
Do you have a question about the cRIO-9101 and is the answer not in the manual?
Questions and answers