Agora Models FDNY FIRE TRUCK TOWER LADDER 9 Build Instructions
Hide thumbs
Also See for FDNY FIRE TRUCK TOWER LADDER 9:
- Build instructions (56 pages) ,
- Build instructions (34 pages)
Advertisement
Quick Links
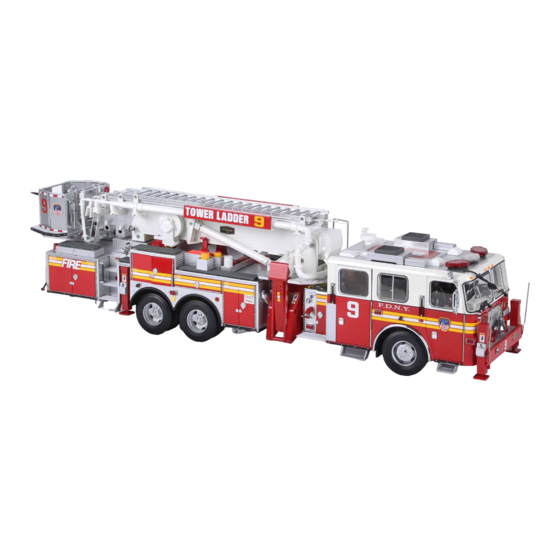
FIRE TRUCK
TOWER LADDER 9
Pack 05
B U I L D
I N S T R U C T I O N S
STAGE 31: ASSEMBLING A STORAGE
STAGE 35: ASSEMBLING THE BOX FRAME
COMPARTMENT
SHELL
STAGE 32: STORAGE COMPARTMENT FRAME
STAGE 36: ASSEMBLING A STORAGE
COMPARTMENT AND A REAR DOOR
STAGE 33: REAR RIGHT WHEEL
STAGE 37: ASSEMBLING A STORAGE
STAGE 34: FITTING THE WHEEL TO THE
COMPARTMENT
CHASSIS , AND ASSEMBLING AND FIT TING
THE FRONT BUMPER
Advertisement

Related Manuals for Agora Models FDNY FIRE TRUCK TOWER LADDER 9


Summary of Contents for Agora Models FDNY FIRE TRUCK TOWER LADDER 9
- Page 1 FIRE TRUCK TOWER LADDER 9 Pack 05 B U I L D I N S T R U C T I O N S STAGE 31: ASSEMBLING A STORAGE STAGE 35: ASSEMBLING THE BOX FRAME COMPARTMENT SHELL STAGE 32: STORAGE COMPARTMENT FRAME STAGE 36: ASSEMBLING A STORAGE COMPARTMENT AND A REAR DOOR STAGE 33: REAR RIGHT WHEEL...
- Page 2 Advice from the experts Please keep ALL unused screws as they will be required in a later stage. Please make sure you don’t mix up the screws. They look quite similar, but the threads do vary slightly. Using the wrong screws may damage the parts. When securing parts together using multiple screws, fit each screw loosely to ensure all the parts are correctly aligned before gently tightening them firmly, but not overtight, in the order in which you placed them.
- Page 3 Stage 31: Assembling a Storage Compartment In Pack 5, you’ll assemble a few storage compartments that will be used for storing some of the essential tools used by FDNY fire fighters. The first compartment includes the ON/OFF switch for operating all the electronics. S T A G E 3 1 P A R T S L I S T Name Compartment inner...
- Page 4 Stage 31: Assembling a Storage Compartment A T T A C H I N G T H E S W I T C H T O T H E S T O R A G E Align the switch at the rear of the storage compartment so C O M P A R T M E N T that the ON/OFF positions correspond.
- Page 5 Stage 31: Assembling a Storage Compartment A S S E M B L I N G T H E S T O R A G E C O M P A R T M E N T Apply a little glue to the flat surfaces before squeezing Take the left-hand door front and the left-hand door back the two parts together so that the lugs firmly fit the noting the square recess for the magnet on both pieces that...
- Page 6 Stage 31: Assembling a Storage Compartment Apply a drop of glue and fit the door handle to the recess on Push the handle firmly into place. the front of the left-hand door. This is a D-shaped fitting. Align the three holes on the door hinge with the three lugs Press firmly into place, checking that the door closes in the on the side of the compartment.
- Page 7 Stage 31: Assembling a Storage Compartment Fix the right-hand door to the compartment in a similar way, Press firmly until the glue has adhered, checking that the applying a little glue around the lugs. door closes in the correct position. Take the magnet and the shelf top.
- Page 8 Stage 31: Assembling a Storage Compartment Using a little glue, take the shelf bottom and push it into the The shelf should now look like this. shelf top until the parts fit snugly together. Take the fire extinguisher from stage 10 and push its The fire extinguisher is fitted next to the switch.
- Page 9 Stage 31: Assembling a Storage Compartment There are grooves on both sides of the shelf that fit over When correctly fitted, the shelf should look like this. two channels in the compartment. Hold the shelf with the tool-holes facing up, then push the shelf-grooves over the channels to fit.
- Page 10 Stage 31: Assembling a Storage Compartment S T A G E C O M P L E T E AGORAMODELS FDNY FIRE TRUCK...
- Page 11 Stage 32: Storage Compartment Frame There is no assembly in this stage. Unpack the parts and move straight to stage 33 to continue with your build. S T A G E 3 2 P A R T S L I S T Name Storage compartment frame Type D screws x6...
- Page 12 Stage 33: Rear Right Wheel Next you’ll fit more tires to their wheel hubs. Prepare a hot-water bath to soften the tires before fitting, just as you did in earlier stages. S T A G E 3 3 P A R T S L I S T Name Tire Tire...
- Page 13 Stage 33: Rear Right Wheel After soaking the tire in hot water for a minute, push the Push the outer wheel into the remaining tire (after soaking) inner wheel into the tire so that the tire rim tucks snugly and tuck the tire rim into the groove around the wheel. around the groove on the wheel.
- Page 14 Stage 33: Rear Right Wheel Also check that both wheels fit evenly all the way round. S T A G E C O M P L E T E AGORAMODELS FDNY FIRE TRUCK...
- Page 15 Stage 34: Fitting the Wheel to the Chassis, and Assembling and Fitting the Front Bumper Now you can fix the wheel to the chassis before moving focus to the front of the fire truck, completing assembly of the front bumper and fixing it to the cab.
- Page 16 Stage 34: Fitting the Wheel to the Chassis, and Assembling and Fitting the Front Bumper Type L x1 FITTING THE WHEEL Push the wheel onto the axle and fix it in place with a TYPE L Take the assembled wheel from stage 33 and align the inner screw.
- Page 17 Stage 34: Fitting the Wheel to the Chassis, and Assembling and Fitting the Front Bumper Type J x1 FITTING THE LEFT STABILIZER TO THE FRONT BUMPER Secure the stabilizer in place using a TYPE J screw that came Take the front bumper assembly and align the fixing tab on with stage 12.
- Page 18 Stage 34: Fitting the Wheel to the Chassis, and Assembling and Fitting the Front Bumper Type J x2 Secure the bumper in place using 2 x Type J screws that The front bumper is now securely attached to the cab. The came with this stage.
- Page 19 Stage 35: Assembling the Box Frame Shell In this next stage, you’ll start to assemble the box frame that forms the central core towards the rear of the truck. S T A G E 3 5 P A R T S L I S T Name Box Frame Shell Box Frame Reinforcement...
- Page 20 Stage 35: Assembling the Box Frame Shell Type B x3 Place the box frame reinforcement inside the box frame shell Holding the frame reinforcement in place, turn the frame as shown. The flat edge rests along the frame and the zig-zag shell over and drive three Type B screws through the frame to edge projects up.
- Page 21 Stage 35: Assembling the Box Frame Shell S T A G E C O M P L E T E AGORAMODELS FDNY FIRE TRUCK...
- Page 22 Stage 36: Assembling a Storage Compartment and a Rear Door You’ll continue to assemble another storage compartment that will eventually be fixed to the storage compartment frame from stage 33, and fix a door to the box frame. S T A G E 3 6 P A R T S L I S T Name Compartment inner Left-hand rear door front...
- Page 23 Stage 36: Assembling a storage compartment and a Rear Door Take the compartment door front and back parts, checking Apply glue, then push the parts firmly together until all four that the square recesses for the magnets are aligned. sides sit flush. Align the hinge of the compartment door assembly with the Glue the hinge over the lugs as shown, checking that the compartment inner, applying a little glue between the four...
- Page 24 Stage 36: Assembling a storage compartment and a Rear Door The door for this compartment pulls down, so check you have Apply a drop of glue before firmly pushing the handle into it in the correct orientation, then prepare to fit the handle. the fitting.
- Page 25 Stage 36: Assembling a storage compartment and a Rear Door Turn the door the right way up and fix the handle in place in The door hinge fits inbetween the box frame and the box the D-shaped hole. Prepare to fix the door to the box frame frame shell.
- Page 26 Stage 36: Assembling a storage compartment and a Rear Door TYPE D x2 Once in position, check that the door closes correctly. With the door in the closed position, secure it in place using 2 x TYPE D screws, driving them in from the outside of the frame.
- Page 27 Stage 37: Assembling a Storage Compartment Now you’re an expert in storage compartment assembly – its time to build another one! S T A G E 3 7 P A R T S L I S T Name Compartment inner Left-hand door front Right-hand door front Left-hand door back...
- Page 28 Stage 37: Assembling a Storage Compartment Assemble the right-hand door in the same way as previous Apply glue before pressing the front and back firmly doors. Align the front and back parts, ensuring the magnet together. recesses are lined up correctly. Do the same for the left-hand door.
- Page 29 Stage 37: Assembling a Storage Compartment Take the compartment inner and note the different shapes Fit the hinge onto the mount, checking the door closes of the hinges correspond to the shaped hinge-mounts on the correctly. compartment. Apply a little glue to the hinge mount. Repeat to fix the left-hand door in place, applying a little Glue and fit the handle to the left-hand door.
- Page 30 Stage 37: Assembling a Storage Compartment The compartment doors are now assembled. To assemble the shelf, place the magnet in the channel at the front edge of the shelf top. See picture 11. This shows the magnet in place. Take the shelf bottom and line up the lugs with the fixing points in the shelf top.
- Page 31 Stage 37: Assembling a Storage Compartment Apply glue before pressing the bottom part firmly into the Slide the sides of the shelf over the channels in the top part. compartment. The two holes in the shelf should face upwards and will be used for storing a tool at a later stage. Check that the small lug on the back of the shelf is located within the hole at the back of the compartment.
- Page 32 Stage 37: Assembling a Storage Compartment S T A G E C O M P L E T E AGORAMODELS FDNY FIRE TRUCK...
Need help?
Do you have a question about the FDNY FIRE TRUCK TOWER LADDER 9 and is the answer not in the manual?
Questions and answers