
Related Manuals for Robin SlimLine


Summary of Contents for Robin SlimLine
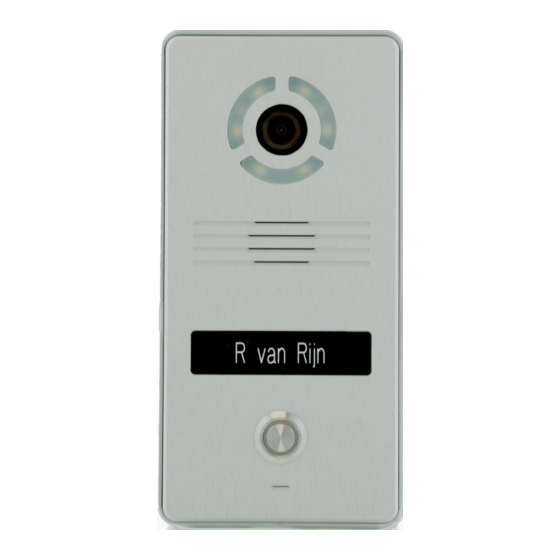
- Page 1 User Manual Robin SlimLine Robin SlimLine ‘for Teams’ Software version 1.0.0 or higher Manual version: 1.0.0 Date: 28-03-2022...
- Page 2 Manual Robin SlimLine ENG - v. 1.0.0...
- Page 3 Robin SlimLine SIP Robin SlimLine SIP for MS Teams The Robin SlimLine SIP for MS Teams is an optimized intercom for use with the CyberGate service of CyberTwice. If you have any questions after reading this manual, please contact us at: ...
-
Page 4: Table Of Contents
2.1.1 Robin SlimLine SP 2.2 Answering 2.3 Controlling the built-in door opener 3 Installation 3.1 Package contents of the Robin SlimLine Surface mount 3.2 Package contents of the Robin SlimLine Flush mount 3.3 Surface mounting instructions 3.4 Flush mounting instructions 4 System installation 4.1 Requirements prior to installation... - Page 5 Manual Robin SlimLine ENG - v. 1.0.0 5.2.5 System 5.2.5.1 System / Device 5.2.5.2 System / Clock 5.2.5.3 System / Events 5.2.5.4 System / Security 5.2.5.5 System / Schedules 5.2.5.6 System / Software 5.2.5.7 System / Streams 5.2.5.8 System / Switch 5.2.5.9 System / Info...
-
Page 6: Introduction
Simple operation The Robin can be programmed to dial a predefined phone extension when the button is pressed. Audio and video will be available during the call and the door opener relay of the Robin can be activated using DTMF. - Page 7 CyberGate, see the website: cybertwice.com Door opener The potential free relay switch (dry contact) embedded in the Robin is activated by typing in a key combination at the dialled device. The key combination can be specified in the WEB interface of the Robin.
- Page 8 PoE network switch or Midspan is all that is necessary. Web-based configuration The Robin can be configured on a PC or Mac via a web browser (e.g. Firefox, Chrome, Safari). Using a web browser, modification of all the settings for the Robin is easy.
-
Page 9: Operation
2.1 Operating the door phone To ring the door phone, press on the button on the Robin. The unit will play a ringing sound and the defined call destination will be called. It will also dim the button illumination when the button is pressed. -
Page 10: Installation
Manual Robin SlimLine ENG - v. 1.0.0 3 Installation There are two versions of the Robin SlimLine, one for surface mount installation and one for flush mount installation. For Surface mount installation, a surface mount box is nessecary (sold seperately), for a Flush mount installation, a flush mount box is nessecary (sold seperately). -
Page 11: Package Contents Of The Robin Slimline Flush Mount
Connector with cable-ends for connecting the build in relay 3.3 Surface mounting instructions Follow the step-by-step plan described below for problem-free mounting of the Robin. Step-by-step plan: 1. Mount a square built-in box in the wall (not supplied). Note: match the screws with the holes of the rear cover to see if the square built-in box is compatible. -
Page 12: Flush Mounting Instructions
Follow the step-by-step plan described below for problem-free mounting of the Robin. Step-by-step plan: 1. Mount the Robin built-in box in the wall. Note: Create a drain hole in the wall (see drawing). 2. Feed the cables (Ethernet and (optional door lock) wires) through the built-in box. -
Page 13: System Installation
We assume here that the network supports DHCP; if so, all settings such as the IP addresses, netmask, gateway and DNS are automatically populated. DHCP is a default setting of the Robin. If the network does not offer DHCP , the network details must be set manually. - Page 14 Robin you would like to configure; the web interface for the selected Robin will show. Mac / Linux users: Enter the IP address of the Robin in the address bar of the web browser that is installed on your PC in order to access the web interface.
-
Page 15: Configuration
The User can only watch live video and optionally control the door opener. A User can’t modify settings of the Robin. The login credentials can be changed in the web interface of the Robin. The default credentials are: Administrator - Login: admin, Password: 123qwe User - Login: user, Password: has to be be set by an Administrator... -
Page 16: Configuration Of The Robin
In the ‘System’ section, view and change the settings that influence standard operation of the Robin. It also contains the log files section for problem diagnosing. ! Note: In the Robin software you’ll note ’APPLY SETTINGS’ buttons. Use these buttons to confirm and activate all the modified settings. ! -
Page 17: Telephony
Enter the data required for registering on a SIP-PBX, a VoIP provider or MS Teams. ! Note: If the Robin is used for a direct connection (Peer2Peer / P2P) to the telephone handset (without using an SIP-PBX or VoIP provider), registration is not required. ! - Page 18 Manual Robin SlimLine ENG - v. 1.0.0 SIP registration Enable Teams mode Activate the Microsoft Teams mode. The necessary audio and video settings for Microsoft Teams and the CyberGate service are set automatically SIP protocol Select the SIP protocol, UDP or TCP , UDP is default SIP proxy / registar...
- Page 19 Manual Robin SlimLine ENG - v. 1.0.0 SIP advanced: Outbound proxy Select this option when a SIP proxy server is used Outbound proxy host Enter the IP address or hostname of the proxy server Outbound proxy port Enter the IP port of the proxy server DNSsrv...
-
Page 20: Telephony / Teams (Robin 'For Teams')
5.2.1.2 Telephony / Teams (Robin ‘for Teams’) The Robin ‘for Teams’ versions feature a -Telephony-Teams- menu. In this menu you can configure the Robin with your CyberGate subscription details found in the admin portal of the CyberGate. Access the CyberGate admin portal here: https://admin.cybergate.cybertwice.com... - Page 21 Manual Robin SlimLine ENG - v. 1.0.0 Teams settings SIP protocol Select the SIP protocol, UDP or TCP , UDP is default Enter the username as provided to you in the Cyber- Username Gate admin portal Enter the password as provided to you in the Cyber- Password...
-
Page 22: Telephony / Phonebook
The value entered for the telephone number (see Number comment) If required, you can select a 'Profile' for this number Profile Allow register Select this option only if the Robin has to support a ‘Peer to Peer’ connection with a telephone set*... - Page 23 2. The number, followed by the IP address of the handset that is to be dialled (e.g. 1000@10.0.0.53, 102@192.168.1.21 etc.). The handset and the Robin are connected to each other directly, i.e. the call is not routed via a SIP-PBX or VoIP provider. The Robin dials the handset directly.
- Page 24 Manual Robin SlimLine ENG - v. 1.0.0 The name that is associated with this profile Description Codec ulaw Support for the G.711 ulaw audio codec Codec alaw Support for the G.711 alaw audio codec DTMF event payload Change the 'payload type' for DTMF signal transmis- type sion.
-
Page 25: Telephony / Call Settings
5.2.1.4 Telephony / Call settings Call priority: The Robin can dial up to three numbers in a set sequence. If the first number is engaged or not answering* it will continue wit the second number. If the second number is engaged or not answering it will continue wit the third number. - Page 26 Schedules-. This function allows you to set multiple timeslots: e.g. office hours, lunch break, etc. Consequently, during the lunch break the Robin can be set to dial a different telephone number from that configured for normal working hours. The timeslots are not prioritised so they must be set consecutively, e.g.: 8:30-12:29 morning ->...
- Page 27 Maximum duration of a call (0=no limit) Call status Displays the status of the phone functionality of the Robin Switch LED on during Enables the LED lights on the Robin during calls to calls improve the video quality in low-light environments...
-
Page 28: Telephony / Call Log
5.2.1.5 Telephony / Call log The call log presents an overview of all the call events to and from the Robin. You can delete the complete log file using the red X alongside the ‘Delete all rows’ label. You can delete individual log lines by clicking the red X behind the log line in question. -
Page 29: Audio
Manual Robin SlimLine ENG - v. 1.0.0 5.2.2 Audio 5.2.2.1 Audio / Settings In this menu you can control all audio related settings such as speaker volume and microphone sensitivity. Settings: Speaker volume Change the speaker volume Microphone sensitivity Change the microphone sensitivity Tone volume... -
Page 30: Audio / Detection
These actions can be defined in the menu -System-Events-. Depending on the location of the Robin and the type of sound that should trigger the detection, two parameters can be set: the volume and the duration. -
Page 31: Video
Manual Robin SlimLine ENG - v. 1.0.0 5.2.3 Video 5.2.3.1 Video / Live Shows real time video captured by the camera. The three buttons below the video frame functions as controls for the built-in relays switch. They are used for: Switching off (Close) -
Page 32: Video / Settings
Manual Robin SlimLine ENG - v. 1.0.0 5.2.3.2 Video / Settings You can change the camera related settings here. Resolution: set the resolution of the camera Bitrate - set the bitrate of the H.264 stream... -
Page 33: Video / Overlay
Show date and time Display the date and time Show device name Display the device name (as set in -System-Device-) Show device location Display the location of the Robin (set in location in -System-Device-) Additional overlay text Display additional text... -
Page 34: Video / Motion
! Note: To make tuning the Motion settings easier, no ‘Events’ that may have been set will be activated when the -Video-Motion- window for the Robin is open. When you close the -Video- Motion- window, detection is enabled again. ! -
Page 35: Network
Manual Robin SlimLine ENG - v. 1.0.0 5.2.4 Network 5.2.4.1 Network / Status Network status shows the current network information. Network status: Shows the network interface that is used Interface MAC address Shows the Ethernet MAC address IP address Shows the IP address IP netmask... -
Page 36: Network / Settings
Manual Robin SlimLine ENG - v. 1.0.0 5.2.4.2 Network / Settings Allows you to change the network settings of the intercom. Configuration: Configuration method Select automatic (DHCP) or manual. IP address Enter the IP address Enter the IP netmask Netmask... -
Page 37: Network / Http
Manual Robin SlimLine ENG - v. 1.0.0 5.2.4.3 Network / HTTP Settings: HTTP port Set the IP port for HTTP communication (default value is 80) Enable HTTPS server Enable web access over HTTPS HTTPS port Set the IP port for HTTPS communication (default... -
Page 38: Network / Mail
Manual Robin SlimLine ENG - v. 1.0.0 5.2.4.4 Network / Mail Configure the e-mail settings for the Robin. Server settings: The green ‘+’ creates a new line. The ‘>>’ behind a line opens the details for this line. The red X behind a line deletes the line from the list. -
Page 39: Network / Nat
Manual Robin SlimLine ENG - v. 1.0.0 Mail server test: Tests the connection with the configured e-mail server. Enter a recipient address for the test e-mail message To Test SMTP server Initiates the test e-mail message SMTP test result Shows the test result 5.2.4.5 Network / NAT... - Page 40 Manual Robin SlimLine ENG - v. 1.0.0 Use STUN for NAT address discovery Stun server The STUN server that will be used to retrieve the WAN IP-address (default STUN server: stun.xten. com) Stun port The connection port of the STUN server (default: 3478) Stun status...
-
Page 41: Network / Rtsp
Manual Robin SlimLine ENG - v. 1.0.0 5.2.4.6 Network / RTSP The Robin can stream the video and audio through RTSP . Most video management software (VMS) solutions use the RTSP standard. The Robin uses H.264 for video and G.711 uLaw for audio. - Page 42 Manual Robin SlimLine ENG - v. 1.0.0 Settings: Enable RTSP server Enable RTSP support RTSP port Change the RTSP port (default 554) Require authentication Use RTSP authentication RTSP username Username RTSP password (needs to be defined) Password Allow Multicast Enable Multicast* Multicast address...
-
Page 43: System
The name entered here is passed to the SIP proto- col. This means that the name is visible, for example when a telephone has a caller ID display You can enter the location of the Robin here, e.g. the Location main entrance, loading door, barrier, etc. -
Page 44: System / Clock
Enter the date and time here (manual setting) ! Note: The Robin does not feature a build-in backup battery. Every time the Robin reboots both the date and time need to be set. By default it will use an NTP server to set the date and time. In case of a ‘manual’... -
Page 45: System / Events
Event actions can be set to be time bound using the ‘Schedule’ mechanism of the Robin. That way an action can only start within a time slot, eg. lunch or after work hours. Definition of the schedules can be done in the menu -System-Schedules-. - Page 46 Manual Robin SlimLine ENG - v. 1.0.0 The green ‘+’ creates a new ‘Event’ . The ‘>>’ behind a line opens the details for this ‘Event’. The red X behind a line deletes the ‘Event’ from the list. The name that is associated with this event source Name...
- Page 47 Picture2email - Send an e-mail containing a photo of the person using the intercom to a predefined e-mail address Switch1 - Switch the internal relay switch in the Robin Webrelay - Switch a relay switch on an external relay unit from ContolByWeb; WEBRelay...
- Page 48 (rising / falling / both) Action type Selects the type of Action. Schedule Select a defined schedule * : For more information about the Robin / WEBRelay, see Tech-Note: “How-To_Robin_and_ WEBRelay” PDF on the support website: support.robintele.com !
-
Page 49: System / Security
(menu -Video-Live-) to control the built-in relay switch Allow HTTP access only Increases the security of the Robin. Access to the from LAN WEB interface is only allowed from the same network as the Robin. ! Note: Disabling this feature is not recommended. ! - Page 50 Upload a certificate to the Robin Certificate Certificate info Shows detailed information about the certificate Access control: The Robin can be controlled via an API. Leave this setting disabled when the API is not used. Enable API interface Enable access through the API interface...
-
Page 51: System / Schedules
Manual Robin SlimLine ENG - v. 1.0.0 5.2.5.5 System / Schedules The Robin has multiple functions that can be made time bound. Use this schedule menu to create timeslots: e.g. office hours, lunch break, etc. Consequently, during the lunch break for example, the Robin can be set to dial a different telephone number from that configured for normal working hours. -
Page 52: System / Software
After restoring the backup, the Robin must be rebooted Firmware_download: You can host the firmware files on your own webserver. The Robin can download it from this server. Define the URL where the firmware file resides URL Shows the upgrade status Status... -
Page 53: System / Streams
Manual Robin SlimLine ENG - v. 1.0.0 Firmware_upload: Select the firmware file from your local PC. Choose file Select the firmware file Update firmware Start the firmware update Tools: Reboot device Reboots the complete device. It may take 30 seconds before the Robin is active again Restore application... -
Page 54: System / Switch
Manual Robin SlimLine ENG - v. 1.0.0 5.2.5.8 System / Switch The Robin has a built-in voltage free relay contact. It can be used to open a door or a gate. When a connection has been established between the Robin and a telephone handset, the relay switch can be operated via key combinations on the telephone. - Page 55 Manual Robin SlimLine ENG - v. 1.0.0 For the actions: to open, to keep open and to close the keys 0..9, * and # can be used --------------------------------- ------------------------------------------------------------------- To open The relay switch opens and closes again after a set time (Pulse time).
-
Page 56: System / Info
Manual Robin SlimLine ENG - v. 1.0.0 5.2.5.9 System / Info The Info menu displays detailed information about the Robin. Advanced: Shows the product type Product Shows the device ID Device Serial number Shows the serial number Shows the software version Version... -
Page 57: System / Debug
The Robin features a built-in ‘Debug’ function. This allows you to create a network trace (pcap-file) of all the network traffic to and from the Robin. This tool allows for a fast and effective resolution of problems with the Robin. -
Page 58: System / Logs
Download the log file to the PC Download Application log: Time stamp for the log entry Timestamp Log level The log entry classification The software component in the Robin that led to genera- Class tion of the entry The actual log message Message... -
Page 59: Support
Manual Robin SlimLine ENG - v. 1.0.0 6 Support For details of special settings, requests for support and FAQs, please use our ‘online’ support page: support.robintele.com... -
Page 60: Appendix A, Electronic Lock
Manual Robin SlimLine ENG - v. 1.0.0 Appendix A, Electronic lock The Robin has a built-in voltage-free relay contact. The Robin is not able to power a electronic lock, a power supply is required. There are many different electronic locks on the market. We advise to use the prescribed method of the electronic lock manufacturer to connect the Robin. - Page 61 Manual Robin SlimLine ENG - v. 1.0.0 Document History Document Version Date Author Change 1.0.0 25-03-2022 KR Initial version 1.0.0 28-03-2022 KR Fixed typos...
Need help?
Do you have a question about the SlimLine and is the answer not in the manual?
Questions and answers