Sign In
Upload
Download
Table of Contents
Contents
Add to my manuals
Delete from my manuals
Share
URL of this page:
HTML Link:
Bookmark this page
Add
Manual will be automatically added to "My Manuals"
Print this page
×
Bookmark added
×
Added to my manuals
Manuals
Brands
THORLABS Manuals
Measuring Instruments
VEGA Series
Operating manual
THORLABS Vega Series Operating Manual
Ss-oct base unit, swept source oct systems
Hide thumbs
Also See for Vega Series
:
User manual
(60 pages)
1
2
Table Of Contents
3
4
5
6
7
8
9
10
11
12
13
14
15
16
17
18
19
20
21
22
23
24
25
26
27
28
29
30
31
32
33
34
35
36
37
38
39
40
41
42
43
44
45
46
47
48
49
50
51
52
53
54
55
56
57
58
59
60
61
62
63
page
of
63
Go
/
63
Contents
Table of Contents
Troubleshooting
Bookmarks
Table of Contents
Table of Contents
Chapter 1 Introduction
Safety
Care and Maintenance
Optical Cleaning
Fiber Cleaning Using the FBC250
Service
Accessories and Customization
Chapter 2 Setup
Unpacking
System Connections
Base Unit Connections
Internal Electrical Connections
Electrical Interfaces to Imaging Scanner
Optical Interface to Imaging Scanner
System Installation
Chapter 3 Description
Tutorial
Theory
Thorlabs Swept-Source OCT System Technology
Nomenclature in OCT Imaging
SS-OCT Base Unit Components
Base Unit
PC with Graphical User Interface
Sdk
Imaging Scanner (Accessory)
OCT-Stand (Accessory)
Chapter 4 System Operation
Starting the System
Turning on the Base Unit
Starting the Software
Basic Adjustments
Adjusting the Focus
Adjusting the Reference Length
Adjusting Polarization
Adjusting the Reference Light Intensity and Amplification
Advanced Adjustments
Focus and Choice of Objective Lens
Imaging through Refractive Media
Reflecting Surfaces and Interfaces
Rough Surfaces
Shutting down the System
Example Images
Chapter 5 Imaging Artifacts
Saturation and Non-Linearity
Multiple Scattering
Phase Wrapping and Fringe Washout
Flipped Image
Shadowing
Image Distortion by Refractive Media
The Group Refraction Index
Measurement Depth in OCT Systems
Distortions in the Image
Chapter 6 Troubleshooting
Changing the Input Fuses
Chapter 7 Certifications and Compliance
Declaration of Conformity Vega™ Series Base Units
Declaration of Conformity Atria™ Series Base Units
Chapter 8 Warranty
Lasers and Imaging Systems
Non-Warranty Repairs
Warranty Exclusions
Chapter 9 Specifications
Chapter 10 Mechanical Drawings
Chapter 11 Regulatory
11.1. Waste Treatment Is Your Own Responsibility
11.2. Ecological Background
Chapter 12 Thorlabs OCT Support Contact
Chapter 13 Thorlabs Worldwide Contacts
Advertisement
Quick Links
Download this manual
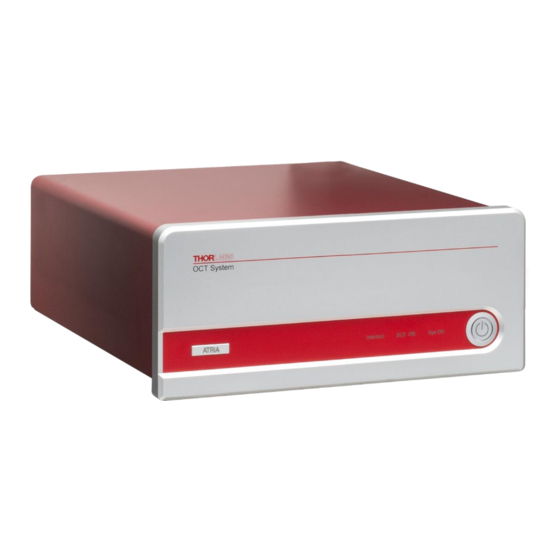
SS-OCT Base Unit
Swept Source OCT Systems:
Vega™ and Atria™ Series
Operating Manual
Table of
Contents
Previous
Page
Next
Page
1
2
3
4
5
Advertisement
Table of Contents
Need help?
Do you have a question about the Vega Series and is the answer not in the manual?
Ask a question
Questions and answers
Related Manuals for THORLABS Vega Series
Laboratory Equipment THORLABS VEG110 User Manual
Swept source oct base unit (60 pages)
Measuring Instruments THORLABS VSD500 User Manual
Visual scratch & defect detection system (34 pages)
Measuring Instruments THORLABS PAX1000 Operation Manual
Compact polarimeter (96 pages)
Measuring Instruments THORLABS K10CR1 User Manual
Motorized cage rotator (49 pages)
Measuring Instruments THORLABS ERM100 Operation Manual
Extinction ratio meter (59 pages)
Measuring Instruments THORLABS PM100D Operation Manuals
Optical power and energy meter (99 pages)
Measuring Instruments THORLABS BP209-VIS Operating Manual
(167 pages)
Measuring Instruments THORLABS PM5020 User Manual
Dual-channel optical power and energy meter (65 pages)
Measuring Instruments THORLABS Telesto Series User Manual
Spectral-domain oct system base units (80 pages)
Measuring Instruments THORLABS TLX1 User Manual
Tunable laser source c-band / l-band (27 pages)
Measuring Instruments THORLABS Redstone OSA305 User Manual
Optical spectrum analyzer (86 pages)
Measuring Instruments THORLABS PM200 Operation Manual
Optical power and energy (74 pages)
Measuring Instruments THORLABS LDC400 User Manual
Automated cleavers for fibers with 80 mm to 1.25 mm claddings (50 pages)
Measuring Instruments THORLABS PM30-120 Operation Manual
Optical power meter system (35 pages)
Measuring Instruments THORLABS PM320E Operation Manual
Optical power and energy meter (70 pages)
Measuring Instruments THORLABS upLED Operation Manual
Usb led driver (26 pages)
This manual is also suitable for:
Atria series
Table of Contents
Print
Rename the bookmark
Delete bookmark?
Delete from my manuals?
Login
Sign In
OR
Sign in with Facebook
Sign in with Google
Upload manual
Upload from disk
Upload from URL


Need help?
Do you have a question about the Vega Series and is the answer not in the manual?
Questions and answers