Sharp Notevision PG-C20XE Operation Manual
Hide thumbs
Also See for Notevision PG-C20XE:
- Operation manual (55 pages) ,
- Service manual (136 pages) ,
- Service manual (99 pages)
Table of Contents
Advertisement
Quick Links
Advertisement
Table of Contents
Troubleshooting

Related Manuals for Sharp Notevision PG-C20XE


Summary of Contents for Sharp Notevision PG-C20XE
- Page 1 OPERATION MANUAL MODEL PG - C20XU LCD PROJECTOR...
- Page 2 2. CONSUMER PRODUCT SAFETY ACT To ensure that you will promptly receive any safety notification of inspection, modification, or recall that SHARP may be required to give under the 1972 Consumer Product Safety Act, PLEASE READ CAREFULLY THE IMPORTANT “LIMITED WARRANTY” CLAUSE.
- Page 3 AVANT DE PROCEDER AU REMPLACEMENT DE LA LAMPE. UNIT TYPE BQC-PGC20X // 1 ONLY. UV RADIATION : CAN CAUSE NE REMPLACER QUE PAR UNE LAMPE SHARP DE TYPE BQC- PGC20X //1. EYE DAMAGE. TURN OFF LAMP BEFORE SERVICING. RAYONS ULTRAVIOLETS : PEUVENT ENDOMMAGER LES YEUX.
-
Page 4: Important Safeguards
IMPORTANT SAFEGUARDS Electrical energy can perform many useful functions. This product has been engineered and manufactured to ensure your personal safety. However IMPROPER USE CAN RESULT IN POTENTIAL ELECTRICAL SHOCK OR FIRE HAZARD. In order not to defeat the safeguards incorporated into this LCD Projector, observe the following basic rules for its installation, use and servicing. -
Page 5: Outstanding Features
Outstanding Features 1. ADVANCED COMPATIBILITY WITH HIGH-END WORKSTATIONS AND PCS Compatible with up to 85 Hz vertical refresh rate, Sync on Green and Composite Sync signals for use with a wide variety of high-end PCs and Workstations. (Page 12) 2. 3D Y/C CIRCUITRY Provides high quality images with minimal dot crawl and cross color noise. -
Page 6: Table Of Contents
How to Access the PDF Operation Manuals Checking the Input Signal (for Windows and Macintosh) ……………… and the Lamp Usage Time …………………… 34 For SHARP Assistance (U.S.A. only) ………… Automatic Power Shutoff Function …………… 34 Part Names ………………………………………… Selecting a Background Image ………………… 35 Power Save Mode Function ……………………... -
Page 7: Usage Guidelines
Usage Guidelines Caution Concerning the Lamp Unit Potential hazard of glass particles if lamp ruptures. Please have Authorized Sharp Industrial LCD Products Dealer or Service Center replace lamp if rupture occurs. See “Replacing the Projection Lamp” on pages 40 and 41. -
Page 8: (For Windows And Macintosh)
If you encounter any problems during setup or operation of this projector, first refer to the “Troubleshooting” section on page 42. If this operation manual does not answer your question, please call toll free 1-888-GO-SHARP (1-888-467-4277) for further assistance. Or, send us an e-mail at lcdsupport@sharpsec.com . -
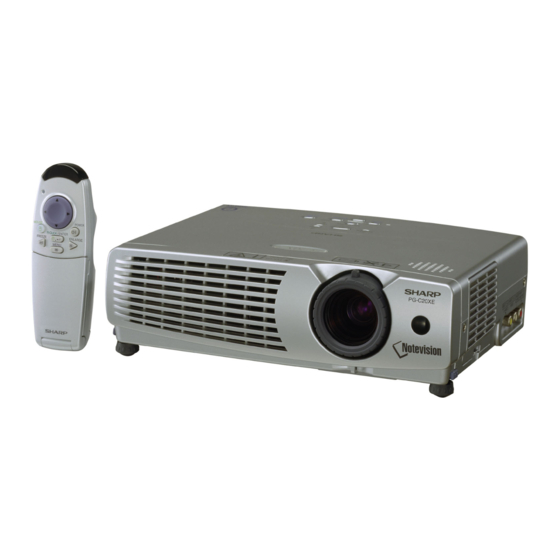
Page 9: Part Names
Part Names Numbers next to the part names refer to the main pages in this manual where the topic is explained. Projector Front and Top View LAMP REPLACEMENT ON/OFF button indicator ON/OFF LAMP TEMPERATURE WARNING POWER POWER indicator indicator TEMP. KEYSTONE INPUT/BACK button AUTO SYNC/ENTER button... - Page 10 Part Names Remote Control Front View Rear View Mouse (∂/ƒ)/ Mouse (©) button Adjustment (∂/ƒ) buttons LEFT-CLICK/ Mouse (ß) button POWER button BACK button RIGHT-CLICK/ MOUSE button ENTER button FREEZE button ENLARGE button MENU button AUTO SYNC button INPUT button AV MUTE button KEYSTONE buttons RESIZE button...
-
Page 11: Setup & Connections
Setup & Connections E-10... -
Page 12: Supplied Accessories
Supplied Accessories Remote control RRMCG1613CESA Power cord Two AAA size batteries CACCU5013DE01 Computer RGB cable Computer audio cable DIN-D-sub RS-232C cable QCNW-4870CEZZ QCNWG0002CEZZ QCNW-5288CEZZ Remote mouse receiver PS/2 mouse control cable USB mouse control cable RUNTK0694CEZZ QCNW-5680CEZZ QCNW-5113CEZZ Extra air filter Lens cap Lens cap strap PFILD0123CEZZ... -
Page 13: Connecting The Projector
• A Macintosh adaptor may be required for use with some Macintosh computers. Contact your nearest Authorized Sharp Industrial LCD Products Dealer or Service Center. E-12... - Page 14 Connecting the Projector Connecting other compatible computers When connecting the projector to a compatible computer other than an IBM-PC (VGA/SVGA/XGA/SXGA) or Macintosh (i.e. Workstation), a separate cable may be needed. Please contact your dealer for more information. • Connecting computers other than the recommended types may result in damage to the projector, the computer, or both. “Plug and Play”...
- Page 15 Connecting the Projector Connecting a video source (DTV decoder or DVD player) using the 15-pin input 1 Connect one end of the HD-15/RCA cable or the HD- 15-RGB cable to the COMPUTER INPUT 1 port on the projector. 2 Connect the other end to the corresponding terminals on the video source.
- Page 16 • The wireless mouse or RS-232C function may not operate if your computer port is not correctly set up. Please refer to the operation manual of the computer for details on setting up/installing the correct mouse driver. • A Macintosh adaptor may be required for use with some Macintosh computers. Contact your nearest Authorized Sharp Industrial LCD Products Dealer or Service Center.
-
Page 17: Operation
Operation Basic Operations 1 Make the necessary connections before pro- ceeding. Connect the power cord to a wall outlet. Maintenance indicators The POWER indicator illuminates red and the projector enters standby mode. ON/OFF LAMP POWER • If the side filter cover is not securely installed, the POWER indicator flashes. - Page 18 Basic Operations 3 Slide the ZOOM knob. The image can be adjusted to the desired size within the zoom range. 4 Rotate the FOCUS ring until the image on the screen becomes clear. 5 Press INPUT to select the desired input mode. Projector Remote control Press INPUT again to change the mode.
-
Page 19: Setting Up The Screen
Setting up the Screen Position the projector perpendicular to the screen with all feet flat and level to achieve an optimal image. Move the projector forward or backward if the edges of the image are distorted. • The projector lens should be centered in the middle of the screen. If the lens center is not perpendicular to the screen, the image will be distorted, making viewing difficult. - Page 20 • When using a mirror, be sure to carefully position both the projector and the mirror so the light does not shine into the eyes of the audience. Ceiling-mount Setup • It is recommended that you use the optional Sharp ceiling-mount bracket for this installation. • Before mounting the projector, contact your nearest Authorized Sharp Industrial LCD Products Dealer or Service Center to obtain the recommended ceiling-mount bracket (sold separately).
- Page 21 Setting up the Screen Digital Keystone Correction • When the image is distorted due to the projection angle, the digital keystone correction function allows you to correct it. • The digital keystone correction can be made by pressing KEYSTONE, or by setting “Keystone” correction in the GUI menu.
-
Page 22: Operating The Wireless Mouse From The Remote Control
Operating the Wireless Mouse from the Remote Control You can use the remote control as a remote mouse. Connecting the Remote Mouse Receiver Connecting to the USB port on a PC or Macintosh 1 Connect one end of the supplied USB mouse control cable to the corresponding terminal on the computer. 2 Connect the other end to the USB port on the remote mouse receiver. - Page 23 Operating the Wireless Mouse from the Remote Control Remote Control/Mouse Receiver Positioning • The remote control can be used to control the projector within the ranges shown below. • The remote mouse receiver can be used with the remote control to control the mouse functions of a connected computer within the ranges shown below.
-
Page 24: Using The Gui (Graphical User Interface) Menu Screens
Using the (Graphical User Interface) Menu Screens This projector has three sets of menu screens (INPUT 1 (RGB), INPUT 1 (COMPONENT) and INPUT 2 (S-VIDEO) or 3 (VIDEO)) that allow you to adjust the image and various projector settings. These menu screens can be operated from the projector or the remote control with the following buttons. - Page 25 Picture1 Contrast Contrast Bright Bright Blue Blue Reset Reset Fine Sync Clock Picture2 Color Phase Tint Sharp H-Pos V-Pos Reset Reset Options Signal Info Lamp Timer Options Signal Info Keystone Lamp Timer Keystone Auto Power Off Blue Auto Power Off...
- Page 26 Items on the INPUT 2 (S-VIDEO) or INPUT 3 (VIDEO) Mode Menu Bar Main menu Sub menu Picture1 Contrast Bright Blue Reset Picture2 Color Tint Sharp Reset Options Signal Info Lamp Timer Keystone Auto Power Off Background Power Save Mode Blue Language English...
-
Page 27: Selecting The On-Screen Display Language
Selecting the On-screen Display Language Projector Remote control English is the preset language for the On-screen Display. The language can be set to English, German, Spanish, Dutch, French, Italian, Swedish, Portuguese, ON/OFF LAMP POWER Chinese, Korean or Japanese. 2, 3 TEMP. -
Page 28: Picture Adjustments
Sharp For less sharpness For more sharpness • “Color”, “Tint” and “Sharp” do not appear in the INPUT 1 (RGB) mode. • “Tint” does not appear when receiving “PAL”, “SECAM”, “PAL M”, “PAL N” or “PAL (60 Hz)” in the S-VIDEO or VIDEO mode. -
Page 29: Computer Image Adjustments (Input 1 Mode Only)
Computer Image Adjustments (INPUT 1 mode only) Projector Remote control Auto Sync Adjustment • Used to automatically adjust a computer image. • Auto Sync adjustment can be made manually by ON/OFF LAMP POWER pressing AUTO SYNC. TEMP. KEYSTONE INPUT AUTO SYNC •... -
Page 30: Adjusting The Computer Image
Computer Image Adjustments (INPUT 1 mode only) Projector Remote control Adjusting the Computer Image When displaying computer patterns which are very detailed (tiling, vertical stripes, etc.), interference may ON/OFF LAMP POWER occur between the LCD pixels, causing flickering, 2, 3, 4 TEMP. -
Page 31: Useful Features
Useful Features Freeze Function Remote control This function allows you to instantly freeze a moving image. This is useful when you want to display a still image from a computer or video, giving you more time to explain the image to the audience. You can also use this function to display a still image from a computer while you make preparations for the next computer images to be presented. -
Page 32: Digital Image Magnification
Digital Image Magnification Remote control This function allows you to magnify a specific portion of an image. This is useful when you want to display a detailed portion of the image. 1 Press ENLARGE on the remote control. Each time ENLARGE is pressed, the image will be magnified. -
Page 33: Gamma Correction
Gamma Correction Remote control • Gamma is an image quality enhancement function that offers a richer image by brightening the darker portions of the image without altering the brightness of the brighter portions. • Three gamma settings are available to allow for differences in the images displayed and in the brightness of the room. -
Page 34: Selecting The Picture Display Mode
Selecting the Picture Display Mode Remote control This function allows you to modify or customize the picture display mode to enhance the input image. Depending on the input signal, you can choose the picture display mode preferred. 1 Press RESIZE on the remote control. Each time RESIZE is pressed, the picture mode changes as shown below. -
Page 35: Checking The Input Signal And The Lamp Usage Time
Checking the Input Signal and the Lamp Usage Time This function allows you to check the current input signal Projector Remote control information and the accumulated lamp usage time. ON/OFF LAMP POWER 1 Press MENU. TEMP. KEYSTONE 2 Press ∂/ƒ to select “Options”, and then press INPUT AUTO SYNC ENTER. -
Page 36: Selecting A Background Image
Selecting a Background Image Projector Remote control This function allows you to select the image displayed when no signal is being sent to the projector. ON/OFF LAMP POWER Description of Background Images 2, 3, 4 TEMP. KEYSTONE Blue Blue screen 2, 3 INPUT AUTO SYNC... -
Page 37: Reverse/Invert Image Function
Reverse/Invert Image Function Projector Remote control This projector is equipped with a reverse/invert image function which allows you to reverse or invert the pro- jected image for various applications. ON/OFF LAMP POWER 2, 3 Description of Projected Images TEMP. KEYSTONE 2, 3 Selected item Projected image... -
Page 38: Maintenance & Troubleshooting
Air filter location. • Have your nearest Authorized Sharp Industrial LCD Products Dealer or Service Center exchange the filter (PFILD0123CEZZ) when it is no longer possible to clean it. - Page 39 Air Filter Maintenance Clean the air filter. Replace the filter cover. Clean the dust off the air filter and cover with a Insert the tab on the end of the filter cover into the vacuum cleaner extension hose. filter cover opening and press the filter cover into position.
-
Page 40: Lamp/Maintenance Indicators
(See pages 37 and 38.) • Cooling fan breakdown. • Take the projector to your nearest Authorized • Internal circuit failure. Sharp Industrial LCD Products Dealer or Service Center for repair. The indicator flashes in • Cooling down. • Wait until the indicator stops flashing and red. -
Page 41: Replacing The Projection Lamp
Carefully change the lamp by following the steps below. If the new lamp does not light after replacement, take your projector to the nearest Authorized Sharp Industrial LCD Products Dealer or Service Center for repair. Purchase a replacement lamp unit (lamp/cage module) of the current type BQC-PGC20X//1 from your nearest Authorized Sharp Industrial LCD Products Dealer or Service Center. - Page 42 Replacing the Projection Lamp Remove the lamp cage cover. Remove the lamp cage. Turn over the projector and loosen the user service Loosen the securing screws on the lamp cage. screw that secures the lamp cage cover. Then lift Hold the lamp cage by the handle and pull it open the cover in the direction of the arrow.
-
Page 43: Using The Kensington Lock
Using the Kensington Lock This projector has a Kensington Security Standard connector for use with a Kensington MicroSaver Security System. Refer to the information that came with the system for instructions on how to use it to secure the Kensington Security projector. -
Page 44: Appendix
Appendix Attaching the Lens Cap Put on the lens cap to prevent damage to the lens when transporting the projector. A lens cap strap is provided to prevent the loss of the lens cap. Attach the lens cap Attach the lens cap Attach the lens cap to strap to the lens cap. -
Page 45: Connection Pin Assignments
Connection Pin Assignments COMPUTER INPUT 1 Port: 15-pin mini D-sub female connector Computer Input Analog 1. Video input (red) 9. Not connected 2. Video input 10. Not connected (green/sync on green) 11. GND 3. Video input (blue) 12. Bi-directional data 4. -
Page 46: Rs-232C Port Specifications
RS-232C Port Specifications PC control A computer can be used to control the projector by connecting an RS-232C cable (null modem, cross type, sold separately) to the projector. (See page 15 for connection.) Communication conditions Set the serial port settings of the computer to match that of the table. Signal format: Conforms to RS-232C standard. - Page 47 RS-232C Port Specifications Commands EXAMPLE • When “BRIGHT” of INPUT 1 (RGB) IMAGE ADJUSTMENT is set to Computer Projector → ← COMMAND PARAMETER COMMAND PARAMETER CONTROL CONTROL CONTROL ITEM CONTROL ITEM CONTENTS CONTENTS C2 C3 C4 P1 P2 P3 P4 C1 C2 C3 C4 P1 P2 P3 P4 640 480 AUTO...
-
Page 48: Computer Compatibility Chart
Computer Compatibility Chart Horizontal Frequency: 15–80 kHz Vertical Frequency: 43–85 Hz Pixel Clock: 12–108 MHz Compatible with sync on green and composite sync signals SXGA (1,280 1,024) compatible in intelligent compression Horizontal Vertical Horizontal Vertical VESA VESA Frequency MAC/ Resolution Frequency Frequency Display... -
Page 49: Specifications
CD-ROM (UDSKA0029CEN1), LCD projector operation manual (TINS-7204CEZZ), LCD projector quick reference guide (TINS-7205CEZZ) This SHARP projector uses LCD (Liquid Crystal Display) panels. These This unit has some inactive TFTs within acceptable tolerances which very sophisticated panels contain 786,432 pixels ( RGB) TFTs (Thin may result in illuminated or inactive dots on the picture screen. -
Page 50: Dimensions
Dimensions Rear View Top View Side View (260) Front View (118) (58) Bottom View Units: inches (mm) E-49... -
Page 51: Glossary
Glossary Active digital keystone correction Corrects keystone distortion caused when the projected image is not perpendicular to the screen. This method provides not only horizontal correction, but vertical as well, thus maintaining the original 4:3 aspect ratio and eliminating jag lines. Aspect ratio Width and height ratio of an image. -
Page 52: Index
Index Active digital keystone correction ........MENU button ..............23 AC socket ................. 12 MOUSE button ..............22 Adjustment buttons ............23 Mouse buttons ..............22 Air filter ................37 Aspect ratio ..............33 ON/OFF button ..............17 AUDIO INPUT terminals ........... 13 On-screen display language ........... - Page 53 SHARP CORPORATION...
Need help?
Do you have a question about the Notevision PG-C20XE and is the answer not in the manual?
Questions and answers