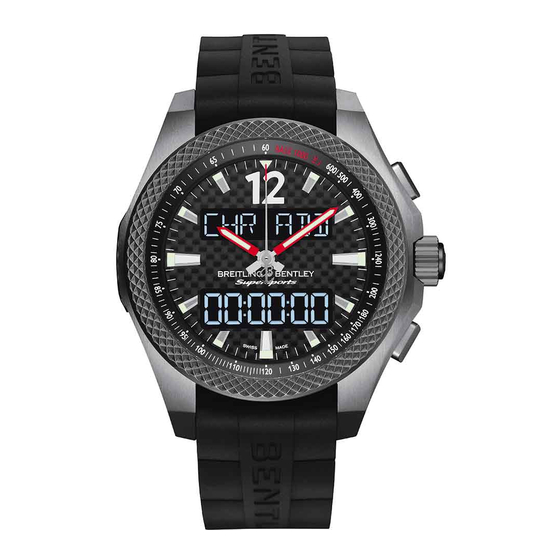
Breitling Bentley SUPERSPORTS B55 Manual
Hide thumbs
Also See for Bentley SUPERSPORTS B55:
- Connection instructions (10 pages) ,
- Manual (166 pages)
Table of Contents
Advertisement
Available languages
Available languages
Quick Links
Advertisement
Chapters
Table of Contents

Related Manuals for Breitling Bentley SUPERSPORTS B55


Summary of Contents for Breitling Bentley SUPERSPORTS B55
- Page 1 B E N T L E Y S U P E R S P O R T S B 5 5...
- Page 2 1. RALLY Chronograph 3. REGULARITY RALLY Chronograph: “Stage” version STAGE 01 STAGE 02 SPLIT 1 SPLIT 2 STAGE 03 TARGET STAGE 01 STAGE 02 STAGE 03 STAGE 04 of S01 of S01 STAGE 04 SPLIT 1 ACTUAL EARLY 01 LATE 02 GOAL 03 EARLY 04 of S03...
- Page 3 BENTLEY SUPERSPORTS B55...
- Page 4 ENGLISH 5-82 ESPAÑOL 83-162 PORTUGUÊS 163-244 245-322 CERTIFICATIONS 323-326 Up-to-date user manuals are available on breitling.com under SERVICE section.
-
Page 5: Table Of Contents
CONTENTS 1. General instructions a) Reference time and timezones b) Functions c) User interfaces d) Light intensity setting e) “Parking” the hands f) Blocking a function g) Connecting the watch to a smartphone 2. Rechargeable battery and power management a) Rechargeable battery b) Power management c) Battery charging 3. - Page 6 7. Configuring the watch ( g) Rereading intermediate times SETTING a) SyNCHRO h) Recovering times i) Synchronizing the seconds hand TILT LIGHT SHORT MEDIUM LONG 11. Lap timer chronograph ( LAP TMR DISPLAy DISP ON DISPOFF a) Recording several laps ( NIGHT MODE b) Synchronizing the seconds hand TONE...
- Page 7 e) Erasing one or several races 17. Notifications received from a smartphone ( NOTIFy f) Recovering times a) Reading notifications b) Setting notifications 14. Regularity rally chronograph ( RGRALLy a) Setting ( 18. Battery charging status ( SET RLy b) Timing a regularity rally - mode mode STAGE...
-
Page 8: General Instructions
GMT (Greenwich Mean Time) designation. This can be found on time stating the lead or the lag. the www.breitling.com website. The local time (TIME) and the second timezone 8. TIMER: countdown – see chapter 15. (TIME 2) are adjusted according to the time difference with the UTC timezone (in one hour and/or 15-minute increments). -
Page 9: C) User Interfaces
12. SETTING: various settings that make it possible to configure and personalize the The crown can be turned forwards (clockwise) or backwards (anti-clockwise). watch – see chapter 7. If one forgets the crown in the pulled out position, the upper screen will display at regular intervals, while a beep will sound every 30 seconds. -
Page 10: E) "Parking" The Hands
The higher the figure, the greater the light intensity. Bear in mind that the greater g) Connecting the watch to a smartphone the light intensity, the more battery is used, which will result in shorter autonomy ® The watch is equipped with a BLE (Bluetooth Low Energy) antenna enabling (see chapter 2). - Page 11 Connexion ON + 20 Noti cations Connection OFF Connection ON Connection ON + Noti cations intensity 1 intensity 2 intensity 3 intensity 4 Intensity control Daily light use (minutes) Graph 1: Typical autonomy in number of days for 10 minutes use of the light and 10 seconds per day of alarm (vibrate function and buzzer) with or without a connection and 20 notifications, according to the light intensity setting.
-
Page 12: B) Power Management
With each press on the crown, the indicator appears on the upper LOW BAT more than ten years of use. This may only be done by an authorized Breitling ser- screen instead of and in place of the light. If the watch is configured in DISPOFF vice center. -
Page 13: C) Battery Charging
c) Battery charging 3. INITIALIZING THE WATCH After purchasing, we recommend completely charging the battery prior to When used for the first time, or after having been charged, the watch guides the any handling. In order to do this, the watch must be connected to the cable user though the following sequence: supplied, following which the cable itself must be connected to the USB power adaptor also supplied (see figure 1). -
Page 14: Adjusting The Time Base Of The Watch ( Utc )
5. Set the main TIME zone ( ) with regard to the difference with the UTC SETTIME NOTE: To recharge your watch, please use the cable supplied with the trans- time (see chapter 6). former. 6. Press the crown back to neutral position 1. The cable, can, however be used directly on a USB port on a PC/Mac. -
Page 15: A) Setting ( Set Utc )
• Press the crown back into neutral position 1. • Define the day by rotating the crown and confirm by pressing P2. UTC time can be found on www.breitling.com. • Select the week display ( ) by turning the crown and confirm by... -
Page 16: A) Setting ( Settime )
• Press the crown into neutral position 1. N.B.: When in setting mode ( ), pressing P1 will restart the seconds counter SETTIME from 0. The seconds counter only stops when the seconds are manually modified. The watch has a perpetual calendar until 2099. In this case, it restarts when exiting setting (putting the crown back to neutral position 1). - Page 17 : setting the duration for the lighting to be switched on when the crown LIGHT SyNCHRO is pressed. The time shown on the analog display (hands) and that shown on the digital : choice of digital LCD behavior – readable all the time even without display (screens) must be perfectly synchronized.
- Page 18 • Select by turning the crown. TILT DISPLAy DISP ON DISPOFF • Press P1 to activate the setting. • Select the function by turning the crown. SETTING • Pull the crown into position 2 (the hour and minute hands will “park”). •...
- Page 19 • Select by turning the crown. The default setting is TONE PUSH PUSH+HR PUSH+CH HANDPRK DBLPRES • Press P1 to activate the setting. • Select the function by turning the crown. SETTING • Turn the crown to select (exit mode after 5 minutes) or (exit mode 5 MIN DBLPRES...
- Page 20 • Pull the crown into position 2 (the hour and minute hands will “park”). 3. Week on the upper screen (ex.: ) and time on the lower screen ( WEEK 25 HH: MM:SS • Select by turning the crown. The default setting is on 4.
- Page 21 • Adjust the minutes by turning the crown and confirm by pressing P2; on the If the alarm is not configured to sound every day, when it is activated, the upper upper screen, the seven days of the week flash one after the other from the left, screen alternates with the days activated (ex: );...
- Page 22 a) Measuring a single time • Pressing P1 stops the chronograph (display on the upper screen: alter- CHR ADD nating with the 1/100 of a second). • Select the function by turning the crown. CHR ADD • Pressing again on P1 restarts the chronograph. •...
- Page 23 e) Converting units of speed f) Introducing the distance for the tachymeter To enable the tachymeter to calculate the speed correctly, the distance corresponding When the speed is displayed, the unit can be changed, thus converting it, as follows: to the time recorded must be introduced. This setting is done as follows: •...
- Page 24 i) Synchronizing the seconds hand • Start recording the 1 lap by pressing P1 ( L01 RUN • Stop recording the 1 lap by starting the 2 ) by pressing P1. The L02 RUN If the seconds hand does not position itself exactly on 0 in mode, proceed CHR ADD display then switches to the following lap time.
- Page 25 b) Synchronizing the seconds hand • Pull the crown into position 2 (the upper screen will display ), and then SET RLy by turning the crown (press P1 to activate the desired setting): If the seconds hand does not position itself exactly on 0 in , proceed as LAP TMR –...
- Page 26 • Pressing P1 again allows the next race from the ongoing rally to start. The upper • The date of the start of the first stage on the lower screen with the indication screen displays xx+1 and the lower screen the hours, minutes and seconds on the upper screen (x being the rally number), and then, for each STAGE DATE...
- Page 27 d) Adding penalty times e) Erasing a stage Penalty times can be added retrospectively to the time of each stage or to the total One or several stages of a rally may be erased. In order to do this, proceed as time of a rally.
- Page 28 • The upper screen displays ; select • To erase all rallies simultaneously, proceed as follows: PENALTy CANCEL FIXEDTM FIXEDTM turning the crown and confirm by pressing on P1. – Pull the crown into position 2 • The upper screen displays the first stage, ;...
- Page 29 – The function which allows the length of the lap (in kilometers or • This operation may be conducted for up to 80 laps. Following this, nothing fur- LENGTH miles) to be introduced before the race. It is also possible to introduce it after ther will happen.
- Page 30 • The lower screen will then display up to 5 digits: tens and units of the unit selec- Then return to the x display on the upper screen with the total time of the race. RACE ted, followed by 3 precision figures: select each one of these figures by rotating During rereading, pressing P1 enables an immediate switch to the next parameter.
- Page 31 1. Determination of the duration of independent stages/races: • To define a Regularity Rally (case 1), pull the crown into position 2, and then turn STAGE the crown (press P1 to activate the desired setting): 2. Determination of intermediate times in a given race: SPLIT 1.
- Page 32 • To launch a new rally, the rally in the memory must be erased by giving a long • A new press on P1 allows the following race/stage to be started. The upper press on P1 (erasing the times measured but not the target times – display screen shows xx+1 and the lower the hours, minutes and seconds up to 99 ERASE...
- Page 33 • The lag or advance time for each stage on the lower screen with the indication advance time is displayed on the lower screen in hour, minute and second xx or format HH:MM:SS. LATE EARLy GOAL This information is accompanied by a sound signal as follows: d) Timing a regularity rally, mode SPLIT...
- Page 34 • The total time on the lower screen with the indication on the upper 15. COUNTDOWN ( RGRALLy TIMER screen. a) Setting ( SET TMR • The date of the race on the lower screen with the indication on the RGRDATE •...
- Page 35 for 20 seconds, with a 10-second reminder after 1 minute. The upper screen flashes Function SWAP ž . The alarm can be stopped by pressing one of the two pushpieces or on function allows the two timezones TIME and TIME 2 to be inversed on the SWAP the crown.
- Page 36 1. Phone call ž displayed, followed by, if possible, the surname and name of – Give P2 a long press CALL the caller or the phone number, with the time of the call. – Push the crown back to position 1. 2.
- Page 37 In order to validate these settings on the smartphone, the watch must be connec- • Give P1 a long press to confirm the extended standby. The hands “park” ted to the smartphone (see chapter 7.i). immediately. Once the procedure is finished, the display turns off and the electronics are disconnected.
- Page 38 • Do not forget to push the crown back to neutral position 1. 20. LIST OF WORDS IN THE USER INTERFACE The list below explains all the texts that may appear in the upper screen through In order to reactivate the watch, it must be charged using the cable provided. the user interface.
- Page 39 CHARGE battery charging LOW BAT battery level low CHR ADD chronograph stopped with option of restarting LXX RUN lap xx underway CONNECT activation or not of the Bluetooth ® connection LxxSPLy Intermediate y lap time xx CONVERT speed unit conversion MEDIUM medium display time DAy xx...
- Page 40 RACE X SPORT race number x sport mode (deactivation of certain functions) RACING STAGExx racing mode (all functions) race (stage) in a rally RALLy x rally number x STOP XX stop lap xx RESET put back to 0 STPRRLy stop regularity rally RGRALLy SxxSPLy regularity rally...
- Page 41 CDCUCLK and ALCU functions of ±25 seconds. The variation in rate of the SuperQuartz™ caliber fitted in your Breitling watch far and above exceeds these demands, achieving a rate of ±15 seconds a year. The term “chronometer” should not be confused with that of “chronograph”, which is a complicated watch fitted with an additional mechanism enabling the measurement of the duration of an event.
- Page 42 SPECIAL CHARACTERISTICS USING THE TACHOMETER The tachometer is the graduation on the dial or flange of your Breitling chronograph enabling you to determine average speeds or hourly productivity rate, based on an observation period of less than 60 seconds. 1. Average speed Using the chronograph to measure the time required to cover a kilometer or a mile.
- Page 43 MAINTENANCE Breitling models are water-resistant to varying degrees. The extent of the water- resistance, expressed in meters (M) is a standard value and does not indicate an absolute depth of immersion. The crown and pushpieces must not under any cir- Your Breitling chronometer is a sophisticated instrument that is constantly cumstances be operated under water or when the watch is wet.
- Page 44 1. Generalidades a) Hora de referencia y husos horarios Breitling metal cases and bracelets are made from the finest alloys and guarantee sturdiness and wearer comfort. Regular cleaning by rinsing and brushing in clear b) Funciones water will keep your watch shiny. This operation is strongly recommended after c) Interfaces usuario each immersion in salty or chlorinated water.
- Page 45 7. Configuración del reloj ( g) Relectura de los tiempos intermedios SETTING a) SyNCHRO h) Recuperación de los tiempos i) Sincronización de la aguja de segundos TILT LIGHT SHORT MEDIUM LONG 11. Cronógrafo de vueltas ( LAP TMR DISPLAy DISP ON DISPOFF a) Cronometraje de varias vueltas ( NIGHT MODE...
- Page 46 e) Borrado de una o varias carreras 17. Notificaciones recibidas de un smartphone ( NOTIFy f) Recuperación de los tiempos a) Lectura de las notificaciones b) Ajustes de las notificaciones 14. Cronógrafo de rally – tipo “regularity rally” ( RGRALLy a) Ajustes ( SET RLy 18.
-
Page 47: Generalidades
GMT o «Tiempo Medio de Greenwich». el tiempo predefinido especificando el adelanto o el atraso. La hora UTC puede obtenerse a través de nuestra web www.breitling.com. La 8. TIMER: cuenta atrás – ver capítulo 15. -
Page 48: C) Interfaces Usuario
12. SETTING: diversos ajustes que permiten configurar y personalizar el reloj – ver Si la tija de la corona está en posición hacia afuera, la pantalla superior indica PUSH capítulo 7. a intervalos regulares; además, suena un bip cada 30 segundos. CROWN Una presión corta en la corona enciende los dos displays digitales. -
Page 49: E) "Aparcamiento" De Las Agujas
e) «Aparcamiento» de las agujas específica del smartphone permite efectuar fácilmente cualquier ajuste, inclusive la puesta en hora, así como recuperar determinadas informaciones del Una doble presión en la corona permite «aparcar» las agujas de las horas y los , del , de los contadores de rally ( ), de carrera ( ) y del... - Page 50 Conexión ON + 20 noti caciones Conexión OFF Conexión ON Conexión ON + noti caciones Intensidad 1 Intensidad 2 Intensidad 3 Intensidad 4 Ajuste de la intensidad Uso diario de la iluminación (minutos) Gráfico 1: Autonomía típica en días para 10 minutos de uso del encendido, 10 segundos al día de alarma (vibrador y buzzer) con o sin conexión y 20 notificaciones en función del nivel de ajuste de la iluminación.
-
Page 51: B) Gestión De La Energía
10 años de uso. Esta operación deberá ser ción únicamente con luz —ver capítulo 7.d), se posiciona automáticamente en realizada únicamente por un centro de servicio Breitling. modo . La hora analógica (sin el segundo) y la hora digital aparecen... -
Page 52: C) Recarga Del Acumulador
c) Recarga del acumulador Tras la compra, y antes de efectuar cualquier manipulación, se recomienda proceder a una recarga completa del acumulador. Para ello, el reloj deberá ser conectado al cable suministrado y éste a su vez al adaptador USB igualmente suministrado (ver figura 1). -
Page 53: Inicialización Del Reloj
3. Ajustar a la hora exacta el huso UTC ( ), que es la principal base de tiempo SET UTC ADVERTENCIA: Para recargar el reloj utilizar el cable que acompaña al trans- por la que se rige el reloj —y no la hora local (ver capítulo 4). formador. -
Page 54: A) Ajuste ( Set Utc )
(la indicación aparece en la pantalla superior). Se puede obtener la hora UTC accediendo a nuestra web www.breitling.com • Definir el día mediante rotación de la corona y validar mediante presión en P2. N.B.: en modo ajuste ( ), una presión en P1 reinicia el cómputo de los... -
Page 55: Ajuste Del Huso Principal ( Time A) Ajuste
• Girando la corona, ajustar la hora en función de la diferencia horaria respecto : la primera semana contiene el 1º de enero y el primer día de la semana es del tiempo UTC, de UTC-12 a UTC+14 lunes. • Validar presionando P2; los minutos parpadean (indicación ) en la pan- MIN +00 : la primera semana contiene el 1º... - Page 56 7. CONFIGURACIÓN DEL RELOJ ( Cabe destacar que en el momento en que se activa el modo tirando de SETTING SETTING la corona hasta la posición 2, las agujas de las horas y de los minutos se «aparcan» En modo , se pueden efectuar los siguientes ajustes (todos estos ajustes SETTING para facilitar la visualización de las dos pantallas.
- Page 57 N.B.: en la pantalla inferior, un contador indica el tiempo total de iluminación, TILT en H:MIN:SEC, desde la última recarga de la batería. • Seleccionar la función mediante rotación de la corona. SETTING • Tirar de la corona hasta la posición 2 (las agujas de horas y minutos se «aparcan»). DISPLAy DISP ON DISPOFF...
- Page 58 • Seleccionar mediante rotación de la corona; por defecto, el ajuste se TONE PUSH PUSH+HR PUSH+CH HANDPRK posiciona en modo DBLPRES • Seleccionar la función mediante rotación de la corona. SETTING • Presionar P1 para activar el ajuste. • Tirar de la corona hasta la posición 2 (las agujas de horas y minutos se «aparcan»). •...
- Page 59 1. el día en la pantalla superior (ej.: , etc.) y la fecha en la CONNECT MONDAy TUESDAy pantalla inferior ( DD.MM.yy • Seleccionar la función mediante rotación de la corona. SETTING 2. la semana en la pantalla superior (ej.: ) y la fecha en la pantalla inferior WEEK 25 •...
- Page 60 • Seleccionar la alarma que se desea ajustar mediante presión en P2 ( hasta • Pulsar la corona en posición neutra 1. Al finalizar el ajuste, la alarma configurada se activa automáticamente, es decir pasa a posicionarse en ON ( o bien, si se ha seleccionado en modo 12 horas (AM/PM), en , respectivamente).
- Page 61 10. CRONÓGRAFO CON TIEMPOS INTERMEDIOS Y TAQUÍMETRO ( • Una presión en P2 permite visualizar el tiempo intermedio. La pantalla superior CHR ADD indica xx en alternancia con las centésimas de segundo; el cronometraje SPLIT permite registrar hasta un máximo de 50 tiempos intermedios en un CHR ADD continúa activo en segundo plano.
- Page 62 d) Taquímetro distancia), seguidos a su vez de una a tres letras (para la unidad de distancia); la unidad de distancia parpadea. Cuando el cronógrafo se ha parado después de una medida de tiempo sin tiempo intermedio, una presión corta en P2 permite indicar la velocidad media corres- •...
- Page 63 g) Relectura de los tiempos intermedios traje siguiente. Se pueden almacenar un máximo de 50 tiempos y leerlos una vez finalizado el cronometraje. La relectura de los tiempos intermedios se efectúa mediante presiones sucesi- vas en P2 con indicación de los tiempos intermedios memorizados SPLIT01 Cuando se selecciona la función , la aguja de segundos se posiciona automá-...
- Page 64 • Una presión posterior en P2 indica el tiempo total en la pantalla inferior (visuali- c) Recuperación de tiempos zación en la pantalla superior en alternancia con la centésima de segundo). TOTAL Si el reloj está conectado al smartphone se pueden recuperar los tiempos de un •...
- Page 65 – Confirmar los ajustes presionando P1 y/o reposicionando la corona en posición • Para borrar un rally es necesario efectuar una presión larga en P2 ( ERASE neutra 1. • En caso de olvido, la etapa en curso se interrumpirá automáticamente después de 99 horas e indicará...
- Page 66 Durante la relectura, una presión en P1 permite pasar inmediatamente al parámetro • Definir las horas de penalización mediante rotación de la corona y confirmar siguiente. Se puede salir del modo relectura ya sea mediante presión larga en P1 o mediante presión en P2.
- Page 67 • La pantalla regresa a la primera etapa . Seleccionar otra etapa mediante • Definir los segundos mediante rotación de la corona y confirmar mediante pre- STAGE01 rotación de la corona y proceder de la misma manera, o bien presionar la corona sión en P1.
- Page 68 13. CRONÓGRAFO DE CARRERA SOBRE PISTA ( b) Cronometraje de una carrera RACE El cronógrafo de carrera sobre pista es similar al pero con la posibilidad LAP TMR • Seleccionar la función mediante rotación de la corona: la aguja de segun- RACE adicional de registrar tiempos intermedios en cada vuelta y proporcionar la veloci- dos se posiciona en mediodía y se convierte en aguja de cronógrafo.
- Page 69 • En caso de olvido, la vuelta en curso se interrumpirá automáticamente después • Para pasar de una carrera a otra x, presionar sucesivamente en P2. RACE de 99 horas y aparecerá la indicación • La fecha de la carrera en la pantalla inferior con indicación en la pantalla DATE superior (x corresponde al número de la carrera).
- Page 70 • Para borrar todas las carreras de una sola vez, proceder de la forma siguiente: a) Ajustes ( SET RLy – tirar de la corona hasta la posición 2 • Seleccionar la función mediante rotación de la corona. Pueden presen- RGRALLy –...
- Page 71 – La función ) que permite definir si los tiempos son de tipo • Para lanzar un nuevo rally es preciso borrar el rally en memoria efectuando TyPE STAGE SPLIT (tiempos intermedios durante un mismo cronometraje) o (tiem- una presión larga en P1 (borrado de los tiempos cronometrados pero no de los SPLIT STAGE pos independientes);...
- Page 72 Cabe señalar que en caso de retraso, se oirá una breve alarma cuando se alcanza • El tiempo-objetivo de las diferentes etapas en la pantalla inferior con indicación el tiempo- objetivo. STAGE • Una nueva presión en P1 permite el inicio de la carrera/etapa siguiente. La •...
- Page 73 • Una segunda presión en P1 detiene momentáneamente el cronógrafo (pantalla • Una vez medido el último tiempo intermedio mediante presión en P2, el superior: en alternancia con el número de tiempos cronometrados yy: cronógrafo se detendrá automáticamente. Cualquier presión corta posterior STPRRLy yy/xx).
- Page 74 • El tiempo de adelanto o de retraso para cada etapa en la pantalla inferior con b) Utilización indicación xx (retraso), xx (adelanto) o LATE EARLy GOAL • Una presión en P1 permite iniciar el timer ( TMR RUN f) Borrado de los datos del «regularity rally» •...
- Page 75 N.B.: en modo ajuste , una presión en P1 reinicia el cómputo de los segundos , únicamente en digital). Este intercambio modifica automáticamente la SET T2 UTC+1 a partir de 0. El cómputo de los segundos sólo se interrumpe cuando se modifica fecha en caso necesario siempre y cuando los dos husos hayan sido TIME...
- Page 76 a) Lectura de las notificaciones • Elegir la notificación deseada mediante rotación de la corona: CALL MESSAGE EMAIL MEETING El reloj memoriza 20 notificaciones con la hora en que se han producido, indistin- tamente del tipo según el método «first in, first •...
- Page 77 superior. Se recomienda proceder a una recarga cuando la carga es inferior a b) Modo SOFT SLEEP 30-25%. Cuando la batería alcanza este valor, la aguja trotadora avanza por pasos El modo permite poner el reloj en espera activa, que equivale al modo SOFT SLEEP de 4 segundos cada 4 segundos.
- Page 78 19. EN CASO DE PROBLEMAS 20. LISTA DE PALABRAS DE LA INTERFAZ DE USUARIO El listado siguiente explica el conjunto de las palabras que pueden aparecer en la Si el reloj no responde o existen problemas de conexión con el smartphone, puede pantalla superior en relación con la interfaz usuario.
- Page 79 CHARGE LONG batería en carga tiempo largo de visualización CHR ADD LOW BAT cronógrafo parado con posibilidad de reinicio nivel bajo del acumulador CONNECT activación o no de la conexión Bluetooth ® LXX RUN lap (vuelta) xx en curso CONVERT conversión de unidad de velocidad LxxSPLy tiempo intermedio y de vuelta xx...
- Page 80 PUSH+CH SPEED xx bip en pulsador y top crono velocidad media de la vuelta xx de una carrera PUSH+HR SPLIT XX bip en pulsador y top horario tiempo intermedio xx de 0 a máx 50 RACE X carrera número x SPORT modo sport (desactivación de algunas funciones) RACING...
- Page 81 XXDAyS número de días ajustados en las funciones CDCUCLK y ALCU reloj Breitling cumple con creces estas exigencias, ya que su precisión se sitúa en ±15 segundos al año. No debe confundirse el término «cronómetro» con el de «cronógrafo». Este último es un reloj complicado dotado de un mecanismo adicional que permite medir la duración de un determinado fenómeno.
- Page 82 El taquímetro es una graduación horaria que aparece grabada en la esfera o en el realce de su cronógrafo Breitling y que permite el cálculo de velocidades medias o producciones horarias tomando como base un tiempo de observación inferior a 60 segundos.
- Page 83 El agua, los cosméticos y el sudor aceleran el proceso de cabo en un centro oficial de servicio postventa Breitling o a través de un concesio- deterioro. En ciertas actividades que implican un contacto frecuente con el agua o nario autorizado (www.breitling.com).
- Page 84 Las cajas y los brazaletes metálicos Breitling se construyen a partir de las mejores ÍNDICE aleaciones y garantizan robustez y confort en la muñeca. Se recomienda limpiarlos periódicamente con un cepillo y enjuagarlos a continuación con agua dulce, 1. Generalidades principalmente cada vez que se sumerjan en agua salada o clorada.
- Page 85 7. Configuração do relógio ( g) Releitura dos tempos intermédios SETTING a) SyNCHRO h) Recuperação dos tempos i) Sincronização do ponteiro dos segundos TILT LIGHT SHORT MEDIUM LONG 11. Cronógrafo dos tempos das voltas ( LAP TMR DISPLAy DISP ON DISPOFF a) Cronometragem de várias voltas ( NIGHT MODE...
- Page 86 d) Releitura de uma corrida 17. Notificações recebidas Num smartphone ( NOTIFy e) Eliminação de uma ou várias corridas a) Leitura das notificações f) Recuperações dos tempos b) Regulação das notificações 14. Cronógrafo do rali - tipo «regularity rally» ( RGRALLy 18.
- Page 87 à antiga denominação GMT (Tempo Médio de Greenwich). Ela pode ser Distance Rally). Após ter definido os objectivos dos tempos, para as etapas ou os encontrada no sítio www.breitling.com. A hora local TIME e o segundo fuso tempos intermédios, este cronógrafo apresenta o tempo medido e compara-o horário TIME 2 são regulados, segundo a diferença horária, em relação ao fuso...
- Page 88 11. NOTIFY: se o relógio tiver sido emparelhado com um smartphone, terá a possi- – assim como a posição instável 0 bilidade de receber as notificações no relógio que são relativas à recepção de (que desempenha a função de pistão, chamadas telefónicas, mesagens e e-mails.
- Page 89 exibição de no ecrã superior e, em seguida, selecção de x (x, representando que seja efectuada uma nova pressão na coroa (indicação no ecrã situado LIGHT UNLOCKD o nível de 1 a 4). A nova regulação deve ser confirmada através de uma pressão breve às 12h).
- Page 90 Ligação ON + 20 Noti cações Ligação OFF Ligação ON Ligação ON + Noti cações Intensidade 1 Intensidade 2 Intensidade 3 Intensidade 4 Regulação da intensidade Utilização diária da luz (minutos) Gráfico 1: Autonomia normal indicada em dias para 10 minutos de utilização da luz e 10 segundos por dia de utilização dos alarmes (a vibração e o toque), com ou sem ligação e 20 notificações, segundo o nível de regulação da luz.
- Page 91 utilizando o cabo especial que é entregue com o cronógrafo. O conector contém dos. A cada pressão na coroa, a indicação aparece no ecrã superior, em LOW BAT um íman integrado, permitindo assegurar o contacto com o relógio. vez da luz. Se o relógio for configurado no modo (exibição accionada DISPOFF apenas com a luz –...
- Page 92 10 anos de utilização. Ela poderá ser efectuada apenas por um centro regulação da inicialização (consultar o capítulo 3). de reparação autorizado Breitling. c) Recarga do acumulador Após a compra, é recomendável proceder a uma recarga completa do acumulador, antes de qualquer manipulação.
- Page 93 3. Acertar, com precisão, a hora do fuso UTC ( ), que constitui a base do SET UTC ATENÇÃO: Para proceder à recarga do relógio, utilizar o cabo fornecido com tempo principal do relógio – não a hora local (consultar o capítulo 4). o transformador.
- Page 94 • Empurrar novamente a coroa para a posição neutra 1. • Definir o dia, através da rotação da coroa, e confirmar através da pressão em P2. A hora UTC pode ser encontrada no sítio www.breitling.com. • Escolher a norma de exibição da semana ( ), através da rotação da...
- Page 95 : a primeira semana contém o dia 1 de Janeiro e o primeiro dia da semana é o • Confirmar através da pressão em P2; os minutos começam a piscar (exibição de domingo. no ecrã superior). MIN +00 : a primeira semana contém o dia 1 de Janeiro e o primeiro dia da semana ARABIC •...
- Page 96 7. CONFIGURAÇÃO DO RELÓGIO ( : possibilidade de desactivar as funções SETTING MODE RALLy RACE RGRALLy : activação ou desactivação da ligação BLE (Bluetooth ® Low Energy). CONNECT No modo , é possível efectuar as regulações seguintes (todas estas regu- SETTING lações são memorizadas no relógio e, portanto, guardadas, mesmo em caso de Tenha em atenção que, a partir do momento em que é...
- Page 97 • Efectuar a regulação para o ponteiro dos minutos e, em seguida, para o ponteiro • Puxar a coroa para a posição 2 (os ponteiros das horas e dos minutos estacionam). das horas, com a confirmação, através da pressão em P1. •...
- Page 98 (confirmação sonora, após cada pressão nos pistões). NIGHT MODE PUSH (confirmação sonora, após cada pressão nos pistões + sinal horário, a PUSH+HR • Seleccionar a função , através da rotação da coroa. SETTING cada hora certa). • Puxar a coroa para a posição 2 (os ponteiros das horas e dos minutos estacio- (confirmação sonora, após cada pressão nos pistões + sinal, a cada hora PUSH+CH nam).
- Page 99 • Confirmar a regulação, pressionando P1 e/ou empurrando novamente a coroa MODE RACING SPORT para a posição neutra 1. • Seleccionar a função , através da rotação da coroa. SETTING Se deixar o relógio constantemente ligado ao smartphone, a sua autonomia ficará •...
- Page 100 9. ALARMES-DESPERTADORES (DE N.B.: uma pressão em P1 activa novamente os sete dias do alarme em curso ALLDAyS O relógio possui sete alarmes diários, baseados na hora local , configuráveis TIME • Regular o tipo de sinal de alarme pretendido (exibição de ALARM SIGNAL em horas, minutos e dias da semana.
- Page 101 • Uma pressão em P1 activa ( e, respectivamente, ) ou • Uma segunda pressão em P1 pára o cronógrafo (ecrã superior: alterna CHR ADD desactiva ( ) o alarme exibido. com os centésimos de segundo). • Uma pressão demorada em P2 efectua uma reposição a zero. •...
- Page 102 Se for esquecida uma cronometragem em curso, quando o tempo total alcançar as e) Conversão das unidades de velocidade 99 horas, 59 minutos e 59 segundos, a contagem parará e o ecrã superior exibirá Quando for exibida a velocidade, será possível alterar a unidade e, portanto, efec- (overflow).
- Page 103 f) Introdução da distância para o taquímetro h) Recuperações dos tempos Para permitir que o taquímetro efectue um cálculo correcto, é necessário introduzir Se o relógio estiver ligado ao smartphone, será possível, através de uma aplica- a distância correspondente ao tempo cronometrado. Esta regulação é efectuada ção do smartphone, recuperar os dados de uma cronometragem.
- Page 104 nova cronometragem, o ponteiro reinicia no zero e posiciona-se directamente no • Posteriormente, através de pressões sucessivas em P2, são exibidos os tempos das segundo em curso. Ele retoma a sua função normal, a partir do momento em que outras voltas no ecrã inferior (com a indicação da volta exibida no ecrã superior: sair do modo de cronógrafo dos tempos das voltas.
- Page 105 12. CRONÓGRAFO DO RALI - TIPO «RALLY CROSS» ( b) Cronometragem de um rali RALLY • Seleccionar a função , através da rotação da coroa; o ponteiro dos RALLy O cronógrafo do rali permite cronometrar diferentes corridas de um rali (até 30 segundos posiciona-se ao meio-dia e transforma-se no ponteiro do cronógrafo.
- Page 106 • Em caso de esquecimento, a etapa em curso parará automaticamente, após 99 Se a memória contiver vários ralis, é necessário pressionar sucessivamente P2, a horas, e exibirá fim de visualizar os parâmetros das outras corridas. O tempo do último rali é, em seguida, automaticamente exibido, com a indicação x no ecrã...
- Page 107 • Definir os segundos de penalidade, através da rotação da coroa, e confirmar f) Introdução de um tempo pré-fixado através da pressão em P1. O tempo da etapa é adaptado consequentemente, É igualmente possível definir um tempo pré-fixado para uma ou várias etapas de assim como o tempo total do rali.
- Page 108 • A exibição regressa à primeira etapa, . Escolher outra etapa, através da velocidade média por volta (se a extensão da volta for indicada). É possível registar STAGE01 rotação da coroa, proceder do mesmo modo ou empurrar novamente a coroa até...
- Page 109 b) Cronometragem de uma corrida • Em caso de esquecimento, a volta em curso parará automaticamente, após 99 horas, e exibirá • Seleccionar a função , através da rotação da coroa; o ponteiro dos segundos RACE posiciona-se ao meio-dia e transforma-se no ponteiro do cronógrafo. O ecrã c) Introdução da extensão da volta superior exibe x, correspondendo x à...
- Page 110 d) Releitura de uma corrida Durante a releitura, uma pressão em P1 permite mudar imediatamente para o parâmetro seguinte. É possível sair do modo de releitura, quer seja através da pres- Após a cronometragem estar terminada, uma pressão em P2 permite exibir sucessi- são demorada em P1 ou rodando a coroa (alteração da função).
- Page 111 1. A determinação da duração das etapas/corridas independentes: • Para definir um «regularity rally» (1.º caso), puxar a coroa para a posição 2 e, STAGE em seguida, sequencialmente, rodando a coroa (pressionar P1 para activar a 2. A determinação dos tempos intermédios numa determinada corrida: SPLIT regulação pretendida): (Ver os exemplos no início do manual de instruções).
- Page 112 b) Cronometragem de um «regularity rally» - modo 2. Um bip breve e grave, se o tempo estiver até 10 segundos atrasado, ou um bip STAGE agudo, se o tempo estiver até 10 segundos adiantado. • Seleccionar a função , através da rotação da coroa; o ponteiro dos RGRALLy 3.
- Page 113 • A data da corrida (1.ª etapa) no ecrã inferior, com a indicação no ecrã • Uma segunda pressão em P1 pára momentaneamente o cronógrafo (ecrã superior: RGRDATE superior. alterna como o número de tempos cronometrados yy: xx). STPRRLy • A hora de partida da corrida (1.ª etapa) no ecrã inferior, com a indicação RGSTART •...
- Page 114 • Em caso de esquecimento, o cronógrafo parará automaticamente, após 99 g) Recuperações dos tempos horas, e exibirá Se o relógio estiver ligado ao smartphone, será possível, através de uma aplicação do smartphone, recuperar os diferentes tempos cronometrados. e) Releitura de um «regularity rally» - modo SPLIT Após a cronometragem estar terminada, uma pressão em P2 permite exibir 15.
- Page 115 • Quando o timer estiver a funcionar, uma pressão demorada em P2 permitirá Uma pressão demorada em P2 permite escolher entre o formato de exibição das 12 reinicializá-lo com o valor previamente regulado ( horas ( ) ou 24 horas ( ).
- Page 116 17. NOTIFICAÇÕES RECEBIDAS NUM SMARTPHONE ( • Uma pressão demorada em P2 permite eliminar a notificação activa. NOTIFy A função permite configurar o relógio, de modo a que este informe o • Para eliminar todas as notificações: NOTIFy utilizador dos eventos seguintes, que chegam ao smartphone ao qual está ligado: –...
- Page 117 – : ambos os alarmes. Esta função é útil e aconselhável, no caso de o relógio não ter sido utilizado durante BOTH um período de tempo relativamente longo. Esta operação permite efectuar um – sem notificações. reset do relógio. O procedimento da colocação em repouso profundo é efectuado do seguinte modo: •...
- Page 118 durante um curto período de tempo, se pretender manter, no máximo, o estado 19. EM CASO DE PROBLEMAS da carga da bateria e, deste modo, apenas as regulações e a hora certa. O procedi- Se o relógio deixar de responder ou em caso de problemas de ligação com mento da colocação em repouso activo é...
- Page 119 20. LISTA DE PALAVRAS DO INTERFACE DO UTILIZADOR CHARGE bateria a carregar CHR ADD cronógrafo parado, com a possibilidade de ser novamente accionado A lista seguinte explica todas as expressões que podem aparecer, ao nível do inter- CONNECT activação ou não-activação da ligação Bluetooth ®...
- Page 120 RACE X LOW BAT corrida número x nível fraco do acumulador RACING modo racing (todas as funções) LXX RUN «lap» (volta) xx em curso RALLy x rali número x LxxSPLy tempo intermédio y da volta xx RESET reposição a zero MEDIUM tempo médio de exibição RGRALLy...
- Page 121 SPORT modo SPORT (desactivação de algumas funções) exibição da semana, segundo a norma US (norte-americana) STAGExx corrida (etapa) num rali fuso UTC STOP XX paragem da volta xx UTC +XX no modo de regulação TIME ou TIME 2 ž hora(s) a mais no fuso UTC STPRRLy paragem do «rali de regularidade»...
- Page 122 O taquímetro é uma graduação no mostrador ou no aro do seu cronógrafo Breitling que permite determinar velocidades médias ou uma produção horária, com base O teste da certificação para os cronómetros de pulso com oscilador de quartzo num tempo de observação inferior a 60 segundos.
- Page 123 Como todos os instrumentos de medição com precisão, o seu relógio deve ser submetido a uma manutenção regular para funcionar da melhor forma: a periodicidade deste procedimento varia, em função da utilização. A Breitling ou o seu revendedor autorizado encarregarse-á prontamente do seu relógio.
- Page 124 Os modelos Breitling são estanques a diversos níveis. O nível de estanqueidade, As caixas e pulseiras metálicas Breitling são concebidas a partir das melhores ligas em metros, é uma norma. Não indica uma profundidade de imersão absoluta. A de materiais e garantem robustez e conforto. Limpar com regularidade o relógio coroa e os pistões nunca devem ser activados na água, ou quando o relógio está...
- Page 131 Connexion ON + 20 Noti cations Connection OFF Connection ON Connection ON + Noti cations intensity 1 intensity 2 intensity 3 intensity 4 Intensity control Daily light use (minutes)
- Page 163 3bars/30m/100FT 5bars/50m/165FT 10bars/100m/330FT 50bars/500m/1650ft+...
- Page 164 CERTIFICATIONS EUROPE AUSTRIA GREECE NORWAY BELGIUM HUNGARY POLAND BULGARIA ICELAND PORTUGAL CYPRUS IRELAND ROMANIA CZECH REPUBLIC ITALY SLOVAKIA DENMARK LATVIA SLOVENIA ESTONIA LITHUANIA SPAIN FINLAND LUXEMBOURG SWEDEN FRANCE MALTA SWITZERLAND GERMANY NETHERLANDS UNITED KINGDOM...
- Page 165 This device complies with Part 15 of the FCC Rules and with Industry Canada SIG, Inc. and any use of such marks by Breitling SA is under license. Other trademarks licence-exempt RSS standard(s). Operation is subject to the following two and trade names are those of their respective owners.
Need help?
Do you have a question about the Bentley SUPERSPORTS B55 and is the answer not in the manual?
Questions and answers