Table of Contents
Advertisement
Advertisement
Table of Contents

Related Manuals for Breitling COCKPIT B50


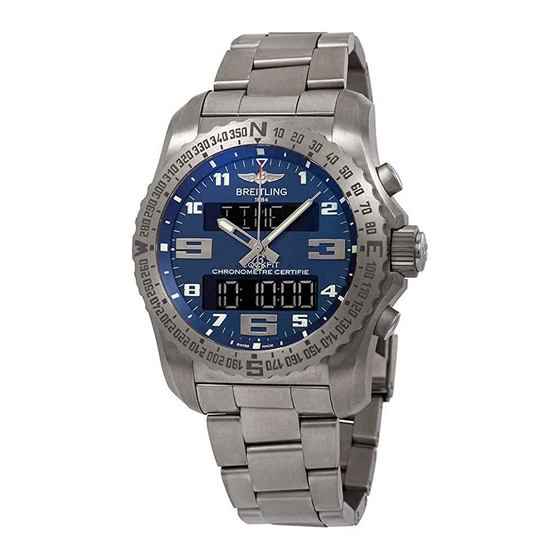
Summary of Contents for Breitling COCKPIT B50
- Page 1 C O C K P I T B 5 0...
- Page 2 COCKPIT B50...
- Page 4 ENGLISH 5-60 61-116 117-172...
- Page 6 CONTENTS 1. General remarks a) Reference time and timezones b) Functions c) User interfaces d) Light intensity setting e) “Parking” the hands f) Blocking a function 2. Rechargeable battery and power management a) Rechargeable battery b) Power management c) Battery charging 3.
- Page 7 LIGHT SHORT MEDIUM LONG DISPLAy DISP ON DISPOFF NIGHT MODE ALARM SIGNAL BUZZER VIBRATE BOTH TONE PUSH PUSH+HR PUSH+CH MODE PILOT SPORT LANG ENGLISH FRENCH GERMAN SPANISH 8. Date display ( DATE 9. Alarms ( a) Setting ( SET AL b) Use 10.
- Page 8 12. “Flight time” chronograph ( CHRFLGT a) Recording a “block time” b) Rereading “block times” c) Erasing one or more blocks 13. Countdown countup clock ( CDCUCLK a) Setting ( SETCDCU b) Use 14. Countup alarm ( ALCU a) Setting ( SETALCU b) Use 15.
-
Page 9: General Remarks
UTC timezone (standing for Coordinated Universal Time), which corresponds to the former GMT (Greenwich Mean Time) designation. UTC time must be introduced manually. This can be found on the www.breitling.com website. The local time (TIME) and the second timezone (TIME 2) are adjusted according to the time difference with the UTC timezone (in one hour and/or 15-minute increments). - Page 10 4. LAP TMR: “lap” counter chronograph to calculate lap times – see chapter 11. 5. CHRFLGT: “flight time” chronograph which allows time periods to be measured by memorizing the start and finish times, as well as the date and duration of the flight –...
- Page 11 c) User interfaces The watch has 3 central hands (hours H, minutes M and seconds SEC) as well as 2 digital displays: upper screen at 12 o’clock (consisting of 7 alphanumeric digits ) and lower screen at 6 o’clock (6 digits ███████...
- Page 12 must give a short or long (about 2 seconds) press. If no action is associated with the pushpieces, will appear in the upper screen. : indicates that the watch is in the process of calculating. WAIT (overflow) indicates that a counter limit has been exceeded. d) Light intensity setting A long press on the crown activates the light intensity setting mode.
-
Page 13: Rechargeable Battery And Power Management
f) Blocking a function Should you wish to keep a specific function displayed, this can be done by deactivating the crown rotating function in neutral position. In order to do this, push the crown three times. The word will appear in the screen at LOCKED 12 o’clock for around 2 seconds. - Page 14 b) Power management The watch is equipped with an intelligent power management system serving to optimize its autonomy. The ultimate aim is to avoid having to re-adjust it Intensity control Graph 1: Typical autonomy in number of days for 10 minutes use of the light and 10 seconds per day of alarm (vibrate function and buzzer) according to the light intensity setting.
- Page 15 Intensity 1 Intensity 2 Intensity 3 Intensity 4 Daily light use (minutes) Graph 2: Typical autonomy in days according to the use of light in minutes per day (for the four intensity settings).
- Page 16 once again after a “stop”. Depending on the status of the battery charge, the watch will inform the user of the need to charge. Parallel to this it will deactivate high-consumption functions little by little as the battery is used up. The sequence includes three successive levels: 1.
- Page 17 BATTERy A battery change will only be required after around 300 complete charges, or after more than 10 years of use. This may only be done by an authorized Breitling service center. c) Battery charging After purchasing, we recommend completely charging the battery prior to any handling.
- Page 18 Figure 1 Once the battery is fully charged, the upper screen will display and the BAT 100% watch will give off a luminous flash. A full recharge takes around 2 hours.
- Page 19 Once the watch is disconnected from the charger cable ( appears in the UNPLUG upper screen), three things may happen: 1. The watch will function as usual and no action is required. 2. The watch was in sleep mode or not completely flat: in principle, nothing needs to be done, but for safety’s sake, the initialization procedure should be conducted in order to confirm the different states (see chapter 3).
-
Page 20: Initializing The Watch
3. INITIALIZING THE WATCH When used for the first time, or after having been charged, the watch guides the user though the following sequence: 1. Pull the crown into position 2 ( ) in order to activate the settings PULL CROWN function. -
Page 21: Adjusting The Time Base Of The Watch ( Utc
( appears on the upper screen). SECOND • Turn the crown to adjust the seconds and confirm by pressing P2. • Press the crown back into neutral position 1. UTC time can be found on www.breitling.com. - Page 22 N.B.: When in setting mode ( ), pressing P1 will restart the seconds counter SET UTC from 0. The seconds counter will only stop when the seconds are changed manually. In this case, it restarts when exiting setting (putting the crown back to neutral position 1).
- Page 23 • Select the week display ( ) by turning the crown and confirm by WEEK NUMBER pressing P2: : The first week includes the first Thursday of the year and the first day of the week is Monday. : The first week includes January 1 and the first day of the week is ISO-2 Monday.
- Page 24 If the date was displayed, appears on the upper screen and the setting SETDATE process will start with adjusting the date. In the second case, press on P2 until the hours begin to flash ( xx). UTC +/- • By turning the crown, adjust the time in relation to difference with UTC, from UTC-12 UTC+14 •...
-
Page 25: Intensity
7. CONFIGURING THE WATCH ( SETTING In the mode, the following adjustments can be made (all these settings are SETTING memorized by the watch and therefore available even in the event of the battery being completely flat): : synchronization of the analog display with the digital display. SyNCHRO : lighting goes on automatically (and possibly the LCD) depending on the TILT... - Page 26 : choosing the type of alarm – buzzer, vibrating or both. ALARM SIGNAL : audible confirmations connected to pushpieces, with or without hourly TONE time signal or signal for full timekeeping hours. : option of disabling the following functions: MODE CHRFLGT CDCUCLK ALCU...
- Page 27 • If there is an inconsistency, turn the crown to position the seconds hand at 12 o’clock ( ž ) and confirm by pressing P2. HAND • Set the minute hand ( ž ), and then the hour hand ( žxx, where xx is HAND HAND...
- Page 28 • Pull the crown into position 2 (the hour and minute hands will “park”). • Select by turning the crown. LIGHT • Press P1 to activate the setting and turn the crown to select (2 seconds), SHORT (4 seconds) or (6 seconds);...
- Page 29 NIGHT MODE • Select the function by turning the crown SETTING • Pull the crown into position 2 (the hour and minute hands will “park”). • Select by turning the crown NIGHT MODE • Press P1 to activate the setting •...
- Page 30 • Confirm the setting by pressing P1 and/or pressing the crown back to neutral position 1. TONE PUSH PUSH+HR PUSH+CH • Select the function by turning the crown. SETTING • Pull the crown into position 2 (the hour and minute hands will “park”). •...
- Page 31 MODE PILOT SPORT • Select the function by turning the crown. SETTING • Pull the crown into position 2 (the hour and minute hands will “park”). • Select by turning the crown. MODE • Press P1 to activate the setting. •...
- Page 32 • Turn the crown to select the language. • Confirm the setting by pressing P1 and/or pressing the crown back to neutral position 1. N.B.: Do not forget to press the crown back once the setting is complete. If for- gotten, the display on the upper screen will indicate and a beep will PUSH CROWN...
- Page 33 A long press on P1 will take you back to the standard hour display ( TIME 9. ALARMS ( The watch has two daily alarms based on local , which can be configured in TIME hours, minutes and the day of the week. a) Setting ( SET AL •...
- Page 34 the setting moving to the following day (example of the display on the upper screen of an alarm set on all five working week days: MTWTF__ N.B.: Pressing P1 reactivates the seven days of the current alarm ( ALLDAyS • Press the crown back to neutral position 1. Upon exiting setting, the alarm set is automatically activated, and is thus in ON mode ( or, if the 12 hour (AM/ PM) display was selected,...
- Page 35 The alarm sounds for 20 seconds, with a 10-second reminder after 2 minutes. The upper screen displays the name of the active alarm by flashing: . This can be deactivated by pressing one of the two pushpieces or on the crown. 10.
- Page 36 b) Measuring a period with intermediate/split times(s) • Pressing P1 starts the chronograph. The upper screen displays the 1/100 of a second, the lower screen the hours, minutes and seconds up to 99 hours, 59 minutes and 59 seconds. • Pressing P2 will display the intermediate time. The upper screen displays SPLIT alternating the 1/100 of a second;...
- Page 37 c) Flyback At any time, a long press on P1 will restart timing from 0 (when the pushpiece is released): this is the FLYBACK function. The seconds hand positions itself directly on the active timing second. d) Tachometer When the chronograph has been stopped after a measured time, a short press on P2 will display the average speed corresponding to the time measured –...
- Page 38 f) Introducing the distance for the tachometer To enable the tachometer to calculate the speed correctly, the distance corresponding to the time recorded must be introduced. This setting is done as follows: • With mode stopped without displaying the speed, pull the crown into CHR ADD position 2;...
- Page 39 • Confirm by pressing P2; the first digit of the distance value will flash. • Select the units, the tens and then the hundreds for the distance by turning the crown, confirming each time by pressing P2. • Press the crown back to neutral position 1. g) Synchronizing the seconds hand If the seconds hand does not position itself exactly on 0 in mode, proceed...
- Page 40 When the function is selected, the seconds hand positions itself automa- LAP TMR tically on 0 and becomes the chronograph hand. With each new recording, the hand goes back to zero and positions itself directly above the second in progress. It returns to its usual function when the lap timer chronograph function is exited.
- Page 41 • Next, successive presses on P2, will display the time of the other laps on the lower screen (indicating the lap displayed on the upper screen: xx). After 10 seconds, the display returns to the last lap. • A long press on P2 will erase all the times ( RESET If one forgets to turn the timing off, when the total time reaches 99 hours, 59 minutes and 59 seconds, timing ceases.
- Page 42 a) Recording a “block time” • Select the function by turning the crown; the seconds hand CHRFLGT automatically positions itself on 0 and becomes the chronograph hand. It returns to its usual function when the “flight time’ chronograph mode is exited.
- Page 43 N.B.: Only one “time block” can be measured at once. N.B.: if the flight recording remains in use for more than 99 hours and 59 minutes, it will stop automatically and the upper screen will display (for overflow). b) Rereading “block times” Once the recording is finished, pressing P2 will automatically and successively dis- play (3 seconds per display): •...
- Page 44 c) Erasing one or more blocks • To erase the active block, press on P2 for a long time when the crown in is neutral position 1 ( RESET • To erase all the blocks at once, proceed as follows: –...
- Page 45 • By turning the crown, select countdown ( ) or countup ( C-DOWN C-UP • Confirm by pressing P2. • Adjust the number of days ( ), hours ( ), minutes ( ) and seconds HOUR MINUTE ) of the countdown or countup by turning the crown, and confirming it SECOND each time by pressing P2.
- Page 46 If the countup ( ) remains on for more than 99 days, 23 hours, 59 minutes and CU RUN 59 seconds, the counter stops and the upper screen displays CU OVF 14. COUNTUP ALARM ( ALCU This function makes it possible to generate an alarm synchronized with the abso- lute time of the countup.
- Page 47 The alarm sounds for 20 seconds, with a 10 second reminder after 2 minutes. The upper screen displays by flashing (alternately with the if different from xxDAy(S) ALCU 0). The alarm can be stopped by pressing one of the two pushpieces or the crown. 15.
- Page 48 During the last 3 minutes, the seconds hand counts the seconds and a beep is emitted every second for the final 10 seconds. At 0, an alarm sounds for 20 seconds, with a 10-second reminder after 1 minute. The upper screen flashes .
- Page 49 FUNCTION SWAP function allows the two timezones TIME and TIME 2 to be inversed on the SWAP digital display and hands, taking a possible date change into consideration. This “exchange” is done by simply pressing P1 when in mode. TIME 2 This is a very useful, practical function, especially for travelers going from one timezone to another, as it means one always has easy access to the local time as indicated by the hands.
- Page 50 charge is less than 30-25%. When the battery reaches this level, the seconds hand advances in 4-second increments. a) “ ” mode DEEP SLEEP mode allows the battery to be disconnected from the watch’s electronic DEEP SLEEP circuits and thus to preserve its performance (capacity). This function is useful if the watch is not used over a relatively long period.
- Page 51 18. LIST OF WORDS IN USER INTERFACE The list below explains all the texts that may appear in the upper screen through the user interface. zone display in 24 hour mode AL1 AM alarm 1 activated in AM mode AL1 OFF alarm 1 deactivated AL1 ON alarm 1 activated...
- Page 52 BATTERy battery mode BEST XX best lap (in LAP mode) BLOCKXX block number BOTH buzzer and vibrate for the alarms BUZZER audible alarm BXX ADD block xx stopped BXX LDG block xx landing time BXX OVF block xx overflow BXX RUN block xx running BXXDATE block date xx...
- Page 53 DD/MM date format day/month DISP ON display always on DISP OFF display always off DIST distance covered for speed calculation EMPTy memory empty FLyBACK chronograph flyback function ž HAND set hand to xx according to the indication in the digital display (synchronization) week format according to ISO ISO-2 week format according to ISO modified...
- Page 54 overflow (exceeded capacity) P2 TO ERASE in CHRFLGT setting mode, press on P2 to erase all blocks PILOT pilot mode (all functions) display zones in 12 hour post meridiem mode PUSH beep signal on pushpiece PUSH+CH beep signal on pushpiece and “start time now” PUSH+HR beep signal on pushpiece and time signal PUSH CROWN...
- Page 55 SPORT sport mode (deactivation of certain functions) STOP XX stop lap xx SWAP inversion of TIME and TIME 2 zones SyNCHRO synchronization of hands T2 AM second zone in AM mode T2 PM second zone in PM mode Thursday TILT angle sensor TIME main timezone...
- Page 56 ±0.07 seconds, corresponding to an annual precision of ±25 seconds. The variation in rate of the SuperQuartz™ caliber fitted in your Breitling watch far and above exceeds these demands, achieving a rate of ±15 seconds a year.
- Page 57 BEZEL COMPASS SCALE By indicating the four points of the compass and the courses, this bezel fulfils several navigational functions. 1. Course memory This function enables the pilot to “memorize” the course to be followed by placing the latter opposite the hour-marker at 12 o’clock. 2.
- Page 58 Like any precision measurement instrument, your watch must be regularly maintained in order to function at its highest level of potential: the frequency of this operation varies according to actual use. Breitling or your authorized retailer will be happy to handle the procedure.
- Page 59 In particular, water, cosmetics and perspiration accelerate the aging process. A metal or synthetic Breitling bracelet/strap is thus better suited to activities involving frequent contact with water or humidity.
- Page 60 Breitling metal cases and bracelets are made from the finest alloys and guarantee sturdiness and wearer comfort. Regular cleaning by rinsing and brushing in clear water will keep your watch shiny. This operation is strongly recommended after each immersion in salty or chlorinated water. For watches fitted with a leather strap, proceed in the same manner, while avoiding getting the strap wet.
- Page 70 Intensity control...
- Page 71 Intensity 1 Intensity 2 Intensity 3 Intensity 4 Daily light use (minutes)
- Page 105 30-25%...
- Page 116 3bars/30m/100FT 5bars/50m/165FT 10bars/100m/330FT 50bars/500m/1650ft+...
- Page 126 Intensity control...
- Page 127 Intensity 1 Intensity 2 Intensity 3 Intensity 4 Daily light use (minutes)
- Page 161 30-25%...
- Page 172 3bars/30m/100FT 5bars/50m/165FT 10bars/100m/330FT 50bars/500m/1650ft+...
- Page 174 E/R/J...
- Page 175 I N S T R U M E N T S F O R P R O F E S S I O N A L S...
Need help?
Do you have a question about the COCKPIT B50 and is the answer not in the manual?
Questions and answers