
Related Manuals for Dacor DHD U990I/DA Series


Summary of Contents for Dacor DHD U990I/DA Series
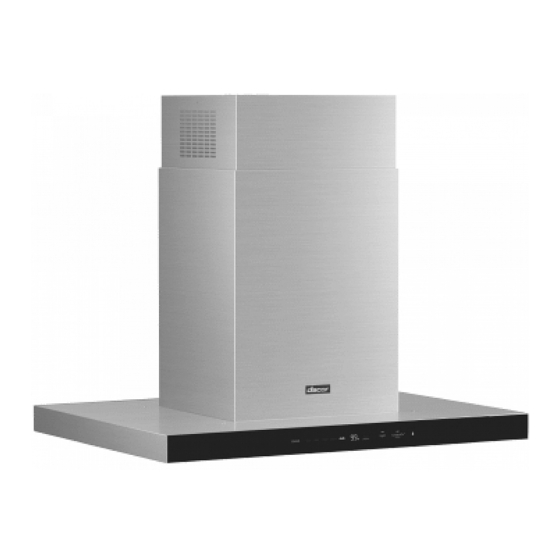
- Page 1 Installation Instructions Instructions d’Installation Instrucciones para instalación Chimney Island Hood Hotte en îlot Campana de isla DHD**U990I*/DA LIB0180483...
-
Page 2: Table Of Contents
Tools and parts Dimetions and clearances Accessories - Sold Separately Installation Installation instructions Ceiling support structures Installing the single fan hood Electrical connection Install the double fan hood Electrical connection Duct cover installation Completing the installation Attach Dacor badge ENGLISH... -
Page 3: Before You Begin
Customer Service To resolve questions and installation issues, contact your Dacor dealer or Dacor customer service. Before calling, have the hood’s model and serial number available. (See the data label inside the hood above the filters on the chassis’ rear wall). -
Page 4: Important Safety Instructions
Important Safety Instructions APPROVED FOR RESIDENTIAL APPLIANCES FOR RESIDENTIAL USE ONLY READ AND SAVE THESE INSTRUCTIONS PLEASE READ ENTIRE INSTALLATION GUIDE BEFORE PROCEEDING. INSTALLATION MUST COMPLY WITH ALL LOCAL CODES. IMPORTANT: Save these instructions for the local electrical inspector’s use. Please leave these instructions with this unit for the owner. - Page 5 Important Safety Instructions This equipment generates, uses, and can radiate radio frequency energy and, if not installed and used in accordance with the instructions, may cause harmful interference to radio communications. However, there is no guarantee that interference will not occur in a particular installation. If this equipment does cause harmful interference to radio or television reception, which can be determined by turning the equipment off and on, the user is encouraged to try to correct the interference by one or more of the following measures: •...
- Page 6 Important Safety Instructions CAUTION To reduce risk of fi re and to properly exhaust air, be sure to duct air outside - do not vent exhaust air into spaces within walls or ceilings, attics or into crawl spaces, or garages. WARNING TO REDUCE THE RISK OF FIRE, USE ONLY METAL DUCTWORK WARNING...
-
Page 7: Installation Requirements
Installation Requirements Electrical requirements IMPORTANT Connect a section of solid copper wire to the pigtail Observe all governing codes and ordinances. leads. It is the customer’s responsibility: 2. Connect the aluminum wiring to the added section of copper wire using special connectors and/or •... -
Page 8: Venting Requirements
Installation Requirements Venting requirements • Vent system must terminate outdoors. • Use clamps to seal all joints in the vent system. • Do not terminate the vent system in an attic or other • The vent system must have a damper. If the roof enclosed area. -
Page 9: Ducting Options
Roof Venting Wall Venting Closely follow the instructions set out in this manual. Dacor is not responsible for any eventual inconveniences, damages or fires caused by not complying with the instructions in this manual. Preparation Do not cut a joist or stud unless absolutely necessary. -
Page 10: What Is In The Box
Installation Requirements What is in the box Hood assembly (1) Duct cover extension (2) 10 " Transition (1) Horizontal supports (2) 36" single fan 36" single fan 36" single fan 36" single fan Transition adapter (1) Upper vertical supports (4) 36"... -
Page 11: Tools And Parts
Installation Requirements Tools and parts Parts not supplied Remove the packaging. Tools/materials required CAUTION • Level Remove the carton carefully. Wear gloves to protect against sharp edges. • Drill with ³/₁₆’’ (4.76 mm) drill bit • Pencil WARNING • Wire stripper or utility knife Remove the protective film before putting into operation. -
Page 12: Dimetions And Clearances
Installation Requirements Dimetions and clearances 36" 42" 54" 36” 42” 54" (91.2 cm) (106.5 cm) (136.7 cm) 27¹⁄₄” (69.3 cm) max. 52 ¹⁄₂” (133.3 cm) min. 32 ¹⁄₄” (82 cm) 10” (25.4 cm) 14¹¹⁄₁₆” (37.3 cm) 16¹⁄₂” (42 cm) 2³⁄₈” (6 cm) Accessories - Sold Separately DHD36U990IS/DA DHD36U990IM/DA... -
Page 13: Ceiling Support Structures
Installation Ceiling support structures • This vent hood is heavy. Adequate structure and support must be provided in all types of installations. • At the hood location, install 2”x 4” cross framing between ceiling joists as shown (2”x 4” are required to support the weight of the hood). -
Page 14: Installing The Single Fan Hood
Installation Installing the single fan hood Place the template in the ceiling considering the 4. Fix the upper horizontal support to the ceiling with instructions for ceiling support structures. 4 - 5 x 45 mm screws. Use 8 x 40 mm anchors if necessary. NOTE Always consider the front of hood when placing the template on the ceiling. - Page 15 Installation Install the 4 vertical supports with 16 - 4.2 x 8 mm 9. Using 2 or more people, lift the hood assembly under screws. the structure. A. 4 - Upper vertical supports B. 16 - 4.2 x 8 mm screws A.
-
Page 16: Electrical Connection
Installation 11. Install the 4 vertical supports with 16 - 4.2 x 8 mm 12. Remove the 2 mounting screws from the structure. screws. Check everything is tightly screwed. A. 2 - Mounting screws A. Lower vertical supports B. 16 - 4.2 x 8 mm screws Electrical connection 4. -
Page 17: Install The Double Fan Hood
Installation Connect green (or bare) ground wire from home WARNING power supply to yellow-green ground wire (E) in ELECTRICAL SHOCK HAZARD. terminal box using UL listed wire connectors. WARNING 8. Tighten strain relief screw. ELECTRICALLY GROUND FAN. 9. Install terminal box cover. CONNECT GROUND WIRE TO GREEN AND YELLOW 10. - Page 18 Installation 5. Install the 4 vertical supports over the horizontal Attach the blower housing to the vertical supports support with 16 - 4.2 x 8 mm screws. with 2 mounting screws. A. Horizontal support B. Vertical supports C. 16 - 4.2 x 8 mm screws 6.
- Page 19 Installation 9. Remove the 2 mounting screws from the structure. 11. Secure the hood base to the blower housing with 4 - 4.2 x 8 mm screws. A. Hood base B. Blower housing A. 2 - Mounting screws C. 4 - 4.2 x 8 mm screws 10.
-
Page 20: Electrical Connection
Installation Electrical connection 4. Run home power supply cable through strain relief, WARNING into terminal box. ELECTRICAL SHOCK HAZARD. WARNING A. Home power supply DISCONNECT POWER BEFORE SERVICING. cable B. UL listed or CSA REPLACE ALL PARTS AND PANELS BEFORE OPERATING. approved strain relief C. -
Page 21: Duct Cover Installation
Installation Duct cover installation • Attach the upper duct covers to the duct cover • Place lower duct covers. extensions using 2 - 3.5 x 6.5 mm screws on the screw slots (B) using the Torx 10 adapter. NOTE The slotted holes in the upper duct covers will be visible when assembled, and can be hidden down inside the lower duct covers. -
Page 22: Completing The Installation
Installation Completing the installation Place the filters and check the operation of the hood. • To get the most efficient use from your new hood, read the “Use and Care” manual. Grasp the filter handles with both hands and then place the front edge of the filter into the hood. -
Page 23: Attach Dacor Badge
Installation Attach Dacor badge Use the template on this page for alignment of the badge. Cut out the template and tape it onto the hood front surace and verify the template is aligned with the right side of the hood and within the upper and lower edge of the front surface. - Page 24 Structures de support des plafonds Installation de la hotte à ventilateur unique Raccordement électrique pour hotte Installer la hotte à double ventilateur Raccordement électrique de la hotte Installation de la couverture du conduit Terminer l'installation Fixez le badge de la plaque Dacor FRANÇAIS...
-
Page 25: Avant De Commencer
Service à la clientèle Pour résoudre les questions et les problèmes d'installation, contactez votre revendeur Dacor ou le service client Dacor. Avant d'appeler, munissez-vous du modèle et du numéro de série de la hotte. (Voir l'étiquette de données à l'intérieur de la hotte, au-dessus des filtres, sur la paroi arrière du châssis). -
Page 26: Instructions De Securité Importantes
Instructions de Securité Importantes APPROUVÉ POUR LES APPAREILS RÉSIDENTIELS POUR USAGE RÉSIDENTIEL UNIQUEMENT LISEZ ET CONSERVEZ CES INSTRUCTIONS VEUILLEZ LIRE LE GUIDE D'INSTALLATION EN ENTIER AVANT DE PROCÉDER. L'INSTALLATION DOIT ÊTRE CONFORME À TOUS LES CODES LOCAUX. Conservez ces instructions pour l'usage de l'inspecteur électrique IMPORTANT: local. - Page 27 Instructions de Sécurité Importantes Cet équipement génère, utilise et peut émettre une énergie de fréquence radio et, s'il n'est pas installé et utilisé conformément aux instructions, il peut causer des interférences nuisibles aux communications radio. Cependant, il n'y a aucune garantie que des interférences ne se produiront pas dans une installation particulière. Si cet équipement provoque des interférences nuisibles à...
- Page 28 Instructions de Sécurité Importantes ATTENTION Pour une utilisation générale de ventilation uniquement. Ne pas utiliser pour évacuer des matières et des vapeurs dangereuses ou explosives. ATTENTION Pour réduire le risque d'incendie et pour évacuer correctement l'air, veillez à faire passer l'air à l'extérieur - ne faites pas passer l'air évacué...
-
Page 29: Exigences D'installation
Exigences d'installation Exigences électriques IMPORTANT Connectez une section de fil de cuivre solide aux fils Respectez tous les codes et ordonnances en vigueur. de la queue de cochon. Il est de la responsabilité du client: 2. Connectez le câblage en aluminium à la section de fil de cuivre ajoutée à... -
Page 30: Exigences De Ventilation
Exigences d'installation Exigences de ventilation • Le système de ventilation doit se terminer à - N'utilisez pas plus de trois coudes à 90°. l'extérieur. - Assurez-vous qu'il y a un minimum de 76,2 cm (30 • Ne terminez pas le système de ventilation dans un po) de conduit droit entre les coudes si plus d'un grenier ou un autre endroit fermé. -
Page 31: Options De Conduits
Ventilation par le toit Ventilation par le mur Suivez scrupuleusement les instructions données dans ce manuel. Dacor n'est pas responsable des éventuels désagréments, dommages ou incendies causés par le non-respect des instructions de ce manuel. Préparation Ne coupez pas une solive ou un montant à... -
Page 32: Ce Que Contient La Boîte
Exigences d'installation Ce que contient la boîte Montage de la hotte (1) Extension du couvercle 10 " Transition (1) Supports horizontaux (2) 36" ventilateur unique du conduit (2) 36" ventilateur unique 36" ventilateur unique 36" ventilateur unique Adaptateur de transition Supports verticaux supérieurs (4) 36"... -
Page 33: Outils Et Pièces
Exigences d'installation Outils et pièces Retirer l'emballage. Pièces non fournies ATTENTION Outils/Matériaux requis Retirez le carton avec précaution. Portez des gants pour • Niveau vous protéger des bords tranchants. • Percez avec une mèche de ³/₁₆'' (4,76 mm) • Crayon AVERTISSEMENT •... -
Page 34: Dimentions Et Dégagements
Exigences d'installation Dimentions et dégagements 36" 42" 54" 36” 42” 54" (91.2 cm) (106.5 cm) (136.7 cm) 27¹⁄₄” (69.3 cm) max. 52 ¹⁄₂” (133.3 cm) min. 32 ¹⁄₄” (82 cm) 10” (25.4 cm) 14¹¹⁄₁₆” (37.3 cm) 16¹⁄₂” (42 cm) 2³⁄₈” (6 cm) Accessoires - Vendus séparément DHD36U990IS/DA DHD36U990IM/DA... -
Page 35: Structures De Support Des Plafonds
Installation Structures de support des plafonds • Cette hotte est lourde. Une structure et un support adéquats doivent être fournis dans tous les types d'installation. • À l'emplacement de la hotte, installez une charpente transversale de 2 po x 4 po entre les solives du plafond, tel qu'illustré... -
Page 36: Installation De La Hotte À Ventilateur Unique
Installation Installation de la hotte à ventilateur unique Placez le gabarit dans le plafond en tenant compte 4. Fixez le support horizontal supérieur au plafond à des instructions relatives aux structures de support l'aide de 4 - 5 vis de 45 mm. Utilisez des chevilles de 8 du plafond. - Page 37 Installation Installez les 4 supports verticaux avec 16 vis de 4,2 x 9. À l'aide de 2 personnes ou plus, soulevez l'ensemble 8 mm. de la hotte sous la structure. A. 4 - Supports verticaux supérieurs B. 16 - 4.2 x 8 mm vis A.
-
Page 38: Raccordement Électrique Pour Hotte
Installation 11. Installez les 4 supports verticaux avec 16 vis de 4,2 x 8 12. Retirez les 2 vis de fixation de la structure. mm. Vérifiez que tout est bien vissé. A. 2 - Vis de montage A. Supports verticaux inférieurs B. -
Page 39: Installer La Hotte À Double Ventilateur
Installation Connectez le fil de terre vert (ou nu) de l'alimentation AVERTISSEMENT électrique de la maison au fil de terre jaune-vert (E) RISQUE DE CHOC ÉLECTRIQUE. de la boîte à bornes à l'aide de connecteurs de fils AVERTISSEMENT homologués UL. METTEZ LE VENTILATEUR À... - Page 40 Installation 5. Installez les 4 supports verticaux sur le support Fixez le boîtier du ventilateur aux supports verticaux à horizontal avec 16 vis de 4,2 x 8 mm. l'aide de 2 vis de montage. A. Supports horizontaux B. Supports verticaux C.
- Page 41 Installation 9. Retirez les 2 vis de fixation de la structure. 11. Fixez le tiroir de la hotte au boîtier du ventilateur à l'aide de 4 vis de 4,2 x 8 mm. A. Tiroir de la hotte A. 2 - Vis de montage B.
-
Page 42: Raccordement Électrique De La Hotte
Installation Raccordement électrique de la hotte 4. Faites passer le câble d'alimentation domestique AVERTISSEMENT dans la boîte à bornes en le faisant passer par le RISQUE DE CHOC ÉLECTRIQUE dispositif anti-traction. AVERTISSEMENT DÉBRANCHER L'ALIMENTATION AVANT DE PROCÉDER À A. Câble d'alimentation L'ENTRETIEN. -
Page 43: Installation De La Couverture Du Conduit
Installation Installation de la couverture du conduit • Fixez les couvercles de gaine supérieurs aux • Placez les couvercles des gaines inférieures. extensions de couvercle de gaine à l'aide de 2 vis 3,5 x 6,5 mm sur les fentes de vis supérieures (B) en utilisant l'adaptateur Torx 10. -
Page 44: Terminer L'installation
Installation Terminer l'installation Placez les filtres et vérifiez le fonctionnement de la hotte. • Pour tirer le meilleur parti de votre nouvelle hotte de cuisinière, lisez le manuel "Utilisation et entretien". Saisissez les poignées du filtre à deux mains, puis placez le bord avant du filtre dans la hotte. -
Page 45: Fixez Le Badge De La Plaque Dacor
Installation Fixez le badge de la plaque Dacor Utilisez le gabarit sur cette page pour l'alignement de la plaque signalétique. Découpez le gabarit et collez-le sur la surface avant du couvercle du conduit, aligné avec la partie inférieure du capot. Vérifiez que le gabarit est aligné... - Page 46 Instalación de la campana extractora de un solo ventilador Conexión eléctrica para campana Instalar la campana extractora de doble ventilador Conexión eléctrica para la campana Instalación de la cubierta del conducto Completar la instalación Coloque la placa de Dacor ESPAÑOL...
-
Page 47: Antes De Empezar
Para resolver dudas y problemas de instalación, póngase en contacto con su distribuidor Dacor o con el servicio de atención al cliente de Dacor. Antes de llamar, tenga a mano el modelo y el número de serie de la campana. (Consulte la etiqueta de datos que se encuentra en el interior de la campana, encima de los filtros, en la pared posterior del chasis). -
Page 48: Instrucciones Importantes De Seguridad
Instrucciones Importantes de Seguridad APROBADO PARA APARATOS RESIDENCIALES SÓLO PARA USO RESIDENCIAL LEA Y GUARDE ESTAS INSTRUCCIONES LEA TODA LA GUÍA DE INSTALACIÓN ANTES DE PROCEDER. LA INSTALACIÓN DEBE CUMPLIR CON TODOS LOS CÓDIGOS LOCALES. IMPORTANTE: Guarde estas instrucciones para el uso del inspector eléctrico local. INSTALADOR: Por favor, deje estas instrucciones con esta unidad para el propietario. - Page 49 Instrucciones Importantes de Seguridad Este equipo genera, utiliza y puede irradiar energía de radiofrecuencia y, si no se instala y utiliza de acuerdo con las instrucciones, puede causar interferencias perjudiciales en las comunicaciones de radio. Sin embargo, no se puede garantizar que no se produzcan interferencias en una instalación concreta. Si este equipo causa interferencias perjudiciales en la recepción de radio o televisión, lo cual puede determinarse apagando y encendiendo el equipo, se recomienda al usuario que intente corregir las interferencias mediante una o varias de las siguientes medidas:Reorienting or relocating the receiving antenna...
- Page 50 Instrucciones Importantes de Seguridad Los ventiladores con conductos siempre deben ventilarse al exterior. PRECAUCIÓN Sólo para uso general de ventilación. No utilizar para extraer materiales y vapores peligrosos o explosivos. PRECAUCIÓN Para reducir el riesgo de incendio y evacuar correctamente el aire, asegúrese de canalizar el aire hacia el exterior: no ventile el aire de salida en espacios dentro de las paredes o techos, áticos o en espacios de arrastre, o garajes.
-
Page 51: Requisitos De Instalación
Requisitos de instalación Requisitos eléctricos IMPORTANTE Conecte una sección de cable de cobre sólido a los Respete todos los códigos y ordenanzas vigentes. cables flexibles. Es responsabilidad del cliente: 2. Conecte el cableado de aluminio a la sección añadida de cable de cobre utilizando conectores y/o •... -
Page 52: Requisitos De Ventilación
Requisitos de instalación Requisitos de ventilación • El sistema de ventilación debe terminar en el exterior. - No utilice más de tres codos de 90°. • No termine el sistema de ventilación en un ático u - Asegúrese de que haya un mínimo de 30" (76.2 cm) otra área cerrada. -
Page 53: Opciones De Conductos
10" (25.4 cm) para la descarga de los humos al exterior. Ventilación de techo Ventilación de pared Siga estrictamente las instrucciones establecidas en este manual. Dacor no se hace responsable de eventuales inconvenientes, daños o incendios causados por el incumplimiento de las instrucciones de este manual. Preparación No corte una viga o montante a menos que sea absolutamente necesario. -
Page 54: Qué Hay En La Caja
Requisitos de instalación Qué hay en la caja Montaje de la campana Exensión para cubierta 10 " Transición (1) Soportes horizontales (2) de ductos (2) 36" ventilador individual 36" ventilador individual 36" ventilador individual 36" ventilador individual Adaptador de la Soportes verticales transición (1) superiores(4) -
Page 55: Herramientas Y Piezas
Requisitos de instalación Herramientas y piezas Cómo quitar el embalaje. Piezas no suministradas PRECAUCIÓN Herramientas/materiales necesarios Retire el cartón con cuidado, use guantes para protegerse • Nivel de los bordes afilados. • Taladro con ³/₁₆' (4,76 mm) de broca • Lápiz ADVERTENCIA •... -
Page 56: Dimensiones Y Espacios Libres
Requisitos de instalación Dimensiones y espacios libres 36" 42" 54" 36” 42” 54" (91.2 cm) (106.5 cm) (136.7 cm) 27¹⁄₄” (69.3 cm) max. 52 ¹⁄₂” (133.3 cm) min. 32 ¹⁄₄” (82 cm) 10” (25.4 cm) 14¹¹⁄₁₆” (37.3 cm) 16¹⁄₂” (42 cm) 2³⁄₈”... -
Page 57: Estructuras De Soporte Del Techo
Instalación Estructuras de soporte del techo • Esta campana de ventilación es pesada. Se debe proporcionar una estructura y un soporte adecuados en todos los tipos de instalaciones. • En la ubicación de la campana, instale un marco transversal de 2 "x 4" entre las vigas del techo como se muestra (se requieren 2 "x 4"... -
Page 58: Instalación De La Campana Extractora De Un Solo Ventilador
Instalación Instalación de la campana extractora de un solo ventilador Coloque la plantilla en el techo teniendo en cuenta 4. Fije el soporte horizontal superior al techo con las instrucciones para las estructuras de soporte del tornillos de 4 - 5 x 45 mm. Utilice anclajes de 8 x 40 techo. - Page 59 Instalación Instale los 4 soportes verticales con 16 tornillos de 4,2 9. Con la ayuda de 2 o más personas, levante el conjunto x 8 mm. de la campana extractora por debajo de la estructura. A. 4 - Soportes verticales superiores A.
-
Page 60: Conexión Eléctrica Para Campana
Instalación 11. Instale los 4 soportes verticales con 16 tornillos de 4,2 12. Retire los 2 tornillos de montaje de la estructura. x 8 mm. Compruebe que todo está bien atornillado. A. 2 - Tornillos de montaje A. Soportes verticales inferiores B. -
Page 61: Instalar La Campana Extractora De Doble Ventilador
Instalación Conecte el cable de tierra verde (o desnudo) de la ADVERTENCIA fuente de alimentación doméstica al cable de tierra PELIGRO DE DESCARGA ELÉCTRICA. amarillo-verde (E) en la caja de terminales utilizando ADVERTENCIA conectores de cable homologados por UL. CONECTE EL VENTILADOR A TIERRA ELÉCTRICAMENTE. 8. - Page 62 Instalación 5. Instale los 4 soportes verticales sobre el soporte Fije la carcasa del soplador a los soportes verticales horizontal con 16 tornillos de 4,2 x 8 mm. con 2 tornillos de montaje. A. Soportes horizontales B. Soportes verticales C. 16 - tornillos de 4,2 x 8 mm 6.
- Page 63 Instalación 9. Retire los 2 tornillos de montaje de la estructura. 11. Fije la base de la campana a la carcasa del soplador con 4 tornillos de 4,2 x 8 mm. A. 2 - Tornillos de montaje A. Base de la campana B.
-
Page 64: Conexión Eléctrica Para La Campana
Instalación Conexión eléctrica para la campana 4. Pase el cable de alimentación de la casa a través del ADVERTENCIA alivio de tensión, en la caja de terminales. PELIGRO DE DESCARGA ELÉCTRICA. ADVERTENCIA A. Cable de alimentación DESCONECTE LA ALIMENTACIÓN ANTES DE REALIZAR EL para el hogar MANTENIMIENTO. -
Page 65: Instalación De La Cubierta Del Conducto
Instalación Instalación de la cubierta del conducto • Fije las cubiertas del conducto superior a las • Colocar las tapas de los conductos inferiores. extensiones de la cubierta del conducto utilizando 2 - tornillos de 3,5 x 6,5 mm en las ranuras de los tornillos superiores (B) utilizando el adaptador Torx NOTA Los agujeros ranurados en las cubiertas de los... -
Page 66: Completar La Instalación
Instalación Completar la instalación Coloque los filtros y compruebe el funcionamiento de la • Para obtener un uso más eficiente de su nueva campana. campana extractora, lea el manual de "Uso y Cuidado". Agarre las asas del filtro con ambas manos y luego coloque el borde delantero del filtro en la campana. -
Page 67: Coloque La Placa De Dacor
Coloque la placa de Dacor Utilice la plantilla de esta página para alinear la placa Dacor. Recorte la plantilla y péguela en la superficie frontal de la cubierta del conducto, alineada con la parte inferior de la campana y verifique que la plantilla esté... - Page 68 Contact Dacor If you have any questions or comments relating to Dacor appliances, please contact the Dacor Customer Service Center. Country Contact Center Web Site U.S.A. 1-833-353-5483 www.dacor.com CANADA 1-844-509-4659 www.dacor.com...