Advertisement
Table of Contents
Warning
1. When assembling and using this product, basic safety precautions should always be followed to reduce
the risk of personal injury and damage to equipment. Please read all instructions before assembly and
use.
2. Some parts may contain sharp edges, wear protective gloves if necessary. At least four or more people are
recommended for safe assembly.
3. Keep all children and pets away from assembly area.
4. Begin assembly not less than 6 feet from any obstruction such as fence, garage, house, overhanging
branches, laundry line or electrical wires.
5. Install on level ground. This gazebo cannot be permanently staked or attached to concrete floor or platform.
This gazebo is intended for decorative and sunshade purposes only and is not meant to withstand
inclement weather including high winds, rain and snow. Gazebo fabric is water resistant, not water proof
and may leak during exposure to precipitation.
6. Check all nuts and bolts for tightness before and during usage.
7. Keep all flame and heat sources away from this gazebo fabric. This gazebo is made with fabric that meets
CPAI-84 specifications for flame resistance. It is not fire proof. The fabric will burn if left in continuous
contact with any flame source. The application of any foreign substance to the gazebo fabric may render
the flame-resistant properties ineffective.
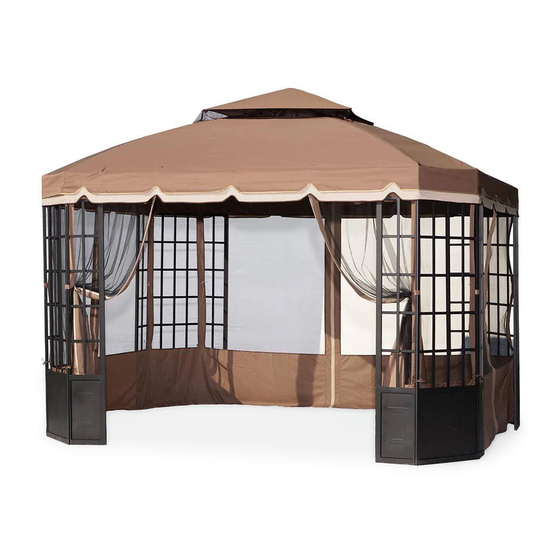
Assembly Instruction
10'x12' Bay Window Gazebo
L-GZ120PST-3
1
Advertisement
Table of Contents

Subscribe to Our Youtube Channel
Related Manuals for Sunjoy L-GZ120PST-3


Summary of Contents for Sunjoy L-GZ120PST-3
- Page 1 Assembly Instruction 10’x12’ Bay Window Gazebo L-GZ120PST-3 Warning 1. When assembling and using this product, basic safety precautions should always be followed to reduce the risk of personal injury and damage to equipment. Please read all instructions before assembly and use.
-
Page 2: Parts List
Parts List Big screen 4 pieces Left Screen 4 pieces Right Screen 4 pieces Long Bar 2 pieces Short Bar 2 pieces Long Mosquito Netting Guider 2 pieces Short Mosquito Netting 4 pieces Guider Larger Roof Connector 1 piece Top Roof Supporter 4 pieces Corner Supporting Bar-Long 4 pieces... -
Page 3: Hardware Pack
Hardware Pack M6×25mm Screw 16 pieces M6×20mm Screw 40 pieces M6 Washer 56 pieces Stake 8 pieces Plastic ring for mosquito netting 48 pieces Plastic Plug (10pcs preassembled) 10 pieces M6 Wrench 1 piece Spare Hardware Pack M6×25mm Screw 2 pieces M6×20mm Screw 4 pieces M6 Washer... - Page 4 Step #1: Bottom Frame Set-up Before assembly, please do following setup first: Attach the Plastic Rings for Mosquito Netting (EE) to the Netting Guiders (D1&D2) and the Big Screen (A) --- 8pcs EE onto D1,5pcs EE onto D2, and 3pcs EE onto A. Use Plastic Plug (FF) to plug up the mosquito netting guider to prevent the plastic rings gliding out –...
- Page 5 Step #2: Top Frame Set-up Fig. 2-1: Screw Center Hook (J) into the Larger Roof Connector (E) and secure them properly. Fig. 2-2: Connect Top Roof Supporter (F) with Larger Roof Connector (E). Attention here: the end of Label “→F” affixed on Larger Roof Connector (E) is used to assemble F. Fig.
- Page 6 Step #3: Put on Canopy and Mosquito Netting Fig. 3-1: Put Larger Canopy (K1) on to the top frame. Don’t unfold it completely at this time. Fig. 3-2: Put on Top Canopy (K2) to Top Roof Supporter (F); tie the netting of Top canopy together with the straps on Larger Canopy (K1).
-
Page 7: Care And Maintenance
Please do not return this product to the store. For technical assistance on assembly or replacement parts, call Sunjoy Industries at (866) 578-6569 from 8:30 AM to 5:30 PM EST Monday to Friday; or For expedited replacement parts order, fax the attached completed customer service replacement form to 740 283 3549; or email sears@sunjoygroup.com...
Need help?
Do you have a question about the L-GZ120PST-3 and is the answer not in the manual?
Questions and answers