Table of Contents
Advertisement
Quick Links
Congratulations – You've purchased a fine item from Target.
Our clear, easy to follow; step by step instructions will guide you through the project from start to finish. Feel confident
that this will be a fun and rewarding project. The final product will be a quality piece that will go together smoothly and
give years of enjoyment.
All you will need is a hammer, and a ladder at least 8.2 ft. high (or 2.5m).
If you have any questions, just call 866-578-6569. Please refer to the DPCI code above when calling.
WARNING:
•
THIS UNIT IS HEAVY!
•
Do not assemble this item alone for safety. Two persons are necessary.
Some parts may contain sharp edges – especially as noted in manual. Wear protective gloves if
•
necessary.
•
Do not play with the construction of the arbor. Children and pets should be supervised when they are in
area of the arbor. Do not allow the gate or the side panel to collide hard to avoid danger.
•
Read all instructions before assembly and using this product.
•
Select ideal location. Set out all parts on a clear and level surface prior to assembly. Ideally, the gazebo frame
should be set up in its desired location to avoid moving it after assembly.
•
Use caution.
During all the process of assembling, especially when lifting heavy or large parts, pay attention to safety.
•
Tools and Assistance. Ladder and wrench are self-provided. Whenever possible, assistance is preferred.
•
Check for parts available.
•
Check for damaged parts. Before assembling your gazebo, check for damaged parts, any part that appear
damaged should be carefully checked to determine that it will be operated properly and perform its intended
function. Any part that is damaged should be properly repaired or replaced by a qualified technician.
•
Refer to assembly diagram. During assembly, it will be helpful to referring to the assembly diagram.
•
Keep children away. Children must never be allowed in the work area. Do not let them handle parts and tools.
No people will be permitted to enter into work area except who is working.
•
Caution for fabric: Keep all flame and heat sources away from this gazebo fabric. This gazebo is made with
fabric that meets CPAI-84 specifications for flame resistance. It is not fire proof. The fabric will burn with
continuous contact with any flame source.
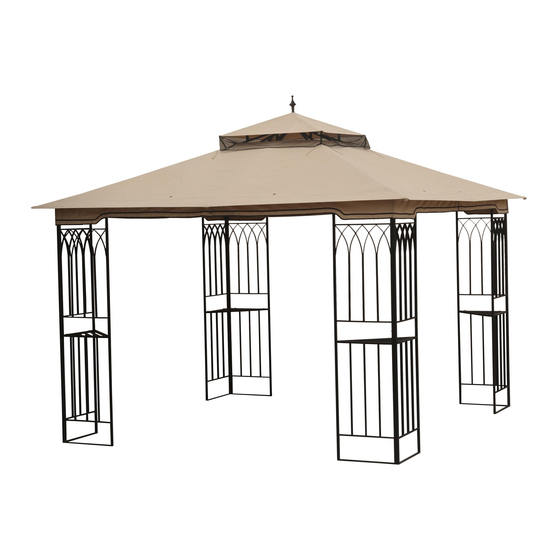
Tivoli Gazebo
Style # L-GZ105PST-4
DPCI# 009-05-0182
Before assembling your gazebo, be sure that you have all parts described in the Parts List.
1
Step #1: Set up panels;
Step #2&3: Set up the top frame;
Step #4: Put on top canopy,
mosquito netting and fix the
whole product.
Product Size identification: 10'L x 10'W
Recommended persons for safe assembly: 3.
Advertisement
Table of Contents

Related Manuals for Sunjoy Tivoli L-GZ105PST-4


Summary of Contents for Sunjoy Tivoli L-GZ105PST-4
- Page 1 Tivoli Gazebo Style # L-GZ105PST-4 DPCI# 009-05-0182 Step #1: Set up panels; Step #2&3: Set up the top frame; Step #4: Put on top canopy, mosquito netting and fix the whole product. Product Size identification: 10’L x 10’W Recommended persons for safe assembly: 3. Congratulations –...
- Page 2 Parts List Part Description Part # Qty. Part Image Large Upper panel Large Bottom Panel Smaller Upper panel 、 Smaller Bottom Panel Long Bar Short Bar Corner Connector Top Bar 1 Top Bar 2 Panel Connector 1 Panel Connector 2 Top Center Connector Canopy Mosquito Netting...
- Page 3 For ease of identification, all hardware is Hardware Identification organized into separate hardware packs as below. Actual size is not shown below. Hardware Pack 1 M5x30 Bolt 16 pcs M5 Flat Washer 32 pcs M5 Wrench 1 pc M5x15 Bolt 16 pcs Hardware Pack 2 M5x15 Bolt...
- Page 4 Step #1 Panels (hardware pack 1) M5x30 Bolt 16 pcs M5 Flat Washer 32 pcs M5x15 Bolt 16pcs M5 Wrench 1 pc Fig. 2-1 CC BB AA BB Fig. 1 Fig. 2-2 1. Use panel connector (J) (Note: surface with thread should face the hole) to assemble large upper panel A and large bottom panel B.
- Page 5 Step #2 Top Frame - 1 No Hardware needed for this step Fig. 3 Fig. 4 Fig. 3 Fig. 4 A(C) 3. Insert one end of two short bar (F) into long bar (E), as in Fig. 3 4. Insert the other end of the short bar (F) into the panel (A) and (c), as in Fig. 4...
- Page 6 Step #3 Top Frame – 2 (Hardware pack 2) M5x15Bolt 8 pcs M5 Flat Washer 8 pcs Fig. 8 Fig. 5 Fig. 7 Fig. 6 Fig. 6 5. Insert top bar 2 (I) into top bar 1(H) and use bolt (CC) and flat washer (BB) to fasten them, as in Fig.
- Page 7 Step #4 Canopy, Mosquito Netting, and Stakes (Hardware pack 2) ¢4.5 x180 Peg 16 pcs Plastic Ring 40pcs Fig. 9 Fig. 10 Fig. 9 Fig.10 9. Put on canopy (M). And then use Plastic Ring (EE) to hang on mosquito netting (N) onto the hanging bar, as shown in Fig.
- Page 8 Limited Warranty Sunjoy Industries warrants to the original purchaser that this item is free from defects in workmanship and materials for a period of one (1) year from the date of purchase, provided the item was factory-sealed at the time of purchase and is maintained with care and used only for personal, residential purposes.
Need help?
Do you have a question about the Tivoli L-GZ105PST-4 and is the answer not in the manual?
Questions and answers