Table of Contents
Advertisement
Quick Links
TRUE
GDM-23-HST02-HC~TSL01
TRUE MANUFACTURING CO., INC.
2001 East Terra Lane • O'Fallon, Missouri 63366-4434
(636) 240-2400 • FAX (636)-272-2408
International FAX (636)272-7546 • (800)-325-6152
Parts Department (800)-424- TRUE
Parts Department FAX (636)-272-9471
North America – Canada
and Caribbean
Warranty Phone: +1 855 878 9277
Warranty Fax: +1 636 980 8510
Technical Phone: +1 855 372 1368
Warranty Email:
warrantyinquiries@truemfg.com
Technical Email:
service@truemfg.com
7:00 – 6:00 CST Monday – Friday.
8:00 – 12:00 Saturday.
TEC_TM_158 | REV. A | EN
MANUFACTURING CO., INC.
Mexico
Phone: +52 555 804 6343/44
service-mexicocity@truemfg.com
9:00 am – 5:30 pm M–F
Latin America
Phone: +56 232 13 3600
servicelatam@truemfg.com
9:00 am – 5:30 pm M–F
GDM-26-HST02-HC~TSL01
INSTALLATION MANUAL
UK, Ireland, Middle East,
Africa and India
Phone: +44 (0) 800 783 2049
service-emea@truemfg.com
8:30 am – 5:00 pm M–F
06/28/2022
INSTALLATION MANUAL
GDM-HST02-HC~TSL01
GDM-HST02-HC~TSL01
Original Instructions
European Union and
Australia
Commonwealth of
Phone: +61 2 9618 9999
Independent States
service-aus@truemfg.com
Phone: +49 (0) 7622 6883 0
8:30 am – 5:00 pm M–F
service-emea@truemfg.com
8:00 am – 5:00 pm M–F
Page 1 of 28
Advertisement
Table of Contents

Related Manuals for True Manufacturing Company GDM-HST02-HC-TSL01


Summary of Contents for True Manufacturing Company GDM-HST02-HC-TSL01
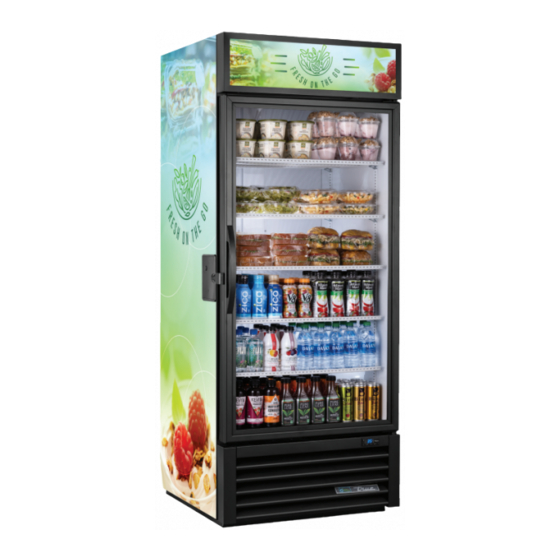
- Page 1 INSTALLATION MANUAL TRUE MANUFACTURING CO., INC. GDM-HST02-HC~TSL01 GDM-23-HST02-HC~TSL01 GDM-26-HST02-HC~TSL01 TRUE MANUFACTURING CO., INC. 2001 East Terra Lane • O’Fallon, Missouri 63366-4434 INSTALLATION MANUAL (636) 240-2400 • FAX (636)-272-2408 International FAX (636)272-7546 • (800)-325-6152 GDM-HST02-HC~TSL01 Parts Department (800)-424- TRUE Original Instructions Parts Department FAX (636)-272-9471 North America –...
-
Page 2: Table Of Contents
GDM HST02 www.truemfg.com T HAN K YO U F O R YO U R PU R C H A S E Congratulations! You have just purchased the finest commercial refrigerator available. You can expect many years of trouble-free operation. Table of Contents Safety Information Electronic Temperature Control Safety Precautions &... -
Page 3: Safety Precautions & Proper Disposal
GDM HST02 www.truemfg.com How to Maintain Your True Refrigerator to Receive the Most Efficient and Successful Operation You have selected one of the finest commercial refrigeration units made. It is manufactured under strict quality controls with only the best quality materials available. Your TRUE cooler, when properly maintained, will give you many years of trouble-free service. –... -
Page 4: Cabinet Dsiposal Warning
GDM HST02 www.truemfg.com Cabinet Disposal Warning Prior to Installation Ownership To ensure that your unit works properly from the first day, it must DANGER! be installed properly. We highly recommend a trained refrigeration mechanic and electrician install your TRUE equipment. The cost of a professional installation is money well spent. -
Page 5: Wire Gauge Chart
GDM HST02 www.truemfg.com Prior to Installation (cont.) Wire Gauge Chart Wiring Instruction Advisement (115V only) Follow the instructions below to convert your TRUE unit from a 4-wire circuit and a 4-prong NEMA 14-20P (see components in Distance In Feet To Center of Load Volts fig. -
Page 6: Uncrating
GDM HST02 www.truemfg.com Prior to Installation (cont.) Uncrating Required Tools Required tools include (but may not be limited to) the following: • Adjustable wrench • Phillips screwdriver • Level Procedure 1. Remove the outer packaging (cardboard and bubble wrap or Styrofoam corner and clear plastic). See fig. 1. Inspect for concealed damage. -
Page 7: Cabinet Location
GDM HST02 www.truemfg.com Installation Cabinet Location 1. Ensure that the drain hose or hoses are positioned in the pan. 2. Free the plug and cord from inside the lower rear of the cooler (DO NOT plug in). 3. Place the unit close enough to the electrical supply so that the extension cords are never used. -
Page 8: Leveling
GDM HST02 www.truemfg.com Installation (cont.) Sealing the Cabinet to the Floor Asphalt floors are susceptible to chemical attack. A layer of tape may be placed on the floor prior to applying the sealant to protect the floor. Procedure 1. Position the cabinet, allowing 3" (73 mm) between the wall and the rear of the cabinet to ensure proper ventilation. -
Page 9: Electrical Safety
GDM HST02 www.truemfg.com Installation (cont.) Electrical Installation & Safety Use of Adapter Plugs How to Connect Electricity NEVER USE AN ADAPTER PLUG! An adapter plug • The power cord from this appliance is equipped with a alters the original OEM plug configuration when grounding plug which minimizes the possibility of electric connecting it to a power source. -
Page 10: Cabinet Setup Shelf Installation
GDM HST02 www.truemfg.com Cabinet Setup Shelf Installation Procedure 1. Hook the shelf clips into the shelf standards. See fig. 1. 2. Push up on the bottom of the clip. See fig. 2. NOTE: You may need to squeeze or twist the bottom of the shelf clip for proper installation. -
Page 11: Battery Backup
GDM HST02 www.truemfg.com Cabinet Setup Battery Backup The cabinet has a battery backup that ensures the electronic control can still monitor the cabinet temperature and actuate the lock during a power outage. This battery backup provides power to the control for a minimum of 2 hours. NOTE: The battery backup system ships with the power switch toggled to OFF. -
Page 12: Cabinet Operation
GDM HST02 www.truemfg.com Cabinet Operation Startup Temperature Control & Light Switch Location • The compressor is ready to operate when the unit is purchased. The light symbol shows the approximate location of the light All you need to do is plug in the cooler. switch. -
Page 13: Sequence Of Operation
GDM HST02 www.truemfg.com Cabinet Operation (cont.) Sequence of Operation When the cabinet is plugged in… 1. Interior lights will illuminate on glass door models (see previous page for light switch location). 2. An electronic control with digital display will illuminate. 3. -
Page 14: Health Safety Timer (Hst)
GDM HST02 www.truemfg.com Cabinet Operation (cont.) Health Safety Timer (HST) Operation The HST cabinet’s operation is determined by the electronic The health safety timer (HST) mechanically locks the cabinet when control, which constantly monitors the cabinet temperature. If the the electronic control detects the cabinet temperature has been control detects the preprogrammed temperature parameters (see above a preset temperature for 30 minutes. -
Page 15: Electronic Temperature Control
GDM HST02 www.truemfg.com Electronic Temperature Control L A E C O N T R O L L E G E N D Compressor Running Evaporator Fan Running Info/Set Point Manual Activation/ Up Arrow Cabinet in Defrost Activation of 2 Parameter Set Manual Defrost/ Stand-By/ Down Arrow... -
Page 16: Lock / Unlock The Control
GDM HST02 www.truemfg.com Electronic Temperature Control (cont.) L A E C O N T R O L L E G E N D Compressor Running Evaporator Fan Running Info/Set Point Manual Activation/ Up Arrow Cabinet in Defrost Activation of 2 Parameter Set Manual Defrost/ Stand-By/... -
Page 17: Lock / Unlock The Door - Button Combo
GDM HST02 www.truemfg.com Electronic Temperature Control (cont.) L A E C O N T R O L L E G E N D Compressor Running Evaporator Fan Running Info/Set Point Manual Activation/ Up Arrow Cabinet in Defrost Activation of 2 Parameter Set Manual Defrost/ Stand-By/... -
Page 18: Enable The Product Loading & Servicing Delay
GDM HST02 www.truemfg.com Electronic Temperature Control (cont.) L A E C O N T R O L L E G E N D Compressor Running Evaporator Fan Running Info/Set Point Manual Activation/ Up Arrow Cabinet in Defrost Activation of 2 Parameter Set Manual Defrost/ Stand-By/... -
Page 19: Clear The Health Safety Alarm Or Product Loading & Servicing Delay
GDM HST02 www.truemfg.com Electronic Temperature Control (cont.) L A E C O N T R O L L E G E N D Compressor Running Evaporator Fan Running Info/Set Point Manual Activation/ Up Arrow Cabinet in Defrost Activation of 2 Parameter Set Manual Defrost/ Stand-By/... -
Page 20: Change The Set Point
GDM HST02 www.truemfg.com Electronic Temperature Control (cont.) L A E C O N T R O L L E G E N D Compressor Running Evaporator Fan Running Info/Set Point Manual Activation/ Up Arrow Cabinet in Defrost Activation of 2 Parameter Set Manual Defrost/ Stand-By/... -
Page 21: Change Defrost Intervals
GDM HST02 www.truemfg.com Electronic Temperature Control (cont.) L A E C O N T R O L L E G E N D Compressor Running Evaporator Fan Running Info/Set Point Manual Activation/ Up Arrow Cabinet in Defrost Activation of 2 Parameter Set Manual Defrost/ Stand-By/... -
Page 22: Display Probe Temperatures
GDM HST02 www.truemfg.com Electronic Temperature Control (cont.) L A E C O N T R O L L E G E N D Compressor Running Evaporator Fan Running Info/Set Point Manual Activation/ Up Arrow Cabinet in Defrost Activation of 2 Parameter Set Manual Defrost/ Stand-By/... -
Page 23: Maintenance, Care, And Cleaning
GDM HST02 www.truemfg.com Maintenance, Care & Cleaning - Take care during operation, maintenance or repairs CAUTION to avoid cuts or pinching from any cabinet part/component. Condenser Coil Cleaning When using electrical appliances, basic safety precautions should be followed, including the following: –... -
Page 24: Stainless Steel Care & Cleaning
GDM HST02 www.truemfg.com Maintenance, Care & Cleaning (cont.) Stainless Steel Care & Cleaning 8 Tips to Help Prevent Rust on Stainless Steel – DO NOT use any steel wool, abrasive or chlorine- CAUTION Maintain the Cleanliness of Your Equipment based products to clean stainless steel surfaces. Avoid build-up of hard stains by cleaning frequently. -
Page 25: Cabinet Adjustments, Servicing & Component Replacement
GDM HST02 www.truemfg.com Cabinet Adjustments, Servicing, & Component Replacement NOTE: Any cabinet adjustments are to be made AFTER the cabinet has been verified level and properly supported. Servicing & Replacing Components • Replace component parts with original equipment manufacturer (OEM) components. •... -
Page 26: Warranty
GDM HST02 www.truemfg.com USA FOODSERVICE & CANADA WARRANTY STATEMENT Warranty Information (USA & Canada Only) FIVE-YEAR HYDROCARBON PARTS & LABOR WARRANTY & THREE YEARS HFC PARTS & LABOR WARRANTY TRUE warrants to the original purchaser of every new TRUE refrigerated unit, the cabinet, and all parts thereof, to be free from defects in material or workmanship, under normal and proper use and maintenance service as specified by TRUE and upon proper installation and start-up in accordance with the instruction packet supplied with each TRUE unit. - Page 27 GDM HST02 www.truemfg.com NOTES TEC_TM_158 | REV. A | EN 06/28/2022 Page 27 of 28...
- Page 28 www.truemfg.com Page 28 of 28 06/28/2022 TEC_TM_126 | REV. A | EN...
Need help?
Do you have a question about the GDM-HST02-HC-TSL01 and is the answer not in the manual?
Questions and answers