
Subscribe to Our Youtube Channel
Related Manuals for OmniPrint OM190


Summary of Contents for OmniPrint OM190
- Page 1 OMNIPRINT OM190/192 IMPACT PRINTER USER'S MANUAL Revision : 02 Version : 2.0 March 12,2017 Omniprint Inc. 1923 E Deere Ave. Santa Ana, CA 92705 TEL: (949) 833-0080 FAX: (949) 833-0040 Website: www.omniprintinc.com...
- Page 2 1. INTRODUCTION OM19X is a dot matrix impact printer that is available in 24 column, OM190, and 40 column, OM192, models. It is compact and reliable with a variety of features and options suitable for a wide array of applications including medical and industrial instruments, point of sale, test and measurement, security, time and attendance, etc.
-
Page 3: General Specifications
2. SPECIFICATIONS 2-1. General specifications. Model OM190 OM192 Print method Shuttle impact dot matrix (8 pins) No. of columns Printing speed 2.5 lps 1.7 lps No. of dots per line Dot Size 0.33 (H) x 0.38 (W) mm Character size (mm) 1.7 (W) x 2.6 (H) -
Page 4: Setting Up The Printer
3. Setting up the printer 3-1. Unpacking. The items illustrated below are included with your printer. If any items are damaged or missing, please contact your dealer for assistance. Printer, Paper Roll, Power Supply, Ribbon (installed), Manual, and Interface Cable. Printer Paper roll Power Adapter... -
Page 5: Connecting The Power Adapter
2. Insert the output plug of the power adapter into the DC jack of the printer. 3. Plug the adapter or the power supply’s cord into an outlet. 4. For best results use one of the following Omniprint adapters: OMPS190-915-NA... -
Page 6: Installing The Ribbon Cartridge
Installing the Ribbon Cartridge 1. Turn the printer off before you open the printer cover. 2. Remove the old ribbon by pressing on the front right corner of the cassette where marked “PUSH”. 3. Turn the ribbon cassette’s knob in the direction of the arrow to take up any slack in the ribbon. -
Page 7: Loading Paper
5. Press the FEED button until approximately two inches of paper is fed through the mechanism. 6. Tear the excess paper against the serrated edge and close the cover. 7. Use the following Omniprint part number to reorder paper: PP-225-135 1 ply paper roll... -
Page 8: External Appearance
4. External Appearance. Cover top Paper cover Roll paper Roll paper Control panel Paper roll holder Top cover Bottom cover Interface connector DC Jack... -
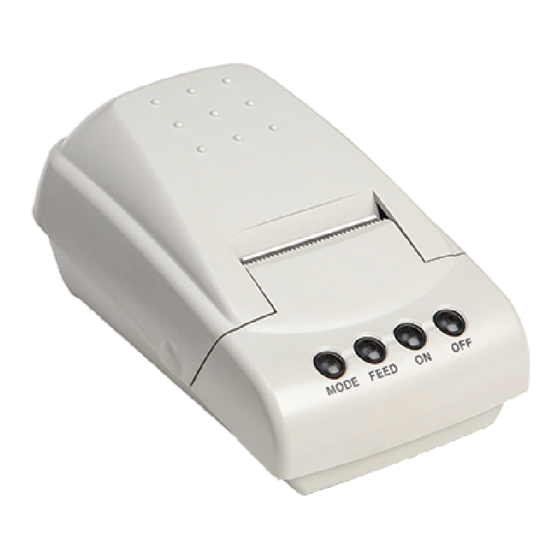
Page 9: Control Panel
5. Control Panel The control panel features four buttons and one LED to indicate printer status. ON BUTTON: Press the ON button to power up the printer. A Green LED inside the button will light up. The printer goes ON LINE ready to receive data from the host. If the supply voltage is too low, A Red LED will blink. -
Page 10: Running The Self Test
6. Running the Self Test Any time you want to check the performance of your printer you can run the self test described below. This shows whether your printer is working correctly. 1. While holding down the FEED button, turn the printer on. 2. - Page 11 7. Set-up mode 7.1 Set-up By Control Panel Buttons You can change the printer serial interface, character table, emulation, and print mode settings by following the procedure below: 1. By turning the power on while pressing the SEL button the printer will print the current configuration and get into SET-UP mode.
- Page 12 9. Accessories 1) Paper: 57.5mm+/-0.5mm(width), 60mm max (roll diameter), 85 microns (thickness) PP-225-80 1-ply paper roll PP-225-75WC 2-ply paper roll 2) Ribbon specification: ERC-09 P (Purple) or B (Black) Standard cartridge ERC-22 P (Purple) or B (Black) Long Life Cartridge 3) Interface Cable: 6 feet long, shielded cable with molded connectors.
- Page 13 10. Troubleshooting 1) IF THE POWER LED DOES NOT COME ON. Make sure the power supply cables are securely plugged into the printer, the adapter, and the power outlet. Also, make sure that power is supplied to the power outlet. If the outlet is controlled by a switch or timer, use another outlet.
-
Page 14: Interface Connections
11. Interface connections The OM19X printer is available in RS-232C serial. The interface type is printed on the self-test printout. 11-1. SERIAL INTERFACE 11-1-1 Serial Interface Specifications Data Transmission Method: Asynchronous serial interface Baud Rate: User selectable from 1200, 2400, 4800, 9600, 19200, 38400, 57600, 115200 Word Length: Start bit... -
Page 15: Command Codes
12. COMMAND CODES FUNCTION KEYSTROKE DECIMAL HORIZONTAL TAB CTRL I LINE FEED CTRL J CARRIAGE RETURN CTRL M SET PRINT MODE ESC ! n 1BH, 21H, n 27, 33, n INITIALIZE PRINT ESC @ 1BH, 40H 27, 64 CHARACTER SET ESC R n 1BH, 52H, n 27, 82, n... - Page 16 ESC R n (1BH, 52H, n): Selects the international character set form the following table Character set U.S.A. France Germany U.K. Denmark I Sweden Italy Spain Japan Norway Denmark II ESC d n (1BH, 64H, n): Prints the data in the print buffer and feed n lines. ESC { n (1BH, 7BH, n): In standard mode, turns upside-down printing mode on or off.
- Page 17 Printer status (n=1) Off/On Decimal Status Not used. Fixed to Off. Not used. Fixed to On. Drawer kick-out connector pin 3 is LOW. Drawer kick-out connector pin 3 is HIGH. On-line. Off-line. Not used. Fixed to On. Not waiting for on-line recovery. Waiting for on-line recovery.
-
Page 19: Appendix 1. International Characters Set
APPENDIX 1. INTERNATIONAL CHARACTERS SET APPENDIX 2. PRINTABLE CHARACTER SET... -
Page 20: Appendix 3. External Dimensions
APPENDIX 3. EXTERNAL DIMENSIONS...
Need help?
Do you have a question about the OM190 and is the answer not in the manual?
Questions and answers