Table of Contents
Advertisement
Available languages
Available languages
Quick Links
H-7935, H-7936
H-9672, H-9673
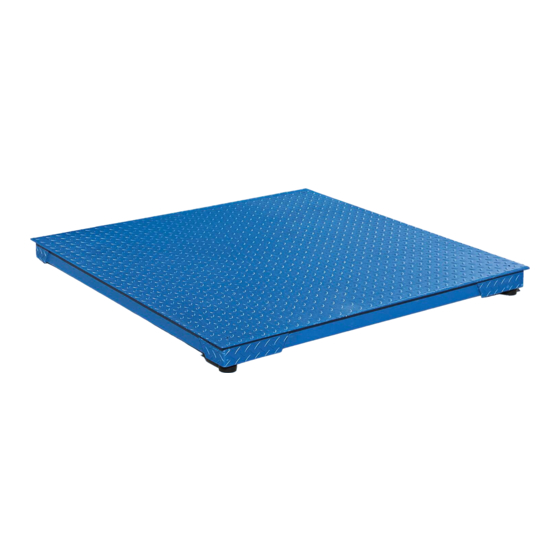
ALL-WEATHER
LOW PROFILE
FLOOR SCALE
SITE SELECTION
Select a site for the floor scale where it is least likely to
be damaged by forklifts and other material handling
devices. Floor scale load cell weighing elements are
prone to overload damage caused by side impacts,
falling objects and weight loads that exceed the rated
capacity of the scale.
Site should be:
• Level within 1/4".
• Free from vibration.
• Clean of debris.
• Out of the way of vehicle traffic patterns, unless
installed in a pit while having a rated capacity
that exceeds all loaded vehicle weights that could
possibly drive onto or contact the scale.
The cable from the floor scale to the digital weight
indicator should be run through conduit to protect it
against possible damage. Running the instrument cable
through conduit is the best method of protection.
UNPACKING
1. Inspect your shipment for damage. If you see visible
signs of damage, notify carrier at once.
2. Remove floor scale from the shipping pallet.
3. Unpack the digital indicator. Digital indicator and
power cord ship in a separate box.
PAGE 1 OF 18
1-800-295-5510
uline.com
INTRODUCTION
INTRODUCTION
RAMP INSTALLATION (OPTIONAL)
1. Set floor scale in a desired location.
2. Position the scale feet inside the mounting tabs.
3. Anchor the ramp to the floor using two 1/2 x 3"
Figure 1
HEIGHT AND LEVEL ADJUSTMENTS
1. Unlock the locknuts on all four feet.
2. Using a pry bar, lift the weight of the scale base off
3. Make adjustments by screwing the feet
4. Do not screw feet counterclockwise more than ten
5. Tighten locknuts on feet.
6. Check your work.
Pour le français, consulter les pages 13-18.
(See Figure 1)
anchors (not included).
Ramp
Load Cell Foot
the scale feet.
counterclockwise. All four feet should make firm
contact with the floor.
turns.
Para Español, vea páginas 7-12.
Mounting Tabs
Scale
Anchor goes here.
0622 IH-7935
Advertisement
Table of Contents

Related Manuals for U-Line H-9672


Summary of Contents for U-Line H-9672
- Page 1 Para Español, vea páginas 7-12. Pour le français, consulter les pages 13-18. H-7935, H-7936 1-800-295-5510 H-9672, H-9673 uline.com ALL-WEATHER LOW PROFILE FLOOR SCALE INTRODUCTION INTRODUCTION SITE SELECTION RAMP INSTALLATION (OPTIONAL) Select a site for the floor scale where it is least likely to 1.
- Page 2 PARTS DESCRIPTION QTY. ULINE PART NO. MFG. PART NO. Stainless Steel Display Indicator H-8000 65087U Power Cord H-8001 65081U Junction Box with Summing Card H-5258 53042 Instrument Cable for LP-7510 Display Indicator H-754-7510CB 65088 Load Cell – 5,000 lb. Capacity H-5261 307301 Load Cell –...
-
Page 3: Setup Instructions
ASSEMBLY SETUP INSTRUCTIONS CONNECTING POWER NOTE: Floor scale was shipped with the four WARNING! Only use the original power plug threaded leveling feet adjusted for a flat and and battery that came with the scale. Using even floor. The leveling feet are locked in place an alternative power plug or battery could with locknuts. -
Page 4: Lcd Functions
DISPLAY INDICATOR AND FUNCTION KEYS LCD FUNCTIONS INSTRUCTION Weighing data Hold Data hold Gross Gross weight Net weight Tare Tare The weighing data is stable LCD Display Weight is zero Overload Underload Decimal Show the counting status Total Go to accumulation mode Battery Indicator Keys KEY FUNCTIONS... -
Page 5: Operation
OPERATION POWER ON/OFF NOTE: There are 8 digits total. The display shows the first 4 digits, then the last 4 digits. Press the ON/OFF key for two seconds to turn the For example, when the first 4 digits displayed scale on or off. are "0012"... -
Page 6: Troubleshooting
TROUBLESHOOTING POSSIBLE TARE OPERATION CODES ERROR REASON SOLUTION UUUUUUUU Weight overload. Reduce the weight. Bad connection with load cell. Check load cell connection. Load cell has quality problem. Inspect load cell. Check input and output. nnnnnnn Calibration error. Check that scale is level. Bad connection. - Page 7 H-7935, H-7936 800-295-5510 H-9672, H-9673 uline.mx BÁSCULA DE PERFIL BAJO DE PISO PARA TODO CLIMA INTRODUCCIÓN INTRODUCCIÓN INSTALACIÓN DE LA RAMPA (OPCIONAL) SELECCIÓN DEL ÁREA 1. Coloque la báscula de piso en la ubicación Seleccione un área para la báscula de piso donde deseada.
- Page 8 PARTES DESCRIPCIÓN CANT. NO. DE PARTE DE ULINE NO. DE PARTE DEL FABRICANTE Indicador de Pantalla de Acero Inoxidable H-8000 65087U Cable Eléctrico H-8001 65081U Caja de Conexiones con Tarjeta de Resumen H-5258 53042 Cable de Instrumento para el Indicador de H-754-7510CB 65088 Pantalla LP-7510...
-
Page 9: Instrucciones De Configuración
ENSAMBLE INSTRUCCIONES DE CONFIGURACIÓN CONECTAR LA CORRIENTE NOTA: La báscula de piso se envía con cuatro ¡ADVERTENCIA! Use solamente el enchufe original patas roscadas de nivelación ajustadas para y la batería que vienen con la báscula. Utilizar un piso plano y parejo. Las patas de nivelación enchufe o baterías alternos podría dañar la báscula. -
Page 10: Funciones De Los Botones
INDICADOR DE PANTALLA Y TECLAS DE FUNCIONES FUNCIONES LCD INSTRUCCIONES Información del Peso Hold Retención de Datos Gross Peso Bruto Peso Neto Tara Tara La información del peso es estable Pantalla LCD El peso es cero Sobrecarga Carga Baja Decimal Muestra el Estado del Conteo Total... - Page 11 FUNCIONAMIENTO ENCENDIDO/APAGADO NOTA: Existen 8 dígitos en total. La pantalla muestra los primeros 4 dígitos, luego los últimos 4. Presione el botón ON/OFF por dos segundos para Por ejemplo, cuando los primeros 4 dígitos que encender o apagar la báscula. se muestren sean "0012"...
-
Page 12: Solución De Problemas
SOLUCIÓN DE PROBLEMAS POSIBLES CÓDIGOS OPERATIVOS DE LA TARA ERROR MOTIVO SOLUCIÓN UUUUUUUU Sobrecarga de peso. Reduzca el peso. Mala conexión con la celda Verifique la conexión de la de carga. celda de carga. La celda de carga tiene un Inspeccione la celda de carga. - Page 13 H-7935, H-7936 1-800-295-5510 H-9672, H-9673 uline.ca BALANCE DE PLANCHER À PROFIL BAS QUATRE SAISONS INTRODUCTION INTRODUCTION CHOIX DE L'EMPLACEMENT INSTALLATION DE LA RAMPE (OPTIONNEL) Choisissez un emplacement où votre nouvelle balance 1. Déposez la balance de plancher à l'emplacement de plancher sera autant que possible protégée des souhaité.
- Page 14 PIÈCES DESCRIPTION QTÉ RÉF. ULINE RÉF. DU FABRICANT Indicateur d'affichage en acier inoxydable H-8000 65087U Cordon d'alimentation H-8001 65081U Boîte de jonction avec carte sommatrice H-5258 53042 Câble d'appareil pour indicateur LP-7510 H-754-7510CB 65088 Cellule de charge – Capacité de 5 000 lb H-5261 307301 Cellule de charge –...
-
Page 15: Montage
MONTAGE INSTRUCTIONS D'INSTALLATION BRANCHEMENT DE L'ALIMENTATION AVERTISSEMENT! N'utilisez que la fiche REMARQUE : La balance de plancher a ARRÊT d'alimentation et la batterie originales fournies été expédiée avec les quatre pieds de avec la balance. L'utilisation d'une fiche nivellement filetés en fonction d'un plancher d'alimentation et d'une batterie différentes plat et uniforme. -
Page 16: Fonctions Des Touches
INDICATEUR D'AFFICHAGE ET TOUCHES DE FONCTION FONCTIONS ACL INSTRUCTIONS Donnée de pesée Hold Maintien des données Gross Poids brut Poids net Tare Tare La donnée de pesée est stable Affichage ACL Le poids est de zéro Surcharge Accepté Sous-charge Décimal Afficher l'état de comptage Total Passer en mode d'accumulation... -
Page 17: Mise En Marche/Arrêt
FONCTIONNEMENT MISE EN MARCHE/ARRÊT REMARQUE : Il y a 8 chiffres au total. L'écran affiche les 4 premiers chiffres, puis les 4 1. Appuyez sur la touche ON/OFF pendant deux derniers. Par exemple, lorsque les 4 premiers secondes pour allumer ou éteindre la balance. chiffres affichés sont «... -
Page 18: Dépannage
DÉPANNAGE CODES DE FONCTION TARE POSSIBLES ERREUR CAUSE SOLUTION UUUUUUUU Surcharge. Réduisez le poids. Mauvaise connexion à la Vérifiez la connexion de la cellule de charge. cellule de charge. Problème de qualité de la Inspectez la cellule de charge. cellule de charge. Vérifiez l'entrée et la sortie.
Need help?
Do you have a question about the H-9672 and is the answer not in the manual?
Questions and answers