Table of Contents
Advertisement
Quick Links
Advertisement
Table of Contents

Subscribe to Our Youtube Channel
Related Manuals for multicomp pro MP760862


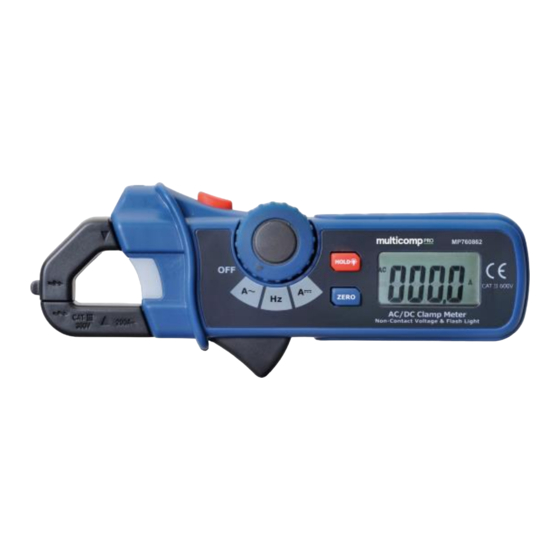
Summary of Contents for multicomp pro MP760862
- Page 1 200A AC/DC Mini Clamp-on Meter MP760862...
- Page 2 Features 3-2/3 digit (2400 count) LCD display White LED backlight Built-in non-contact AC voltage detector plus flashlight Frequency measurement 40Hz to 1kHz Autoranging with auto power off 0.7” (18mm) Jaw opening Specifications Display 3-2/3 (2400 count) Digit LCD with white LED backlight Polarity...
- Page 3 Range Specifications Function Range Resolution Accuracy (of reading) DC Current 200A 100mA ± (2.8% + 8 digits) AC Current 200A 100mA ±(3.0% + 8 (50/60Hz) digits) Frequency 40-51Hz 0.01Hz ±(1.2% + 5 digits) (Auto-Ranging) 51-510Hz 0.1Hz Input Sensitivity: 5A 0.51-1kHz 0.001kHz AC RMS min.
- Page 4 Safety Information Caution! Refer to the explanation in this Manual Double Insulation This meter has been designed to be safe in use, but the operator must use caution in its operation. The rules listed below should be carefully followed for safe operation. NEVER apply voltage or current to the meter that exceeds the specified maximum: USE EXTREME CAUTION when working with voltages...
- Page 5 Operation AC Current Measurements 1) Set the Function switch to the ACA range. 2) Press the jaw trigger and clamp around, fully enclosing a single conductor. Do not allow a gap between the two halves of the jaw. Refer to the diagram at right for the correct way to enclose a single conductor.
- Page 6 4) Fully enclose the conductor to be measured. Do not allow a gap between the two halves of the jaw. 5) Read the DCA value on the LCD. Non-Contact AC Voltage Measurements WARNING: Risk of Electrocution. Before use, always test the Voltage Detector on a known live circuit to verify proper operation Touch the probe tip to the hot conductor or insert into the hot side of the electrical outlet.
- Page 7 Press and hold the top button to turn the flashlight on. Release the button to turn the flashlight off. Data Hold To freeze the current reading on the LCD, press the “Hold Backlight” key. The word HOLD will appear on the LCD while the meter is in the Data Hold mode.
- Page 8 Lift off the battery compartment cover and replace the two 1.5V AAA cells. Replace compartment cover and secure the screw. INFORMATION ON WASTE DISPOSAL FOR CONSUMERS OF ELECTRICAL & ELECTRONIC EQUIPMENT. When this product has reached the end of its life it must be treated as Waste Electrical &...
Need help?
Do you have a question about the MP760862 and is the answer not in the manual?
Questions and answers