
Subscribe to Our Youtube Channel
Related Manuals for multicomp pro MP700852


Summary of Contents for multicomp pro MP700852
- Page 1 Spectrum Analyzer User Manual Part Number: MP700852 Newark.com/multicomp-pro Farnell.com/multicomp-pro sg.element14.com/b/multicomp-pro Page <1> 07/01/22 V1.0...
-
Page 2: General Warranty
General Warranty We warrant that the product will be free from defects in materials and workmanship for a period of 3 years from the date of purchase of the product by the original purchaser from our company. The warranty period for accessories is 12 months. This warranty only applies to the original purchaser and is not transferable to a third party. -
Page 3: Safety Terms And Symbols
• Do not operate in an explosive atmosphere. In order to avoid damages to the device or personal injuries, it is important to operate the device away from an explosive atmosphere. • Keep product surfaces clean and dry. To avoid the influence of dust or moisture in air, please keep the surface of device clean and dry. -
Page 4: Document Overview
3. Document Overview • Quick Start This chapter states the matters need to attention before first power on, how to power on at first time, introduces spectrum analyzer’s front/rear panel and user interface, explains how to use the instrument with a measurement example demonstration. - Page 5 4.2.2 Allowed Variation Range of Supply Power Parameters The spectrum analyzer is compatible with 100V~240V, 50Hz-60Hz AC power, Table 4 1 lists the power requirement to run the spectrum analyzer. Table 4-1 Working Power Variation Range Power Supply Parameter Compatible Range Voltage 100 - 240V AC Frequency...
-
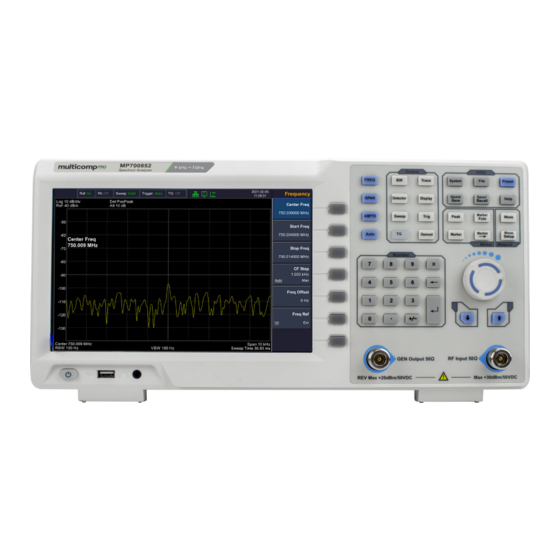
Page 6: Front Panel
4.3 First Time to Power on Connect the three-pin AC power cord into the instrument. Insert the plug into a power socket provided with a protective ground. WARNING Check the power source before turning on the spectrum analyzer, to protect the device from damage. 1) Press the power switch on the bottom left of the front panel. -
Page 7: Front Panel Function Key
4.4.1 Front Panel Function Key Table 4-3 Function Key Description Keys Description Basic keys Activates the center-frequency function, and accesses the frequency FREQ function menu. Activates the frequency sweep span function, and set Full Span\Zero Span\ SPAN Last Span. Activates the reference level function, and accesses the amplitude softkeys, with which you AMPTD set functions that affect data on the vertical axis. -
Page 8: Utility Keys
Accesses the softkeys that allow you to select the trigger mode Trig of the analyzer. Accesses the softkeys that allow you to set the tracking generator. Accesses the softkeys that allow you to set the Demod demodulation. Marker measure keys Places a marker on the highest peak, and accesses the Peak functions Peak menu. - Page 9 4.4.2 Parameter Input Specific parameter values are able to be entered using the numeric keypad, knob, and directional keys. Numeric Keypad 1. Numeric keys Numbers 0-9 are available to be used. Decimal point A decimal point “.” will be inserted at the cursor position when this key is pressed. Sign key Sign key “+/-”...
- Page 10 Knob The knob function: During parameter editing, turn the knob clockwise to increase, or counterclockwise to decrease the parameter values at specified steps. Direction key The directional keys have following functions: 1) Increase or decrease the parameter value at specific steps while editing a parameter. 2) Move the cursor though the directory tree in the [File] function.
-
Page 11: Rear Panel
The output of the tracking generator can be connected to a receiver through an N type male connector, users can purchase this option if required. CAUTION Input voltage at RF input port must not be higher than 50 V DC to avoid damage to the attenuator and input mixer tracking generator. - Page 12 Table 4-4 Rear Panel Description Name Description Handle Stow the handle for mobile use. You can lock the spectrum analyzer to a fixed location using the Lock hole security lock (please buy it yourself) to secure the spectrum analyzer. HDMI interface HDMI output, connect an external monitor or projector.
- Page 13 Table 4-5 User interface Description Name Description Related Key Set the reference frequency as Int Reference frequency FREQ → [Freq Ref] (internal) or Ext (external) input Preamplifier Turn on/off the preamplifier AMPTD→ [Preamplifier] Set the sweep status to Single or [Sweep]→...
-
Page 14: Basic Measurement
Use the number keypad, knob, and Active parameter setting arrow keys to set the value. Attenuation Display input attenuation setting AMPTD → [Attenuation] Detector type Display detector type [Detector] Reference level Reference level AMPTD → [Ref Level] Amplitude Scale Type Log (logarithmic) or Line (linear) AMPTD →... - Page 15 To clearly observe the signal, reduce the frequency span to 1 MHz and set the center frequency to 100MHz. 2) Setting Center Frequency Press “FREQ”, select [Center frequency] on corresponding pop up menu. Input “100” and select the unit as MHz on the numeric keypad.
- Page 16 4) Activate Marker —Press [Marker] button in the function area. Press the softkey to select [Marker 1 2 3 4 5 ], select Marker 1, the marker is located at horizontal center by default, that is the signal peak point or its neighbor. —Press Peak, and enter the next level menu, select [Max Search].
- Page 17 5.1.1 [Center Freq] Sets the center frequency of the sweep. When pressed, the frequency mode is switched to Center Freq and Span in order to enter the desired parameter data. Key Points: • The start and stop frequencies vary with the center frequency when the span is constant. •...
- Page 18 5.1.5 [Freq Offset] You can set a frequency offset to displayed frequency value, including freq marker value. This movement won’t influence sweep frequency range. While this function activated (frequency offset isn’t 0), you can modify this parameter using the numeric keys, knob or direction keys.
- Page 19 Reference level located at the top of axis grid. Measurement near the reference level would gain better accuracy, but input signal amplitude should not exceed the reference level; if it exceeds, the signal will be compressed and distorted, result in wrong measurement.
- Page 20 5.3.5 [Ref Offset] Assigns an offset to the reference level to attempt to compensate for gains or losses generated between the device under measurement and the analyzer. Key points: • The changing of this value changes both the readout of the reference level and the amplitude readout of the marker, but will not impact the position of the curve on the screen.
- Page 21 5.5.3 [VBW Auto Man] Sets the desired video bandwidth in order to remove the band noise. Set the video resolution displays in function area, ranging from 10Hz to 1MHz by sequence step. You can modify this parameter by numeric key, step key or knob. The underline under Auto or Manual means Auto mode or Manual mode.
- Page 22 5.6.6 [View] Stops updating trace data and display current trace for observation.. 5.6.7 [Operations►] Enter trace math related sub menu. 1) [1 ↔ 2] Exchange the trace stock 1 data with trace stock 2 and place them in display mode. 2) [2-DL →...
- Page 23 5.7.1 [Pos Peak] Searches the maximum from the sampling data segment and displays it at the corresponding pixel. Positive peak detector will be selected when [Max Hold] pressed. 5.7.2 [Neg Peak] Searches the minimum from the sampling data segment and displays it at the corresponding pixel. 5.7.3 [Normal] When noise is detected, the positive and negative peaks are alternately displayed, otherwise only positive peaks are displayed.
- Page 24 5.9.1 [Sweep Time Auto Man] Sets the time interval for the analyzer to complete a sweep. • In non-zero span, the analyzer uses the shortest sweep time on the basis of the current RBW and VBW settings if Auto is selected.
- Page 25 1) [Network Meas On Off] Turn on or off the tracking source network measurement function. Tracking source network measurement function, mainly for amplitude and frequency characteristics measurement; RF output and spectrum measurement is fully synchronized, can be used as a scalar network analyzer. When the network measurement function is “on”, the measurement results show relative values after “normalized”, expressed in “dB”.
- Page 26 5.12.2.1.1 [AM On Off] Turn AM demodulation On or Off. 5.12.2.1.2 [Carrier Freq] Set the carrier frequency of the AM modulation signal. 5.12.2.1.3 [IF BW] Set the demodulation bandwidth of the AM modulated signal. 5.12.2.1.4 [Data Reset] Set the maximum, minimum, and average data reset under the AM modulated signal. 5.12.2.1.5 [Setup►] Set the time axis, depth axis and AF trigger of AM modulation.
- Page 27 • [Trigger Level] Set the trigger level as a percentage of the depth. • [Trigger Delay] Set the trigger delay time. • [Return] Return to the previous menu. 5.12.2.2 [FM►] Enter FM demodulation soft menu. 5.12.2.2.1 [FM On Off] Turn FM demodulation On or Off. 5.12.2.2.2 [Carrier Freq] Set the carrier frequency of the FM modulation signal.
- Page 28 3) [AF Trigger►] Set the AF triggering conditions. • [AF Trigger On Off] Set the AF trigger to be On or Off. • [Edge Pos Neg] Set the trigger to rising or falling edge. • [Trigger Mode] Set the triggering mode to single trigger or continuously trigger. •...
- Page 29 5.14 [Marker] The marker appears as a rhombic sign (shown below) for identifying the point on the trace. We can easily readout the parameters of the marked point on the trace, such as the amplitude, frequency and sweep time. Key points: •...
- Page 30 • Two ways to enable a certain point as the reference: a) Open a “Normal” marker and locate it onto a point and then switch the marker type into “Delta”, creating a new reference, then you can modify the location of the delta point to achieve the delta measurement. b) Open a Delta Marker and place it onto a point, then reselect the Delta menu to locate the marker you opened onto this points, then you can modify the location of the delta point to achieve the delta measurement.
- Page 31 5.16 [Marker Fctn] Marker Function • Executes specific marker soft menu. 5.16.1 [Function Off] Turn off marker measurement function. 5.16.2 [NdB On Off] Enables the N dB BW measurement or sets the value of N. The N dB BW denotes the frequency difference between points that are located on both sides of the current marker while the amplitude falls off (N<0) or rises (N>0) N dB separately, Key points: •...
- Page 32 5.17.4 [Chanel Power On Off] Turn on or off channel power measurements. Press [Meas Setup] to pop up the channel power measurement parameter settings soft menu. The channel power is used to measure the transmitter channel power, according to the user set the channel bandwidth, through the linear power integration method to obtain the absolute value of the main channel power.
- Page 33 5) [UpLine Edit►] Upper line editing is used to edit the control line above the trace, depending on the trace. 6) [LowLine Edit►] Lower line editing is used to edit the control line above the trace, depending on the trace. 7) [Return] Return to the previous menu.
- Page 34 5.19.2 [Setting] A soft menu for setting the interface address of the spectrum analyzer, including [Network ►]. The spectrum analyzer supports VGA, LAN and USB interface communication. 5.19.2.1 [LAN►] Pop out the relative menu for network configuring. 1) [IP] Used to set the IP address of the LAN port. 2) [Mask] Set the subnet mask parameter.
- Page 35 Start Frequency 9.000 kHz 500M 500.009000MHz Stop Frequency 1.000009000GHz 1.5G 1.500009000GHz Auto 500M 50.000000 MHz Auto Frequency Step 100.000000 MHz Auto 1.5G 150.000000 MHz Frequency Offset 0 Hz Frequency Reference Internal SPAN 500M 500.000000MHz Sweep 1.000000000GHz 1.5G 1.500000000GHz AMPTD Reference Level 0.00 dBm Attenuator Auto 10 dB...
- Page 36 Trace Trace Trace Type Clear Write Trace 1 Math 1<- ->2 Display Full Display Window Zoom Display Line Amplitude Scale Grid Label Trig Trigger Type Auto Demod DEMOD Analog Demod Peak Peak Search Marker Fctn Marker Noise Frequency Count Marker Marker Trace Marker List...
- Page 37 System Interface 192.168.1.13 Mask 255.255.255.0 Gate 192.168.1.1 DHCP Language English Date/Time 5.19.13 [Calibration►] Pop up user calibration soft menu including [Calibration] and [Factory]. [Calibration]: Set the signal generator frequency as 440MHz, power as -20dBm, access to RF instrument RF input, press the [Calibration] softkey, start the implementation of user calibration.
- Page 38 5.23.1.1 [Screen Pixmap►] Enter screenshot save soft menu, you can choose to save screenshots to local or flash memory, the image file format is bmp, the lower left corner of the screen status display bar will display the saved screenshots information. 5.23.1.1 [Trace Data►] Enter the trace data save soft menu, you can choose to save the trace data to the local or flash memory, trace data file format is csv, the bottom left corner of the screen status display trace data saving information.
-
Page 39: Specification
6. Specification This chapter lists the technical specifications and general technical specifications of the spectrum analyzer. Unless otherwise stated, the technical specifications apply to the following conditions: • The instrument has been preheated for 30 minutes before use. • The instrument is in the calibration cycle and has been self-calibrated. “Typical”... - Page 40 Resolution Filter Shape <5 typical Factor (60 dB : 3 dB) Video Bandwidth (-3 dB) 10 Hz to 1 MHz(1-3-5-10 steps by sequence) Resolution bandwidth (-6 dB) 200 Hz,9 kHz,120 kHz,1 MHz (EMI) 200 Hz, 9 kHz, 120 kHz, 1 MHz Amplitude and level Amplitude measurement DANL to +10 dBm, 100 kHz to 10MHz, Preamp Off...
- Page 41 Input Attenuation Switching Uncertainty Setting range 0 dB to 40 dB, in 1 dB step fc = 50 MHz, relative to 10 dB, 20°C to 30°C Switching uncertainty <0.5 dB Absolute Amplitude Uncertainty fc = 50 MHz, peak detector, preamplifier off, attenuation = 10 dB, input signal level = -10dBm, 20°C to 30°C Uncertainty <0.4 dB...
- Page 42 Sweep Span≥10 Hz 10 ms to 3000 s Sweep Time Zero Span 20 us to 3000 s span ≥ 100 Hz: 5% (nominal) Sweep time uncertainty zero span (sweep time setting value > 1 ms): 5% (nominal) Sweep Mode Continuous, Single Trigger Trigger source free run, video, external...
- Page 43 External Trigger Input Impedance 1 kΩtypical Connector BNC female Audio interface Impedance 30 Ω, typical Connector 3.5 mm USB Host Connector A Plug Protocol USB version 2.0 USB Device Connector B Plug Protocol version 2.0 HDMI Connector A Plug Protocol version 1.4 10/100Base, RJ-45 Display...
-
Page 44: Warranty
7. Warranty 7.1 Troubleshooting Typical issues that may occur when using your spectrum analyzer: • Power on malfunction • No signal display • Wrong measurement results or poor frequency or amplitude precision. 1. Power on malfunction Power on malfunction can include a situation where the screen is still dark (no display) after switch on. If the screen is still dark after power on, please check: 1) If the power supply has been connected correctly and it the power supply voltage range is within the specification. -
Page 45: Appendix A: Enclosure
8. Appendix Appendix A: Enclosure (The accessories subject to final delivery.) Standard Accessories Appendix B: General Care and Cleaning General Care Do not store or leave the instrument where the liquid crystal display could be exposed to direct sunlight for long periods of time. -
Page 46: Appendix C: Usb Disk Requirements
Group was aware of the possibility of such loss or damage arising) is excluded. This will not operate to limit or restrict the Group’s liability for death or personal injury resulting from its negligence. Multicomp Pro is the registered trademark of Premier Farnell Limited 2019.
Need help?
Do you have a question about the MP700852 and is the answer not in the manual?
Questions and answers