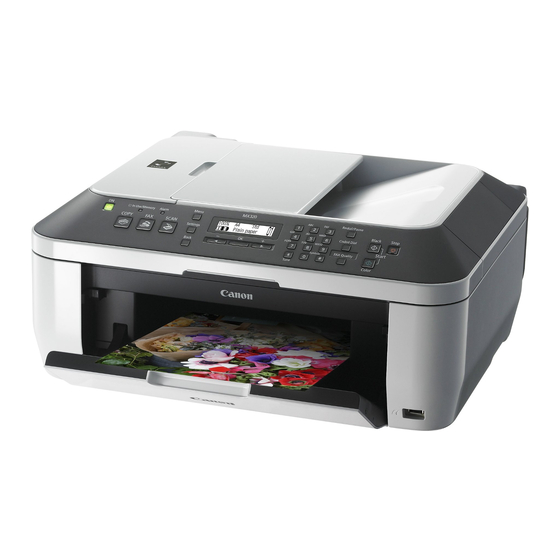
Canon PIXMA MX320 SERIES Getting Started
Office all-in-one printer
Hide thumbs
Also See for PIXMA MX320 SERIES:
- Manual (818 pages) ,
- Getting started (49 pages) ,
- Setting up (16 pages)
Table of Contents
Advertisement
Quick Links
Office All-In-One
Todo en uno para oficina
Getting Started
=Read Me First=
Guía de inicio
=Léame en primer lugar=
Make sure to read this manual before using the machine. Please keep it in hand for future reference.
Asegúrese de leer este manual antes de usar el equipo. Consérvelo a mano para utilizarlo como referencia en el futuro.
series
ENGLISH
ESPAÑOL
Advertisement
Table of Contents

Related Manuals for Canon PIXMA MX320 SERIES


Summary of Contents for Canon PIXMA MX320 SERIES
-
Page 1: Getting Started
Office All-In-One Todo en uno para oficina series Getting Started =Read Me First= Guía de inicio =Léame en primer lugar= Make sure to read this manual before using the machine. Please keep it in hand for future reference. Asegúrese de leer este manual antes de usar el equipo. Consérvelo a mano para utilizarlo como referencia en el futuro. ENGLISH ESPAÑOL... - Page 2 ■ Symbols The following symbols are used to mark important instructions. Observe these instructions. Caution Instructions that, if ignored, could result in personal injury or material damage. Instructions that must be observed for safe operation. Additional explanations. Descriptions for operations that take some time to complete. •...
-
Page 3: Table Of Contents
Contents Contenido Pre para tion Pre para ció n Remo ve th e Pr o te ctive Mater ial Ret irad a de l m at er ia l p r o te ctor Conne ct th e Tele ph o ne L in e Conexión de la lín ea t elefónic a Tu rn th e Po w e r On En cend id o d e l e qu ipo... -
Page 4: Preparation Preparación
Preparation Preparación ■ Check the Included Items ■ Compruebe los elementos que se incluyen Before turning on the machine, remove all the orange tapes and the protective sheets. Antes de encender el equipo, retire todas las cintas naranjas y las láminas protectoras. •... -
Page 5: Remove The Protective Material
Remove the Protective Material Retirada del material protector Open the Paper Output Lift the Scanning Unit (Cover) (B) until it Tray (A). locks into place. The Scanning Unit Support (C) is fixed automatically. Abra la bandeja de salida del papel (A). Levante la unidad del escáner (cubierta) (B) hasta que encaje en su lugar. -
Page 6: Connect The Telephone Line
Connect the Telephone Line Conexión de la línea telefónica To use the machine as a fax, a telephone line needs to be connected. This section describes the basic method of telephone line connection. For other connection methods, refer to the on-screen manual: Basic Guide. When not using as a fax: When using as both a fax and telephone:... - Page 7 Only when connecting a telephone: Sólo al conectar un teléfono: Remove the telephone connector cap (B), then connect a telephone with the telephone line cable. Retire la tapa del conector del teléfono (B) y conecte un teléfono mediante el cable de línea telefónica. •...
-
Page 8: Turn The Power On Encendido Del Equipo
Turn the Power On Encendido del equipo Plug the power cord into the left side of the Turn on the machine (A). machine, then connect the other end to the wall outlet. Encienda el equipo (A). Enchufe el cable de alimentación en la parte izquierda del equipo y conecte el otro extremo a la toma de corriente. -
Page 9: Install The Fine Cartridges
Install the FINE Cartridges Instalación de los cartuchos FINE • Handle the FINE Cartridges carefully. Do not drop or apply excessive pressure to them. • Be sure to use the supplied FINE Cartridges. • Instale los cartuchos FINE con cuidado. No los deje caer ni los presione con demasiada fuerza. - Page 10 Open the Ink Cartridge Locking Cover on the right side. Pinch (G) firmly and pull up the cover. Abra la cubierta de bloqueo del cartucho de tinta Sujete (G) firmemente y levante la cubierta. Remove the Black FINE Cartridge from its box. Extraiga el cartucho FINE del lado derecho.
- Page 11 Place the Black FINE Cartridge into the right slot Coloque el cartucho FINE negro en la ranura derecha • Do not knock the FINE Cartridge against the sides of the holder. • Install in a well-lit environment. • Install the Black FINE Cartridge into the right slot, and the Color FINE Cartridge into the left slot. •...
- Page 12 Lift the Scanning Unit (Cover) (A) slightly and fold the Scanning Unit Support (E), then gently close the Scanning Unit (Cover) (A). Levante la unidad del escáner (cubierta) (A) ligeramente y pliegue el soporte de la unidad del escáner (E) para luego cerrar suavemente la unidad del escáner (cubierta) (A). •...
-
Page 13: Set Up For Fax Reception
Set Up for Fax Reception Configuración del equipo para la recepción de fax If you are not using the machine as a fax, go to "7 Install the Software" on page 14. Select a receive mode according to your needs to receive faxes easily. You can change the receive mode any time. - Page 14 When you want to switch the line between fax and telephone automatically (FAX priority mode) When a call arrives: Si desea alternar la línea entre el modo fax y teléfono automáticamente (FAX como modo prioritario) Si recibe una llamada: Voice call: The machine rings.
- Page 15 Press the FAX button (A), then press the Menu button (B). The FAX settings screen is displayed. Pulse el botón FAX (A) y, a continuación, Menú (Menu) (B). Aparecerá la pantalla Configuración de fax (FAX settings). Press the OK button. The Receive mode set.
-
Page 16: Install The Software
Install the Software Instalación del software To use the machine by connecting it to a computer, software including the drivers needs to be copied (installed) to the computer's hard disk. The screens below are based on Windows Vista operating system Ultimate Edition (hereafter referred to as "Windows Vista") and Mac OS X v.10.5.x. - Page 17 Windows Macintosh Refer to the "Additional Information for Spanish Users " sheet to install the Spanish version of the software. Consulte la "Informacion adicional para usuarios españoles" para instalar la version en español. If the Found New Hardware or Found New Hardware Wizard dialog box appears: Si aparece el cuadro de diálogo Nuevo hardware encontrado (Found New Hardware) o Asistente...
- Page 18 Windows Macintosh Turn on the computer, then insert the Setup CD-ROM into the CD-ROM drive. The setup program should start automatically. Encienda el ordenador y, a continuación, introduzca el CD-ROM de instalación (Setup CD-ROM) en la unidad de CD-ROM. El programa de instalación deberá iniciarse de forma automática. Go to Step Windows Vista Vaya al paso...
- Page 19 Windows Macintosh Click Easy Install. Drivers, application software, and on-screen manuals are installed automatically. Haga clic en Instalación simple (Easy Install). Los controladores, las aplicaciones de software y los manuales en pantalla se instalan automáticamente. • If you want to select particular items to install, click Custom Install and follow the on-screen instructions to proceed with the installation.
- Page 20 Windows Macintosh Read the License Agreement screen carefully and click Yes. Lea detenidamente la pantalla Contrato de licencia (License Agreement) y haga clic en Sí (Yes). • During installation, follow any on-screen instructions to install the software. • Durante la instalación, siga todas las instrucciones en pantalla para instalar el software. When the Please Allow All Install Wizard Processes screen appears, click Next.
- Page 21 Windows Macintosh When the Printer Connection screen appears, connect the machine to the computer with a USB cable. Cuando aparezca la pantalla Conexión de impresora (Printer Connection), conecte el equipo al ordenador con un cable USB. • The USB port is located on the back center of the machine. •...
- Page 22 Internet connection is required. (Connection fees apply.) • Se requiere una conexión a Internet. (Se aplican tasas de conexión). To register later, click Cancel. User registration can be started from the Canon Solution Menu icon. For details, refer to "Solution Menu" on page 30. • •...
- Page 23 Windows Macintosh When the Extended Survey Program screen appears, confirm the message. If you can agree, click Agree. If you click Do not agree, the Extended Survey Program will not be installed. (This has no effect on the machine's functionality.) Cuando aparezca la pantalla Extended Survey Program, confirme el mensaje.
- Page 24 Windows Macintosh Refer to the "Additional Information for Spanish Users " sheet to install the Spanish version of the software. Consulte la "Informacion adicional para usuarios españoles" para instalar la version en español. Connect the machine to the computer with a USB cable. Make sure the machine is turned on.
- Page 25 If the CD-ROM folder does not open automatically, double-click the CANON_IJ icon on the desktop. Haga doble clic en el icono Configuración (Setup). Si la carpeta CANON no se abre automáticamente, haga doble clic en el icono CANON_IJ del escritorio. Enter your administrator name and password.
- Page 26 Windows Macintosh Click Install. Haga clic en Instalar (Install). • Move the cursor over items to display explanations. • Desplace el cursor sobre los elementos para visualizar explicaciones. Read the License Agreement screen carefully and click Yes. Installation starts. Lea detenidamente la pantalla Contrato de licencia (License Agreement) y haga clic en Sí...
- Page 27 Windows Macintosh Click Next. Haga clic en Siguiente (Next). Click Next. If connected to the Internet, the user registration page appears. Follow the on-screen instructions to register your machine. You will need your product serial number, which is located on the inside of the machine. Haga clic en Siguiente (Next).
- Page 28 Windows Macintosh When the Extended Survey Program screen appears, confirm the message. If you can agree, click Agree. If you click Do not agree, the Extended Survey Program will not be installed. (This has no effect on the machine's functionality.) Cuando aparezca la pantalla Extended Survey Program, confirme el mensaje.
-
Page 29: Loading Paper Carga Del Papel
Loading Paper Carga del papel Open the Paper Support (A). Abra el soporte de papel (A). Move the Paper Guides (B) to both edges. Desplace las guías de papel (B) hacia ambos bordes. Load paper in the center. Load paper in portrait orientation with the printing side facing up. Cargue el papel en el centro. - Page 30 Slide the left and right Paper Guides (B) against both edges of the paper. Confirm that the loaded paper does not exceed the line (C). Deslice las guías de papel izquierda y derecha (B) hacia ambos bordes del papel. Compruebe que el papel cargado no supera la línea (C). •...
-
Page 31: After Installing The Machine
After Installing the Machine Después de instalar el equipo ■ Manuals ■ Manuales Safety Precautions Precauciones de seguridad Describes how to set up and use your machine. S afety and E nv iron me nt Introduces the machine and its functions, the I nfo rma tion included manuals and application software. - Page 32 Open various applications and on-screen manuals with a single click. You can start Solution Menu from the Canon Solution Menu icon on the desktop (Windows) or on the Dock (Macintosh). If you have a problem with machine settings, click the Change settings or find solutions to problems. in Solution Menu to open My Printer (Windows only).
- Page 33 Try Using the Machine! Intente utilizar el equipo. Various application software are installed on the computer along with the drivers. You can print creative items by correcting/enhancing photos using the applications. Alternatively, use the Operation Panel on the machine to print your own items easily.
-
Page 34: Try Copying
Try Copying Realice una prueba de copia You can copy a document by simply placing it on the Platen Glass and pressing the Start button. This section explains with Plain Paper. For various copying procedures, refer to "Copying" in the on-screen manual: Basic Guide. Para copiar un documento sólo tiene que colocarlo en la bandeja de cristal y pulsar el botón Iniciar (Start). - Page 35 Close the Document Cover (A), press the COPY button (D), then press the Black button (E) or the Color button (F). Copying will start. Remove the document after printing. Cierre la cubierta de documentos (A), pulse el botón COPIA (COPY) (D) y, a continuación, Negro (Black) (E) o Color (F). La copia se iniciará.
- Page 36 Print Photos from a Computer Impresión de fotografías desde un ordenador Easy-PhotoPrint EX allows you to print photos easily. This section explains how to print borderless photos using 4" x 6" size Photo Paper Plus Glossy II. The screens are based on Windows Vista. Easy-PhotoPrint EX le permite imprimir fotografías fácilmente.
- Page 37 Load a sheet of photo paper in portrait orientation. Load paper with the printing side facing up. Cargue una hoja de papel fotográfico con orientación vertical. Cargue el papel con la cara de impresión boca arriba. • For details, refer to "8 Loading Paper" on page 27. •...
-
Page 38: Send Faxes
Send Faxes Envío de faxes This section explains how to send a fax in black and white from the ADF (Auto Document Feeder) (A). For other procedures to send faxes, refer to "Faxing" in the on-screen manual: Basic Guide. Make sure that the telephone line type is set correctly. For the setting procedure, refer to "Setting Up the Machine"... - Page 39 Insert the document until a beep sounds, then slide the left and right Paper Guides (D) against both ends of the document. Inserte el documento hasta que suene un pitido y deslice las guías de papel izquierda y derecha (D) hacia ambos extremos del documento.
- Page 40 Maintenance Mantenimiento After a period of use, the inside of the machine may become stained with ink. To avoid staining your hands or clothes with ink, it is recommended that you clean the Ink Cartridge Locking Cover (A) and the inside of the tray (B) with a dry cloth as required. If the Scanning Unit (Cover) is left open for more than 10 minutes, the FINE Cartridge Holder moves to the right automatically.
-
Page 41: Specifications
Transmission speed Black & white: Approx. 3 seconds/page at 33.6 Kbps, ECM-MMR, transmitting from memory (Based on ITU-T No.1 chart for US specifications and Canon FAX Standard chart No.1 for others, both in standard mode or Canon FAX Standard chart No.1, standard mode.) Color: Approx. - Page 42 (Basado en el cuadro n.º 1 de ITU-T para especificaciones de EE UU y en el cuadro n.º 1 del estándar de FAX de Canon para el resto, ambos en modo estándar, o en el cuadro n.º 1 del estándar de FAX de Canon, modo estándar.) Color: aprox.
- Page 43 Puede que algunas opciones no estén disponibles con Windows Media Center • Para actualizar desde Windows XP a Windows Vista, desinstale primero el software incluido con la impresora de inyección de tinta Canon. • Macintosh: el disco duro debe tener formato Mac OS Plus (con registro) o Mac OS Plus.
-
Page 44: Getting Help From Canon
2973B001 CL-211XL Color (optional) 2975B001 PG-210 Black 29188002 CLI-211 Color 2974B001 Call 1-800-OK-CANON to locate a dealer near you, or visit the Canon eStore at www.canonestore.com CANON U.S.A. INC. One Canon Plaza, Lake Success, NY 11042 U.S.A. www.usa.canon.com QT5-3185-V01 XXXXXXXX Asistencia de Canon Dirección de correo electrónico de la asistencia...
Need help?
Do you have a question about the PIXMA MX320 SERIES and is the answer not in the manual?
Questions and answers