Table of Contents
Advertisement
Quick Links
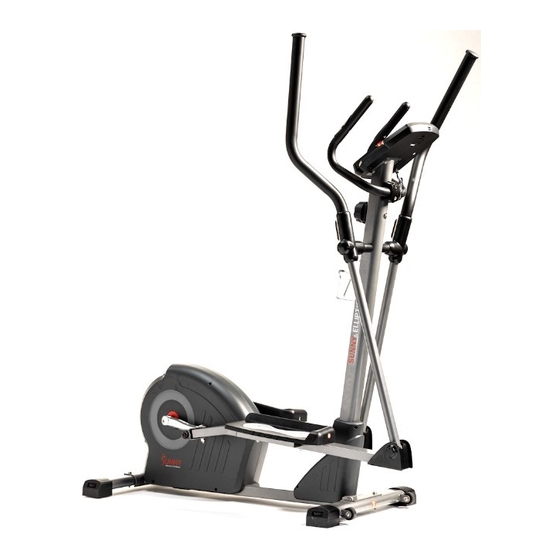
ELITE INTERACTIVE SERIES
EXERCISE ELLIPTICAL
SF-E320047
USER MANUAL
IMPORTANT! Please retain owner's manual for maintenance and adjustment instructions. Your
satisfaction is very important to us, PLEASE DO NOT RETURN UNTIL YOU HAVE CONTACTED
US: support@sunnyhealthfitness.com or 1-877-90SUNNY (877-907-8669).
Advertisement
Table of Contents

Related Manuals for Sunny Health & Fitness ELITE INTERACTIVE Series


Summary of Contents for Sunny Health & Fitness ELITE INTERACTIVE Series
- Page 1 ELITE INTERACTIVE SERIES EXERCISE ELLIPTICAL SF-E320047 USER MANUAL IMPORTANT! Please retain owner’s manual for maintenance and adjustment instructions. Your satisfaction is very important to us, PLEASE DO NOT RETURN UNTIL YOU HAVE CONTACTED US: support@sunnyhealthfitness.com or 1-877-90SUNNY (877-907-8669).
-
Page 2: Important Safety Information
IMPORTANT SAFETY INFORMATION We thank you for choosing our product. To ensure your safety and health, please use this equipment correctly. It is important to read this entire manual before assembling and using the equipment. Safe and effective use can only be achieved if the equipment is assembled, maintained, and used properly. -
Page 3: Exploded Diagram
EXPLODED DIAGRAM 1... - Page 4 EXPLODED DIAGRAM 2...
-
Page 5: Parts List
PARTS LIST Description Spec. Description Spec. Main Frame Bolt M8*16 Ф32*Ф8*2.0 Front Stabilizer Big Washer Φ32*3.5 Rear Stabilizer Shaft Sleeve Ф19*Ф26*0.3 Front Post Wave Washer Φ31.8*Φ19.2 Left Swing Rod Bushing Φ32*3 Right Swing Rod Shaft Sleeve Ф14*Ф8.2*58 Left Foot Bar Insulation Casing Right Foot Bar Left Foot Bar Cover-A... - Page 6 PARTS LIST Description Spec. Description Spec. Ф6*Ф16*1.2 Left Decorative Cover Washer Ф12*1.0 Right Decorative Cover Shaft Snap Ring Adjustable End Cap Magnetic Plate Axle Screw ST4.2*20 Magnetic Bracket Bolt M8*55 Magnet Seat Bolt M8*40 Magnet Transportation Wheel Screw ST2.9*9 Screw M8*20 Spring Tension Wire...
-
Page 7: Hardware Package
HARDWARE PACKAGE Ordering Replacement Parts (U.S. and Canadian Customers only) Please provide the following information in order for us to accurately identify the part(s) needed: ✓ The model number (found on cover of manual) ✓ The product name (found on cover of manual) ✓... - Page 8 ASSEMBLY INSTRUCTIONS We value your experience using Sunny Health and Fitness products. For assistance with parts or troubleshooting, please contact us at support@sunnyhealthfitness.com or 1-877-90SUNNY (877-907-8669). STEP 1: Unscrew 4 Screws (No. 70) from Main Frame (No. 1) with Allen Wrench (No. 121).
- Page 9 We value your experience using Sunny Health and Fitness products. For assistance with parts or troubleshooting, please contact us at support@sunnyhealthfitness.com or 1-877-90SUNNY (877-907-8669). STEP 3: Remove 6 Screws (No. 70), 4 Washers (No. 45), 2 Big Arc Washers (No. 25) and 6 Spring Washers (No.
- Page 10 We value your experience using Sunny Health and Fitness products. For assistance with parts or troubleshooting, please contact us at support@sunnyhealthfitness.com or 1-877-90SUNNY (877-907-8669). STEP 4: Attach the Left Decorative Cover (No. 63) and Right Decorative Cover (No. 64) to the Main Frame (No.
- Page 11 We value your experience using Sunny Health and Fitness products. For assistance with parts or troubleshooting, please contact us at support@sunnyhealthfitness.com or 1-877-90SUNNY (877-907-8669). STEP 5: Remove 2 Bolts (No. 31), 2 Spring Washers (No. 17), 2 Big Washers (No. 32) and 2 Wave Washers (No.
- Page 12 We value your experience using Sunny Health and Fitness products. For assistance with parts or troubleshooting, please contact us at support@sunnyhealthfitness.com or 1-877-90SUNNY (877-907-8669). STEP 6: Attach the Left Pedal (No. 48) to the Left Foot Bar (No. 7) with 2 Bolts (No. 47), 2 Washers (No.
- Page 13 We value your experience using Sunny Health and Fitness products. For assistance with parts or troubleshooting, please contact us at support@sunnyhealthfitness.com or 1-877-90SUNNY (877-907-8669). STEP 8: Attach the Left Swing Rod Cover-A (No. 27) and Left Swing Rod Cover-B (No. 28) to the Left Swing Rod (No.
- Page 14 We value your experience using Sunny Health and Fitness products. For assistance with parts or troubleshooting, please contact us at support@sunnyhealthfitness.com or 1-877-90SUNNY (877-907-8669). STEP 10: Remove 4 Screws (No. 21) from the back of the Computer (No. 20) with the Spanner (No.
-
Page 15: Battery Installation And Replacement
BATTERY INSTALLATION & REPLACEMENT BATTERY INSTALLATION 1. Take out 2 AA batteries from computer box. 2. Press the buckle of battery cover on the Computer (No. 20), then remove battery cover. 3. Install 2 AA batteries into the battery case on the back of the Computer (No. 20). Pay attention to the battery + and –... -
Page 16: Adjustments Guide
ADJUSTMENTS GUIDE MOVING THE ELLIPTICAL BIKE Press the Middle Handlebar (No. 11) and tilt the elliptical bike until the Transportation Wheels (No. 69) touch the ground. Now you can transport the elliptical bike to the desired location with ease. ADJUSTING THE BALANCE In order to achieve a smooth and comfortable ride, you must ensure that the elliptical bike is stabled and secured. -
Page 17: Exercise Computer
EXERCISE COMPUTER FUNCTION BUTTONS: MODE: 1. Press the button to select hour, minute, year, month and date for setting. 2. Press the button to select TIME, DISTANCE, CALORIES and PULSE to preset. 3. Press the button to select function displaying on main LCD or enter after setting. -
Page 18: Operation
RPM: Displays the Rotation per Minute (RPM). The RPM and SPEED will switch to one another on display, every 6 seconds after exercise starts. SPEED: Displays current training speed. Maximum speed is 99.9 MPH (miles/hour). DISTANCE: Accumulates total distance from 0.00 up to 99.99 m (miles). The user may preset target distance data by pressing the SET &... -
Page 19: App Connection
please hold the handle pulses with both hands. You may preset target pulse before training starts. Once your current heart rate is achieved, the computer will beep to notify you. 8. Recovery – When the PULSE is working, you can press “RECOVERY” button to start the recovery test function. -
Page 20: Troubleshooting
TROUBLESHOOTING PROBLEM SOLUTION Remove the computer and verify that the wire from computer properly connected to the wire that comes from the front post. Check batteries correctly There is no display on the computer. positioned and battery springs are in proper contact with batteries.
Need help?
Do you have a question about the ELITE INTERACTIVE Series and is the answer not in the manual?
Questions and answers