Advertisement
ESSENTIAL INTERACTIVE SERIES
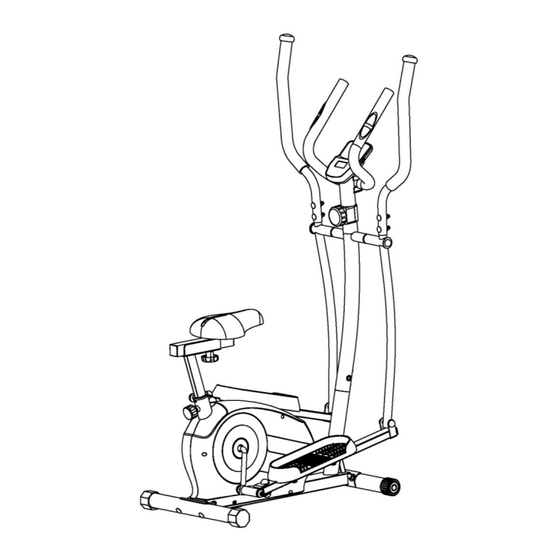
SEATED ELLIPTICAL
SF-E322004
USER MANUAL
IMPORTANT! Please retain owner's manual for maintenance and adjustment instructions.
Your satisfaction is very important to us, PLEASE DO NOT RETURN UNTIL YOU HAVE
CONTACTED US: support@sunnyhealthfitness.com or 1-877-90SUNNY (877-907-8669).
Advertisement
Table of Contents

Subscribe to Our Youtube Channel
Related Manuals for Sunny Health & Fitness ESSENTIAL INTERACTIVE SF-E322004


Summary of Contents for Sunny Health & Fitness ESSENTIAL INTERACTIVE SF-E322004
- Page 1 ESSENTIAL INTERACTIVE SERIES SEATED ELLIPTICAL SF-E322004 USER MANUAL IMPORTANT! Please retain owner’s manual for maintenance and adjustment instructions. Your satisfaction is very important to us, PLEASE DO NOT RETURN UNTIL YOU HAVE CONTACTED US: support@sunnyhealthfitness.com or 1-877-90SUNNY (877-907-8669).
-
Page 2: Important Safety Information
IMPORTANT SAFETY INFORMATION We thank you for choosing our product. To ensure your safety and health, please use this equipment correctly. It is important to read this entire manual before assembling and using the equipment. Safe and effective use can only be achieved if the equipment is assembled, maintained and used properly. -
Page 3: Pre-Assembly Check List
PRE-ASSEMBLY CHECK LIST Before you start to assemble, please make sure all parts are included. Description Spec. Qty. Description Spec. Qty. Main Frame Right Handlebar Front Stabilizer Decorative Cover 40X55X70 Rear Stabilizer 38-1 Meter BJHT060 Handlebar Post Nut Cap Left Pedal Support Tube Nut Cap 18R Right Pedal Support Tube Nut Cap... -
Page 4: Hardware Package
HARDWARE PACKAGE Ordering Replacement Parts (U.S. and Canadian Customers only) Please provide the following information in order for us to accurately identify the part(s) needed: The model number (found on cover of manual) The product name (found on cover of manual) ... - Page 5 ASSEMBLY INSTRUCTIONS We value your experience using Sunny Health and Fitness products. For assistance with parts or troubleshooting, please contact us at support@sunnyhealthfitness.com or 1-877-90SUNNY (877-907-8669). STEP 1: Remove 2 Paper Tubes (No. H) from the Main Frame (No. 1). Attach the Front Stabilizer (No.
- Page 6 We value your experience using Sunny Health and Fitness products. For assistance with parts or troubleshooting, please contact us at support@sunnyhealthfitness.com or 1-877-90SUNNY (877-907-8669). STEP 3: Remove 2 Wave Washers (No. 63), 2 Hex Bolts (No. 25) and 2 Flat Washers (No. 26) from the long axle of the Handlebar Post (No.
- Page 7 We value your experience using Sunny Health and Fitness products. For assistance with parts or troubleshooting, please contact us at support@sunnyhealthfitness.com or 1-877-90SUNNY (877-907-8669). STEP 4: Secure the Left & Right Pedals (No. 27L & No. 27R) to the Left & Right Pedal Support Tubes (No.
- Page 8 We value your experience using Sunny Health and Fitness products. For assistance with parts or troubleshooting, please contact us at support@sunnyhealthfitness.com or 1-877-90SUNNY (877-907-8669). STEP 6: Remove 4 Phillips Screws (No. 62) from the Meter (No. 38-1) with Spanner (No. 116). Plug the Pulse Sensor Wire (No.
-
Page 9: Troubleshooting
TROUBLESHOOTING 1. If you find there is no difference between tension level 1 to level 8, please check the connection of the tension cable. Please see Diagram A under STEP 2. 2. If the meter does not show numbers correctly, please check the batteries. If the meter does not count the speed and time, please check the connections of Upper Sensor Wire (No. -
Page 10: Adjustment Guide
ADJUSTMENT GUIDE ADJUSTING THE TENSION Adjust the tension by rotating the Tension Controller (No. 10a) clockwise to increase the level of resistance. Rotate the Tension Controller (No. 10a) counter-clockwise to decrease the level of resistance. Tension levels are set at Level 1 being the lowest and Level 8 being the highest. -
Page 11: Battery Installation And Replacement
BATTERY INSTALLATION & REPLACEMENT Battery Battery Cover 38-1 BATTERY INSTALLATION 1. Take out 2 AAA batteries from meter box. 2. Press the buckle of battery cover on the Meter (No. 38-1), then remove battery cover. 3. Install 2 AAA batteries into the battery case on the back of the Meter (No. 38-1). Pay attention to the battery + and –... - Page 12 EXERCISE METER ■KEY FUNCTION This key lets you select and lock on to a particular function you want. SCAN→TIME→SPD (SPEED) →DIST (DISTANCE) →CAL (CALORIES)→ODO (TOTAL DISTANCE) →RPM →PULSE Press and hold for 3 seconds to reset the value to zero [without resetting ODO (TOTAL DISTANCE)].
- Page 13 APP CONNECTION: Connect Smart Equipment to SunnyFit App: 1. Scan to download SunnyFit from the app store: 2. Ensure that the Bluetooth function is turned on from your mobile device. 3. If this is your first time using the SunnyFit app, follow the in-app instructions to register for your free SunnyFit account and log in.
-
Page 14: Parts List
PARTS LIST Description Spec. Qty. Description Spec. Qty. Main Frame Mushroom Cap Φ28.6X1.5 Front Stabilizer 49-1 Crank Arm L140XW228 Tension Controller Rear Stabilizer Cover End Cap Φ50X1.5 Hex Bolt M10X50 Leveler Cap Φ50X1.5 52-1 Connecting Joint Carriage Bolt M10XL57 Axle Bushing 1 Φ24X16XΦ16.1 Arc Washer Φ10X1.5XΦ25XR28... - Page 15 Description Spec. Qty. Description Spec. Qty. 7/8"X24 Flat Belt 380 PJ6 Washer Φ22.6XΦ28X2.5 Belt Pulley Φ260 Allen Wrench Locking Nut-L Φ45XH3.5XΦ33.5 Open Face Bearing Φ45.8X8.8 Allen Wrench Bearing Housing 2.5X76X76 Spanner S13, S14 Hex Bolt M6X55 Spanner S13, S14, S15 Bolt ST3X10 Spanner...
-
Page 16: Exploded Diagram
EXPLODED DIAGRAM 1 EXPLODED DIAGRAM 2 Version: 1.1...
Need help?
Do you have a question about the ESSENTIAL INTERACTIVE SF-E322004 and is the answer not in the manual?
Questions and answers