
Related Manuals for Sunny Health & Fitness SF-BH6629


Summary of Contents for Sunny Health & Fitness SF-BH6629
-
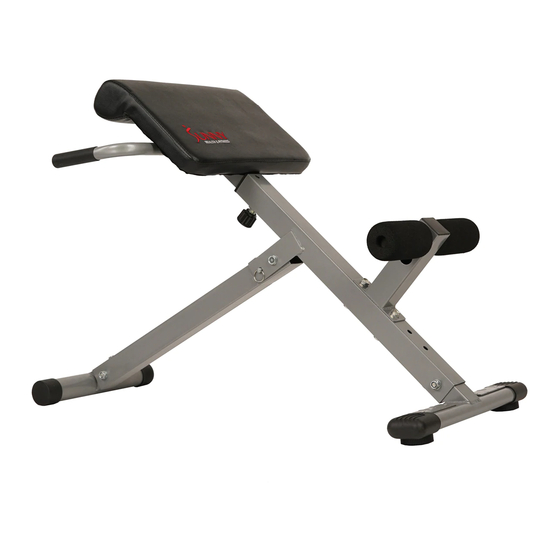
Page 1: User Manual
45 DEGREE HYPEREXTENSION ROMAN CHAIR SF-BH6629 USER MANUAL IMPORTANT: Read all instructions carefully before using this product. Retain owner’s manual for future reference. For customer service, please contact: support@sunnyhealthfitness.com... -
Page 2: Important Safety Information
IMPORTANT SAFETY INFORMATION We thank you for choosing our product. To ensure your safety and health, please use this equipment correctly. It is important to read this entire manual before assembling and using the equipment. Safe and effective use can only be assured if the equipment is assembled, maintained, and used properly. -
Page 3: Exploded Drawing
EXPLODED DRAWING... -
Page 4: Parts List
PARTS LIST Cushion Right Handle Bar Adjustable Tube Back Base Tube Left Handle Bar Back Stand Tube Front Base Tube Leg Support Tube Front Stand Adjustable Tube Support Plate Foam Tube Foam Hex Bolt M10x65 2pcs Hex Bolt M10x70 3pcs Nut M10 5pcs Lock pin 1pc Hex Bolt M8x15 4pcs... -
Page 5: Assembly Instructions
ASSEMBLY INSTRUCTIONS STEP 1: Fix the Cushion (1) to the Adjustable Tube (2), using Hex Bolts (D) and Washers (F). Then attach Right Handlebar (3) and Left Handlebar (4) to Adjustable Tube (2), using Hex Bolts (A), Washers (E) and Nuts (G). STEP 2: Insert Back Stand Tube (5) into Back Base Tube (6). - Page 6 STEP 3: Insert Front Stand Adjustable Tube (7) into Front Base Tube (8) Secure using Hex Bolts (C) and Washers (E). STEP 4: Insert Foam Tube (10) through the hole of the Leg Support Tube (9). Then put Foam (11) on the ends of the Foam Tube (10).
- Page 7 STEP 5: Attach Back Stand Tube (5) to Front Stand Adjustable Tube (7), using Hex Bolt (B), Washer (E), and Nut (G). Insert Lock Pin (H). Place bench on floor, making sure the Tubes are level on the floor. Tighten all the Hex Bolts and Nuts.
- Page 8 Assembly is now complete. To adjust the cushion height: With one hand, turn Lock Pin (I) to loosen and pull on it. With the other hand, move the adjustable tube to desired height. Insert Lock Pin (I) into one of the five settings to secure and turn to tighten.
-
Page 9: Maintenance
MAINTENANCE IMPORTANT: Safe and effective use can only be achieved if the equipment is assembled, maintained and used properly. It is your responsibility to ensure that the equipment is maintained regularly. Any components found to be worn and/or damaged should be replaced before continuing use of the equipment.
Need help?
Do you have a question about the SF-BH6629 and is the answer not in the manual?
Questions and answers