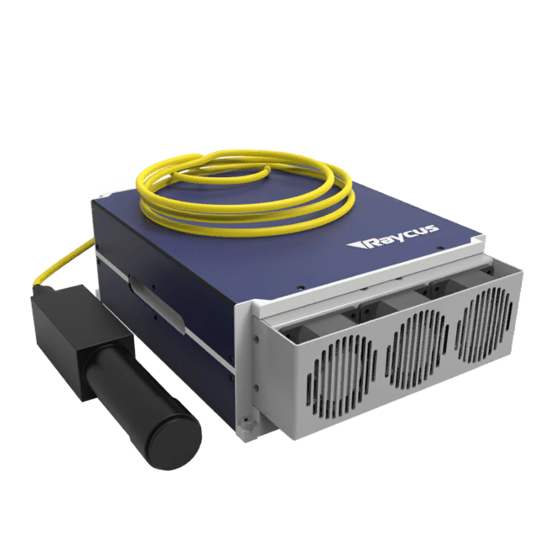
Summary of Contents for Raycus RFL-P100M
- Page 1 RFL- P100M 编号 密级 阶段标记 页数 名称 RFL-P100M 脉冲光纤激光器英文使用说明书 会签 单位 第二事业部 编写 李科 校对 朱军 审核 施建宏 标审 李其军 批准 黄保 武汉锐科光纤激光技术股份有限公司...
- Page 2 User’s guide Ytterbium Pulsed Fiber Laser RFL- P100M Ver.: 2.0 Ytterbium Pulsed Fiber Laser User’s Guide RFL-P100M Wuhan Raycus Fiber Laser Technologies Co., Ltd.,2018 Proprietary information. All rights reserved Issued 19 October 2018...
- Page 3 Raycus pulsed fiber laser is classified as a high power Class IV laser device. Before supplying the power to the device, please make sure that the correct voltage of 24VDC power source is connected and the anode and cathode are right.
-
Page 4: Table Of Contents
User’s guide Ytterbium Pulsed Fiber Laser RFL- P100M Ver.: 2.0 Content Description ..................... 1 1.1. Product description ......................1 1.2. Actual configuration list ....................1 1.3. Environmental requirements and cautions ..............1 1.4. Specifications ......................... 2 Mounting ....................4 Mounting dimensions ....................4 Method of installation .................... -
Page 5: Description
1) Caution: Make sure the corresponding wires of the device are properly grounded. 2) All the maintenance to the device should only be done by Raycus, because there is no replacement or accessory provided with the device. Please do not try to damage the labels or open the cover in order to prevent against electric shock, or the warranty will be invalid. -
Page 6: Specifications
User’s guide Ytterbium Pulsed Fiber Laser RFL- P100M Ver.: 2.0 5) Do not install the collimating device into the output head when the laser device is in working. 6) The device has four cooling fans at the rear panel to dissipate heat. In order to guarantee enough airflow to help giving heat off, there must be a space of at least 10 cm’s width for airflow in front and rear side of the device. - Page 7 User’s guide Ytterbium Pulsed Fiber Laser RFL- P100M Ver.: 2.0 Anti Strong Back optical isolator Reflection Supply voltage Cooling Forced Air Cooled ℃ Operating Temperature ℃ Store Temperature Humidity Power Consumption @25℃ Laser module dimensions 396×360×123 W×D×H 3 / 12...
-
Page 8: Mounting
User’s guide Ytterbium Pulsed Fiber Laser RFL- P100M Ver.: 2.0 2. Mounting 2.1 Mounting dimensions 1) Fiber Laser module dimensions (As shown in Fig. 1). Figure 1. Dimension drawing of laser module (Unit: mm). 2) Isolated output head dimensions (As shown in Fig. 2). Figure 2. - Page 9 User’s guide Ytterbium Pulsed Fiber Laser RFL- P100M Ver.: 2.0 24V+ 24V- Figure 3. Definition of power line wires 3) Make sure that the interface of the external controller matches the laser and the control cable is well connected to the laser’s interface. The recommended electrical connection is shown in Fig.
-
Page 10: Control Interface
User’s guide Ytterbium Pulsed Fiber Laser RFL- P100M Ver.: 2.0 3. Control Interface There are DB9 and DB25 interfaces at the rear of the laser. The DB9 is a RS232 interface only used for debugging, no needs to connect. And DB25 is the joint interface connecting control system to the laser system, please make sure the connection is reliable before operation. - Page 11 User’s guide Ytterbium Pulsed Fiber Laser RFL- P100M Ver.: 2.0 laser output power from 0~100% (the actual laser power may not be strictly linear with the setting value). The relationship between PIN value and output power is shown in Table 4: Table 4 Definition of power control PIN value Setting 1 Setting 2 Setting 3 Setting 4...
- Page 12 User’s guide Ytterbium Pulsed Fiber Laser RFL- P100M Ver.: 2.0 Figure 6. Control sequence of laser. T1:Represent the initialization time of the laser machine. The initialization time is less than10s from power-on to perform initialization. T2:Represent the pump recharge time, usually around 5ms. T3:Represent the frequency switching time.
- Page 13 User’s guide Ytterbium Pulsed Fiber Laser RFL- P100M Ver.: 2.0 PS 2: If the voltage or current states of the laser are abnormal, the alarm might present “POWER ERR” due to using different marking card (for example: Beijing JCZ Technology Co. marking card,).
- Page 14 User’s guide Ytterbium Pulsed Fiber Laser RFL- P100M Ver.: 2.0 Figure 7 Schematic of laser pulse duration adjustment(200ns) 8) I/O connection of digital signal: the supply current of input signals are less than 10mA, and the supply current of output signals are less than 3 mA. The connection circuit of input and output signals is shown in Fig.
-
Page 15: Operation Regulations
User’s guide Ytterbium Pulsed Fiber Laser RFL- P100M Ver.: 2.0 4. Operation Regulations 4.1 Pre-inspection 1) Make sure the device appearance is in good condition and the output fiber is neither excessively bended nor broken. 2) Make sure signal line of laser and marking system are properly connected. 4.2 Operation procedures 1) Starting procedures Please make sure the control system is on before you turn on the fiber laser. -
Page 16: Instructions For Warranty, Return And Maintenance
Raycus has the right to choose to repair or replace any product that proves to be defective in materials and workmanship selectively during the warranty period. Only products with particular defects are under warranty.


Need help?
Do you have a question about the RFL-P100M and is the answer not in the manual?
Questions and answers