Table of Contents
Advertisement
Quick Links
OWNER'S MANUAL
ASSEMBLY AND
OPERATING INSTRUCTIONS
WARNING
PLEASE READ THIS ENTIRE MANUAL
BEFORE INSTALLATION AND USE
OF THIS PELLET FUEL-BURNING
APPLIANCE.
FAILURE TO FOLLOW THESE
INSTRUCTIONS COULD RESULT IN
PROPERTY DAMAGE, BODILY INJURY
OR EVEN DEATH.
CONTACT LOCAL BUILDING OR FIRE
OFFICIALS ABOUT RESTRICTIONS
AND INSTALLATION INSPECTION
REQUIREMENTS IN YOUR AREA.
NOTICE TO INSTALLER: LEAVE
THESE INSTRUCTIONS WITH
THE GRILL OWNER FOR FUTURE
REFERENCE.
SAVE THIS MANUAL FOR FUTURE
REFERENCE.
Before visiting your local retailer, call our customer service department at 1-866-994-6390
Customer Service Hotline
1-866-994-6390
DO NOT RETURN YOUR GRILL TO THE STORE
from 9:00 am to 5:00 pm Eastern Time, Monday through Friday
or email us consumercare@thefulhamgroup.com.
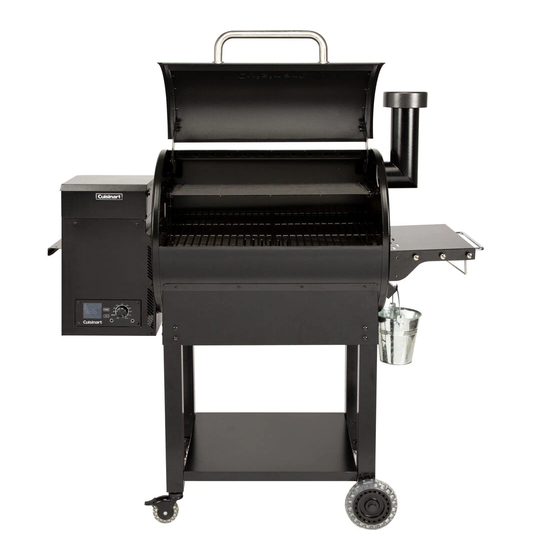
DELUXE WOOD PELLET GRILL
& SMOKER
Model NO: CPG-700
Advertisement
Table of Contents

Related Manuals for Cuisinart CPG-700


Summary of Contents for Cuisinart CPG-700
-
Page 1: Cover
DELUXE WOOD PELLET GRILL & SMOKER Model NO: CPG-700 OWNER’S MANUAL ASSEMBLY AND OPERATING INSTRUCTIONS WARNING PLEASE READ THIS ENTIRE MANUAL BEFORE INSTALLATION AND USE OF THIS PELLET FUEL-BURNING APPLIANCE. FAILURE TO FOLLOW THESE INSTRUCTIONS COULD RESULT IN PROPERTY DAMAGE, BODILY INJURY OR EVEN DEATH. -
Page 2: Safety Information
SAFETY INFORMATION Warnings and Usage IMPORTANT: ALL INSTRUCTIONS AND SAFEGUARDS ON THIS SECTION MUST BE FOLLOWED TO PREVENT DAMAGE AND/OR INJURY. IMPORTANT SAFETY INFORMATION WARNING: Never cover the cooking grates with foil or otherwise, it will restrict airflow and cause a hopper fire. WARNING: For outdoor use only. -
Page 3: Table Of Contents
TABLE OF CONTENTS Cover …………….…………..………………………….………...….………….………….….…………………..……..1 Safety Information……….….....……………………...………...….………….….………….……………..……..2 Table of Contents……...…….……………………..….………...….………….………………..……….…….…..3 Exploded View……....………….…………………….…………………….......……….………..5 Parts List….………......……..…..….……...…....……………..………………......6 Assembly Preparation and Instructions…......…………………...……………………….….….…..…..8 Operating the Grill…................…..……..…………………….…..21 Cooking..…………….…………………..………………….…..…...….….……………………...…...25 Care and Maintenance....…......……….………………..…………….……...….….…...…..28 Trouble Shooting..……....…….……………………………………..….…………………..…..…...31 Warranty and Replacement Parts…..………..……….……………………..…………..………….……...33... - Page 4 SAFETY INFORMATION GENERAL WARNINGS - - - - - - - - - - - - - - - - - - - - - - - - - - - - - - - - - - - - - - - - - - - - - - - - - - - - - - - - - - - - - - - - - - - - - - - - - - - - - - - - - - - •...
-
Page 5: Exploded View
EXPLODED VIEW... -
Page 6: Parts List
PARTS PART DESCRIPTION PART DESCRIPTION (x1) Hopper Lid (x1) Drip Shield Hopper top Legs, Hopper (x2) (x1) left panel Side Hopper top Locking (x2) (x1) back panel Caster Hopper top (x2) (x1) Wheel front panel Hopper top Legs, Shelf (x2) (x1) right panel Side... - Page 7 PARTS PART DESCRIPTION PART DESCRIPTION Paper Towel Side Shelf (x1) (x1) Bracket (right) Side Shelf Grease (x1) (x1) Bracket (left) Bucket Paper Towel (x1) Bracket HARDWARE PART DESCRIPTION PART DESCRIPTION Phillips Head Wheel (x2) Screw 1/4” x (x26) Washer 5/8” Phillips Head Flat Washer (x18)
-
Page 8: Assembly Preparation And Instructions
ASSEMBLY PREPARATION Some parts may contain sharp edges. Wear protective gloves during assembly and set up. Read and follow all safety statements, warnings, assembly instructions and use and care instructions before attempting to assemble and use. Before you Begin: Unpack all the components and verify that everything is present before beginning assembly. Several components are packed inside the cooking chamber, it is important to remove these as well. - Page 9 ASSEMBLY INSTRUCTIONS STEP 2 - ATTACHING LEGS TO MAIN BARREL - - - - - - - - - - - - - - - - - - - - - - - - - - - - - - - - - - - - - - - - - - - - - - - - - - - - - - - - - - - - - - - - - - - - - - - - - - - - - - - - - - - •...
- Page 10 ASSEMBLY INSTRUCTIONS STEP 4 - GREASE CHANNEL - - - - - - - - - - - - - - - - - - - - - - - - - - - - - - - - - - - - - - - - - - - - - - - - - - - - - - - - - - - - - - - - - - - - - - - - - - - - - - - - - - - •...
- Page 11 ASSEMBLY INSTRUCTIONS STEP 6 - ATTACHING TOOL HOOKS STEP 7 - SIDE SHELF ASSEMBLY - - - - - - - - - - - - - - - - - - - - - - - - - - - - - - - - - - - - - - - - - - - - - - - - - - - - - - - - - - - - - - - - - - - - - - - - - - - - •...
- Page 12 ASSEMBLY INSTRUCTIONS STEP 9 - SIDE SHELF - - - - - - - - - - - - - - - - - - - - - - - - - - - - - - - - - - - - - - - - - - - - - - - - - - - - - - - - - - - - - - - - - - - - - - - - - - - - - - - - - - - •...
- Page 13 ASSEMBLY INSTRUCTIONS STEP 11 - CHIMNEY - - - - - - - - - - - - - - - - - - - - - - - - - - - - - - - - - - - - - - - - - - - - - - - - - - - - - - - - - - - - - - - - - - - - - - - - - - - - - - - - - - - •...
- Page 14 ASSEMBLY INSTRUCTIONS STEP 13 - HOPPER - - - - - - - - - - - - - - - - - - - - - - - - - - - - - - - - - - - - - - - - - - - - - - - - - - - - - - - - - - - - - - - - - - - - - - - - - - - - - - - - - - - •...
- Page 15 ASSEMBLY INSTRUCTIONS STEP 15 - HOPPER - - - - - - - - - - - - - - - - - - - - - - - - - - - - - - - - - - - - - - - - - - - - - - - - - - - - - - - - - - - - - - - - - - - - - - - - - - - - - - - - - - - •...
- Page 16 ASSEMBLY INSTRUCTIONS STEP 17 - HOPPER - - - - - - - - - - - - - - - - - - - - - - - - - - - - - - - - - - - - - - - - - - - - - - - - - - - - - - - - - - - - - - - - - - - - - - - - - - - - - - - - - - - •...
- Page 17 ASSEMBLY INSTRUCTIONS STEP 19 - HOPPER INSTALLATION - - - - - - - - - - - - - - - - - - - - - - - - - - - - - - - - - - - - - - - - - - - - - - - - - - - - - - - - - - - - - - - - - - - - - - - - - - - - - - - - - - - •...
- Page 18 ASSEMBLY INSTRUCTIONS STEP 21 - COOKING GRATES - - - - - - - - - - - - - - - - - - - - - - - - - - - - - - - - - - - - - - - - - - - - - - - - - - - - - - - - - - - - - - - - - - - - - - - - - - - - - - - - - - - •...
- Page 19 ASSEMBLY INSTRUCTIONS STEP 22 - COOKING GRATES - - - - - - - - - - - - - - - - - - - - - - - - - - - - - - - - - - - - - - - - - - - - - - - - - - - - - - - - - - - - - - - - - - - - - - - - - - - - - - - - - - - •...
- Page 20 ASSEMBLY INSTRUCTIONS STEP 23 - GREASE BUCKET - - - - - - - - - - - - - - - - - - - - - - - - - - - - - - - - - - - - - - - - - - - - - - - - - - - - - - - - - - - - - - - - - - - - - - - - - - - - - - - - - - - •...
-
Page 21: Operating The Grill
OPERATING THE GRILL - - - - - - - - - - - - - - - - - - - - - - - - - - - - - - - - - - - WARNING - - - - - - - - - - - - - - - - - - - - - - - - - - - - - - - - - - Read and follow all warnings and instructions contained in the preceding sections of this manual. - Page 22 OPERATING THE GRILL - - - - - - - - - - - - - - - - - - - - - - - - - - - - - - - - - - - WARNING - - - - - - - - - - - - - - - - - - - - - - - - - - - - - - - - - - •...
- Page 23 OPERATING THE GRILL BREAKING IN YOUR GRILL: - - - - - - - - - - - - - - - - - - - - - - - - - - - - - - - - - - - - - - - - - - - - - - - - - - - - - - - - - - - - - - - - - - - - - - - - - - - - - - - - - - - Many surfaces of your Pellet Grill have been coated in a thin layer of oil to protect it during shipping.
- Page 24 OPERATING THE GRILL MANUAL START-UP PROCEDURE: (To be used if ignitor is not working properly): - - - - - - - - - - - - - - - - - - - - - - - - - - - - - - - - - - - - - - - - - - - - - - - - - - - - - - - - - - - - - - - - - - - - - - - - - - - - - - - - - - - Step 1: Ensure the grill is off.
-
Page 25: Cooking
- - - - - - - - - - - - - - - - - - - - - - - - - - - - - - - - - - - - - - - - - - - - - - - - - - - - - - - - - - - - - - - - - - - - - - - - - - - - - - - - - - - The Cuisinart Pellet Grill is equipped with a direct sear function which allows you open an air path between your food and the fire pot. - Page 26 - - - - - - - - - - - - - - - - - - - - - - - - - - - - - - - - - - - - - - - - - - - - - - - - - - - - - - - - - - - - - - - - - - - - - - - - - - - - - - - - - - - There are two food thermometers supplied with your Cuisinart Pellet Grill.
- Page 27 COOKING COOKING TIPS: - - - - - - - - - - - - - - - - - - - - - - - - - - - - - - - - - - - - - - - - - - - - - - - - - - - - - - - - - - - - - - - - - - - - - - - - - - - - - - - - - - - CLEANLINESS: •...
-
Page 28: Care And Maintenance
CARE AND MAINTENANCE INSIDE SURFACES: - - - - - - - - - - - - - - - - - - - - - - - - - - - - - - - - - - - - - - - - - - - - - - - - - - - - - - - - - - - - - - - - - - - - - - - - - - - - - - - - - - - It is recommended to regularly clean out any ash and pellet debris from the fire pot by scooping it out or using a shop-vac. - Page 29 CARE AND MAINTENANCE PELLET HOPPER CLEAN-OUT: - - - - - - - - - - - - - - - - - - - - - - - - - - - - - - - - - - - - - - - - - - - - - - - - - - - - - - - - - - - - - - - - - - - - - - - - - - - - - - - - - - - If grill will be left un-attended for a long period of time, we recommend you remove unused pellets.
- Page 30 CARE AND MAINTENANCE • Clean inside and outside of grill by wiping off with a damp cloth. Apply a light coat of vegetable oil or vegetable oil spray to the interior surface to prevent rusting. • Never apply paint to the interior surface. Rust spots on the interior surface can be buffed, cleaned, then lightly coated with vegetable oil or vegetable oil spray to minimize further rusting.
-
Page 31: Trouble Shooting
TROUBLE SHOOTING ISSUE RESOLUTION: - - - - - - - - - - - - - - - - - - - - - - - - - - - - - - - - - - - - - - - - - - - - - - - - - - - - - - - - - - - - - - - - - - - - - - - - - - - - - - - - - - - PROBLEM POSSIBLE CAUSE SOLUTION... - Page 32 TROUBLE SHOOTING PROBLEM POSSIBLE CAUSE SOLUTION This is normal due to the air pressure inside the grill. The This condition will not affect cooking. But can be minimized by amount of smoke can vary ensuring the inside of the grill is clean and there is not excessive ash. depending on cooking conditions.
-
Page 33: Warranty And Replacement Parts
WARRANTY AND REPLACEMENT PARTS EXPLODED VIEWS - - - - - - - - - - - - - - - - - - - - - - - - - - - - - - - - - - - - - - - - - - - - - - - - - - - - - - - - - - - - - - - - - - - - - - - - - - - - - - - - - - -... - Page 34 WARRANTY AND REPLACEMENT PARTS EXPLODED VIEWS - - - - - - - - - - - - - - - - - - - - - - - - - - - - - - - - - - - - - - - - - - - - - - - - - - - - - - - - - - - - - - - - - - - - - - - - - - - - - - - - - - - 32 33...
- Page 35 WARRANTY AND REPLACEMENT PARTS PARTS LIST: - - - - - - - - - - - - - - - - - - - - - - - - - - - - - - - - - - - - - - - - - - - - - - - - - - - - - - - - - - - - - - - - - - - - - - - - - - - - - - - - - - - Hopper Lid Chimney Cap Hopper top left panel...
- Page 36 (inclement weather, act of nature, animal tampering), improper installation not in accordance with local codes or printed manufacturer instructions. • To register your Cuisinart product, please visit https://cuisinart.registria.com. • For questions and replacement parts, please contact us at consumercare@thefulhamgroup.com or call 1-866-994-6390.
Need help?
Do you have a question about the CPG-700 and is the answer not in the manual?
Questions and answers