Advertisement
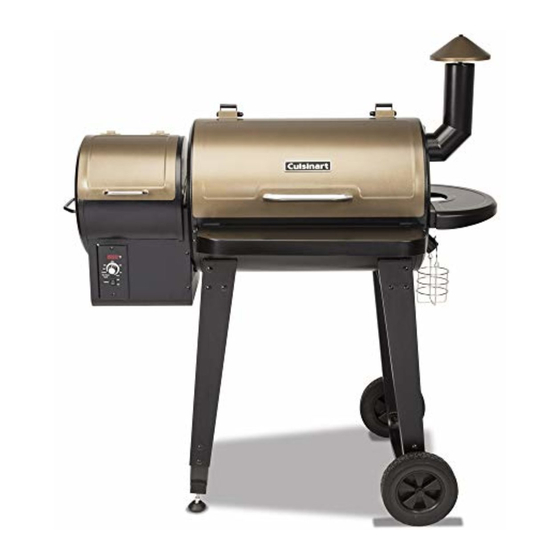
Wood Pellet BBQ Grill & Smoker
CPG-4000
Email or call our Customer Service Department from 9:00am
to 5:00pm Eastern time, Monday through Friday
Customer Service Phone: 1-866-994-6390
Customer Service Email: grilling@thefulhamgroup.com
WEBSITE: www.cuisinartgrill.com
TABLE OF CONTENTS
Table of Contents
Warnings
Assembly Instructions
Distributed by:
The Fulham Group
Newton, MA
USA
Manufacturer:
Jiangsu Zgrills Technology Co.,Ltd.
No 85 Baoying Road , Economic Development Zone ,
Baoying , Yangzhou , Jiangsu , China.
1
2
4
5
6
12
13
15
16
18
20
22
1
Advertisement
Table of Contents

Related Manuals for Cuisinart CPG-4000


Summary of Contents for Cuisinart CPG-4000
-
Page 1: Table Of Contents
Maintenance & Cleaning Troubleshooting Digtal Thermostat Control Wiring Diagram Warranty Wood Pellet BBQ Grill & Smoker Distributed by: CPG-4000 The Fulham Group Newton, MA Manufacturer: Email or call our Customer Service Department from 9:00am Jiangsu Zgrills Technology Co.,Ltd. to 5:00pm Eastern time, Monday through Friday... - Page 2 To prevent fingers, clothing or other objects from coming in contact with the auger feed WARNINGS! system, the appliance is equipped with a metal safety screen, mounted to the interior of the hopper. This screen must not be removed unless directed by Customer Service or an authorized dealer.
-
Page 3: Component List
EXPLODED VIEW COMPONENT LIST ITEM QTY DESCRIPTION ITEM QTY DESCRIPTION Hinge Assembly Cooking Grate Hinge Pin Warming Rack Side Handle Hopper Bottom Cover Grill Lid Hopper Safety Screen Name Plate Hopper Assembly Lid Handle Cable Box Grill Chamber Assembly Power Cord Hopper Assembly Digital Control W/SDC Chimney Cap... - Page 4 BASE ASSEMBLY MOUNTING THE BASE TO THE CHAMBER 1) Attach on Front Leg (20) and one Rear Leg (21) to the Wheel Base (28) using 3 Flat 1) On a soft surface, place Grill Chamber (7) on its side or back. Attach the Wheel Base Spacers (J), 3 Spring Washers (E) and 3 Bolts (B) per leg.
- Page 5 ATTACHING HANDLE TO LID ATTACHING SMOKESTACK TO GRILL CHAMBER 1) Place one Hexagon Bolt (A) through one Flat Washers (G), then place both through the 1) Place the Chimney Gasket (11) between the Chimney (10) and the Grill Chamber. back side of the Lid (4) and meet with the Lid Handle (6). Tighten loosely with a wrench. Align the holes between the Chimney (10), Chimney Gasket (11) and Grill Chamber.
- Page 6 POSITIONING THE GREASE DRAIN PAN HANG ON THE GREASE BASKET Open lid, place the Grease Drip Pan (31) inside the Grill Chamber onto the supporting Locate the Grease Drain Tube which is on the right side of the chamber, then hang the brackets.
-
Page 7: Initial Firing Instructions
SUBSEQUENT START-UP INITIAL FIRING INSTRUCTIONS TURNING ON GRILL: 1. Fill the hopper with pellets. The hopper will hold about 15 pounds. Please read this manual carefully and follow it step by step before starting your Adding additional pellets while cooking will depend on the temperature and length grill f or the first time and each time the grill runs out of pellets. -
Page 8: Operating Tips
OPERATING TIPS 1.Just like other barbecues, the actual temperature of this grill or the cooking times 2.Fill the Pellet Hopper with pellets. (Note: Only Dia 6MM Pellets can be used.) 3.Remove the Porcelain Grills, Grease Drain Pan and Heat Baffle, then pour 1/2 will be affected by external temperature, humidity, wind conditions, quality of pellets cup of pellets into the Firepot. -
Page 9: Maintenance & Cleaning
Use a warm soap water to wipe the grease. Do not use oven cleaner, abrasive cleansers or abrasive cleaning pads on the outside grill surfaces. Use Cuisinart Cover to protect your grill is highly recommended. Use a high-quality car wax on the outside surfaces of the grill can protect your paint finish. -
Page 10: Troubleshooting
. Replace the fuse if blown. Contact your name, phone number, address, Get your new parts Customer Ser vice Cuisinart model number, serial number to place an order and part identification number from If both of the Draft Inducer Fanand the the COMPONENT LIST. -
Page 11: Digtal Thermostat Control Wiring Diagram
DIGTAL THERMOSTAT CONTROL WIRING DIAGRAM SENSOR GREEN/WHITE WIRES AUGER DRIVE MOTOR (SMALL FAN BLADE) YELLOW/WHITE WIRES Smoke DRAFT NDUCER FAN Shut Down High (LARGE FAN BLADE) Cycle Power PURPLE/WHITE WIRES HOT ROD SWITCH (FIBERGLASS NSULATION) BLACK WHITE WIRES • POWER CORD Email or call our Customer Service Department from 9:00am to 5:00pm Eastern time, Monday through Friday Customer Service Phone 1-866-994-6390... -
Page 12: Warranty
WARRANTY Cuisinart 1 YEAR L IMITED WARRANTY PROOF OF PURCHASE is required to access this warranty program, which is in effect from the date of purchase. Customers will be subject to parts, shipping, and handling fees if unable to provide proof of the purchase or after the warranty has expired.
Need help?
Do you have a question about the CPG-4000 and is the answer not in the manual?
Questions and answers