Table of Contents
Advertisement
Quick Links
Advertisement
Table of Contents

Related Manuals for Keysight Technologies 87104A SP4T


Summary of Contents for Keysight Technologies 87104A SP4T
- Page 1 Keysight 8710x Series Coxial Multiport Switches Operating and Service Manual...
- Page 2 MENT IS PROVIDED “AS IS,” AND IS SUBJECT lation (“FAR”) 2.101. Pursuant to FAR 12.212 TO BEING CHANGED, WITHOUT NOTICE, IN © Keysight Technologies 2007 - 2019 and 27.405-3 and Department of Defense FAR FUTURE EDITIONS. FURTHER, TO THE MAXI- No part of this manual may be reproduced in Supplement (“DFARS”) 227.7202, the U.S.
-
Page 3: Waste Electrical And Electronic Equipment (Weee) Directive
Waste Electrical and Electronic Equipment (WEEE) Directive This instrument complies with the WEEE Directive marking requirement. This affixed product label indicates that you must not discard this electrical or electronic product in domestic household waste. Product category: With reference to the equipment types in the WEEE directive Annex 1, this instrument is classified as a “Monitoring and Control Instrument”... - Page 4 THIS PAGE HAS BEEN INTENTIONALLY LEFT BLANK. Keysight 8710x Operating and Service Manual...
-
Page 5: Table Of Contents
Table of Contents Waste Electrical and Electronic Equipment (WEEE) Directive ....3 Product category: ........... . 3 Sales and Technical Support . - Page 6 THIS PAGE HAS BEEN INTENTIONALLY LEFT BLANK. Keysight 8710x Operating and Service Manual...
-
Page 7: List Of Figures
List of Figures Figure 1-1 Keysight 87106D and 87104D coaxial multiport switches ..12 Figure 2-1 Drive connection diagrams for Option 161 and Option 100 ..16 Figure 2-2 Pin configuration for indicator function . - Page 8 THIS PAGE HAS BEEN INTENTIONALLY LEFT BLANK. Keysight 8710x Operating and Service Manual...
-
Page 9: List Of Tables
List of Tables Table 1-1 List of Keysight 8710x series coaxial multiport switches ..12 Keysight 8710x Operating and Service Manual... - Page 10 THIS PAGE HAS BEEN INTENTIONALLY LEFT BLANK. Keysight 8710x Operating and Service Manual...
- Page 11 Keysight 8710x Series Coxial Multiport Switches Operating and Service Manual Introduction General Information Key Features This chapter provides you the overview of Keysight 8710x series coaxial multiport switches.
-
Page 12: Introduction
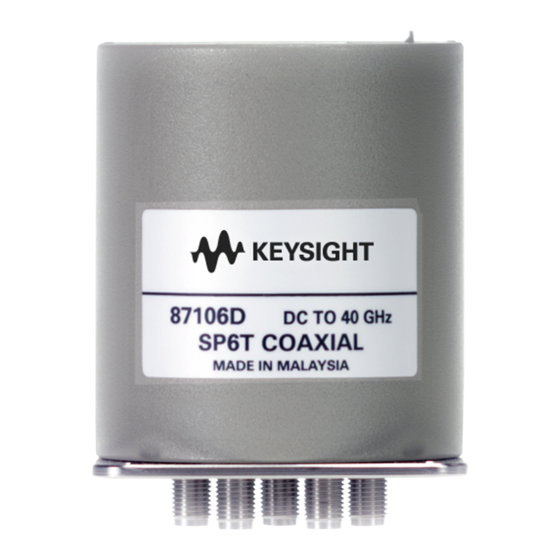
Introduction General Information Keysight 87104A/B/C/D SP4T and 87106A/B/C/D SP6T terminated switches provide the life and reliability required for automated test and measurement, signal monitoring and routing applications. These switches can be used in various applications as they are available in multiple frequency ranges, up to 40 GHz. -
Page 13: Key Features
Introduction Key Features – SP4T and SP6T configurations – Magnetic latching – Operating life of 10 million cycles, typical – Guaranteed repeatability of 0.03 dB up to 5 million cycles ensure accurate system measurements and reduces calibration intervals – Excellent isolation, typically > 65 dB at 40 GHz –... - Page 14 Introduction THIS PAGE HAS BEEN INTENTIONALLY LEFT BLANK. Keysight 8710x Operating and Service Manual...
- Page 15 Switch Configuration Switch Configuration Driving the Switch Standard Drive TTL Drive (Option T24) Electronic Position Indicators This chapter provides you information on how to drive the switches using standard drive and TTL drive. Also included is the configuration to utilize the function of the position indicator. Keysight 8710x Operating and Service Manual...
-
Page 16: Switch Configuration
Switch Configuration Driving the Switch Each RF path can be closed by applying ground (TTL “High” for Option T24) to the corresponding “drive” pin. In general, all other RF paths are simultaneously opened by internal logic. See Figure 2-1 for drive connection diagrams. Figure 2-1 Drive connection diagrams for Option 161 and Option 100 The default operation of the switches is break-before-make. -
Page 17: Standard Drive
Switch Configuration Standard Drive 1 Connect pin 1 to supply voltage (+20 Vdc to +32 Vdc) and pin 15 to ground. Pin 15 must always be connected to ground to enable the electronic position-indicating circuitry NOTE and drive logic circuitry. If pin 15 is not connected to power supply ground, catastrophic failure will occur. -
Page 18: Ttl Drive (Option T24)
Switch Configuration TTL Drive (Option T24) 1 Connect pin 1 to supply voltage (+20 Vdc to +32 Vdc) and pin 15 to ground. Pin 15 must always be connected to ground to enable the electronic position-indicating circuitry NOTE and drive logic circuitry. In addition to the quiescent current supplying the electronic position-sensing circuitry, the drive current flows out of pin 15 (during switching) on TTL drive switches (option T24). -
Page 19: Electronic Position Indicators
Switch Configuration Electronic Position Indicators The electronic position indicators consist of optically isolated, solid state relays which are driven by photo-electric sensors coupled to the mechanical position of the RF path’s moving elements (see Figure 2-2). The circuitry consists of a common which can be connected to an output corresponding to each RF path. - Page 20 Switch Configuration THIS PAGE HAS BEEN INTENTIONALLY LEFT BLANK. Keysight 8710x Operating and Service Manual...
- Page 21 Keysight 8710x Series Coxial Multiport Switches Operating and Service Manual Installation and Verification Installation Operating and Service Instructions This chapter provides you installation information and simple verification steps of the switches.
-
Page 22: Installation And Verification
Installation and Verification Installation Initial inspection 1 Inspect the shipping container for damage. If the shipping container or cushioning material is damaged, it should be kept until the contents of the shipment have been checked for completeness and the instrument has been checked both mechanically and electrically. –... -
Page 23: Operating And Service Instructions
Installation and Verification Operating and Service Instructions Operator’s check The operator’s check is supplied to allow the operator to make a quick check on the coaxial multiport switches prior to use or if a failure is suspected. Description The coaxial multiport switch is connected to a network analyzer configured for the S-parameter measurement. -
Page 24: Performance Test
Installation and Verification Quick check procedure 1 Connect the common port of the switch to Port 1 of the network analyzer and one of the outer RF ports to Port 2 of the network analyzer as illustrated in Figure 3-1. 2 For standard drive, apply ground to the corresponding “drive”... - Page 25 This information is subject to change without notice. Always refer to the Keysight website for the latest revision. © Keysight Technologies 2007 - 2019 Edition 3, March 18, 2019 Printed in Malaysia *87104-90001* 87104-90001 www.keysight.com...
Need help?
Do you have a question about the 87104A SP4T and is the answer not in the manual?
Questions and answers