Table of Contents
Advertisement
DUAL ALARM CLOCK RADIO WITH STEREO CD PLAYER
AND DIGITAL FM TUNER
MODEL: JCR-375
USER MANUAL
PLEASE READ THIS USER MANUAL COMPLETELY BEFORE OPERATING THIS UNIT
AND RETAIN THIS BOOKLET FOR FUTURE REFERENCE
Please contact Spectra Customer Service at 1-800-777-5331 if you have any questions
about operating this product
Advertisement
Table of Contents

Related Manuals for Jensen JCR-375


Summary of Contents for Jensen JCR-375
- Page 1 DUAL ALARM CLOCK RADIO WITH STEREO CD PLAYER AND DIGITAL FM TUNER MODEL: JCR-375 USER MANUAL PLEASE READ THIS USER MANUAL COMPLETELY BEFORE OPERATING THIS UNIT AND RETAIN THIS BOOKLET FOR FUTURE REFERENCE Please contact Spectra Customer Service at 1-800-777-5331 if you have any questions...
-
Page 2: Important Safety Instructions
WARNING TO PREVENT FIRE OF SHOCK HAZARD, DO NOT USE THIS PLUG WITH AN EXTENSION CORD, RECEPTACLE OR OTHER OUTLET UNLESS THE BLADES CAN BE FULLY INSERTED TO PREVENT BLADE EXPOSURE. TO PREVENT FIRE OR SHOCK HAZARD, DO NOT EXPOSE THIS APPLIANCE TO RAIN OR MOISTURE. The Caution Marking is located at the bottom enclosure of the apparatus. - Page 3 16. Use replacement part as specified by the manufacturer. 17. Upon completion of any service or repairs to this product, ask the service technician to perform safety checks. 18. Power Sources - This product should be operated only from the type of power source indicated on the marking label.
-
Page 4: Compliance With Fcc Regulations
COMPLIANCE WITH FCC REGULATIONS This device complies with Part 15 of the FCC Rules. Operation is subject to the following two conditions: (1) This device may not cause harmful interference, and (2) This device must accept any interference received, including interference that may cause undesired operation. -
Page 5: Protect Your Furniture
The serial number of this product is found on its bottom. You should note the serial number of this unit in the space provided as a permanent record of your purchase to aid in identification in the event of theft of loss. Model Number: JCR-375 Serial Number:... -
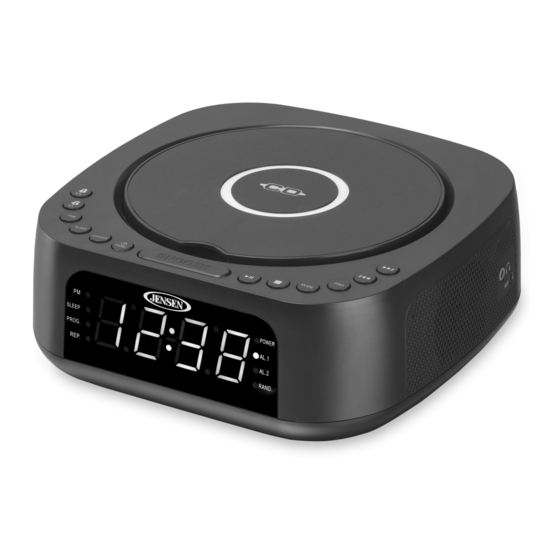
Page 6: Location Of Controls
LOCATION OF CONTROLS... -
Page 7: Power Connection
1. VOLUME+ / ALARM 1 BUTTON 15. ALARM 1 INDICATOR 2. VOLUME- / ALARM 2 BUTTON 16. ALARM 2 INDICATOR 3. TIME BUTTON 17. RANDOM PLAY INDICATOR 4. SLEEP BUTTON 18. LED DISPLAY 5. DIMMER BUTTON 19. PM INDICATOR 20. SLEEP INDICATOR 6. -
Page 8: Standby Mode
BATTERY NOTE AND CARE Batteries shall not exposed to excessive heat such as sunshine, fire or the like. Be sure that all batteries are installed correctly. Wrong polarity may damage the unit. Do not mix old and new batteries. Do not mix alkaline, standard (carbon-zinc) or rechargeable (nickel-cadmium) batteries. Only batteries of the same or equivalent type as recommend are to be used. -
Page 9: Alarm Operation
ALARM OPERATION The unit features a dual alarm clock. Setting the alarms: 1. In standby mode, press and hold the ALARM 1 BUTTON (#1), The ALARM 1 INDICATOR (#s15) and the wake up option will flash on the LED DISPLAY (#18) to prompt for input. 2. -
Page 10: Snooze Function
If no buttons are pressed when the alarm is sounding, it will continue sounding for 60 minutes and then turn off automatically. Wake to Radio - Turning the wake to RADIO on: The Radio will automatically turn on when the alarm time is reached. The corresponding ALARM 1 INDICATOR (#15) or ALARM 2 INDICATOR (#16) will flash. -
Page 11: Radio Operation
RADIO OPERATION Listening to the radio: 1. Tap the POWER BUTTON (#6) to turn the unit on. 2. If you repeatedly tap the FUNCTION BUTTON (#6), you will step through the different modes available: CD -> Radio -> AUX 3. Tap the FUNCTION BUTTON (#6) repeatedly to select radio mode. 4. -
Page 12: For Windows Users
CD / MP3 CD OPERATION PLEASE READ THIS IMPORTANT INFORMATION: CD mechanisms used in devices like this are designed to fully read all commercial CDs. They will also read self-compiled CD-R/CD-RW discs but it may take up to 10 seconds for playback to start. -
Page 13: Program Play Mode
REPEAT MODE (playing an MP3/CD) Repeat 1: Tap the MODE BUTTON (#10), the REPEAT INDICATOR (#22) will light up and flash. The current track will be repeated until it is interrupted. Repeat Folder: Tap the MODE BUTTON (#10) again, the RANDOM PLAY INDICATOR (#17) will light up and flash. -
Page 14: Auxiliary Input
AUXILIARY INPUT This unit provides an AUX IN JACK (#24) for connecting external audio devices like MP3 players, CD players, smart phones and iPods (except iPod shuffle 3rd generation) to listen to your external source through the speakers of this system. 1. -
Page 15: Usb Charging
USB CHARGING THE UNIT FEATURES A USB CHARGING PORT (DC 5V 2.1 A) FOR CHARGING YOUR CELL PHONE. 1. Plug the standard end of a USB charging cable (micro USB version cable included) into the USB CHARGING PORT (#26) located on the left side of the unit. Plug the other end of the charging cable into your device if it uses a micro USB plug. -
Page 16: Troubleshooting Guide
TROUBLE SHOOTING GUIDE If you experience difficulties in the use of this clock radio, please check the following or call 1- 800-777-5331 for Customer Service and support Symptom Possible Cause Solution Noise or sound - Station not tuned properly for AM - Retune the AM or FM broadcast distorted on AM or FM or FM. - Page 17 1 YEAR LIMITED WARRANTY AND SERVICE VALID IN THE U.S.A. ONLY SPECTRA MERCHANDISING INTERNATIONAL, INC. warrants this unit to be free from defective materials or factory workmanship for a period of 1 year from the date of original customer purchase and provided the product is utilized within the U.S.A. This warranty is not assignable or transferable.
Need help?
Do you have a question about the JCR-375 and is the answer not in the manual?
Questions and answers
Why doesn't the time stay on display? Switches to AUH.
The Jensen JCR-375 clock display does not stay on during a power outage. When power is lost, the display turns off and the unit switches to battery backup to save clock settings. Once power is restored, the display flashes to alert that a power outage occurred. If no battery is installed, all settings are lost. The mention of "AUH" is not explained in the provided context.
This answer is automatically generated
I cannot find power cord for Jensen 375
The Jensen JCR-375 is powered by an external 120V AC adapter with an output of DC 5V / 3A. To find a replacement power cord, look for a compatible AC adapter with these specifications. You can check electronics stores, online marketplaces, or contact the manufacturer for an official replacement.
This answer is automatically generated
My 3 options under function say. CD. Radio. And AUH (not AUX as manual says?