Table of Contents
Advertisement
Advertisement
Table of Contents

Subscribe to Our Youtube Channel
Related Manuals for Tar River SAYA-507


Summary of Contents for Tar River SAYA-507
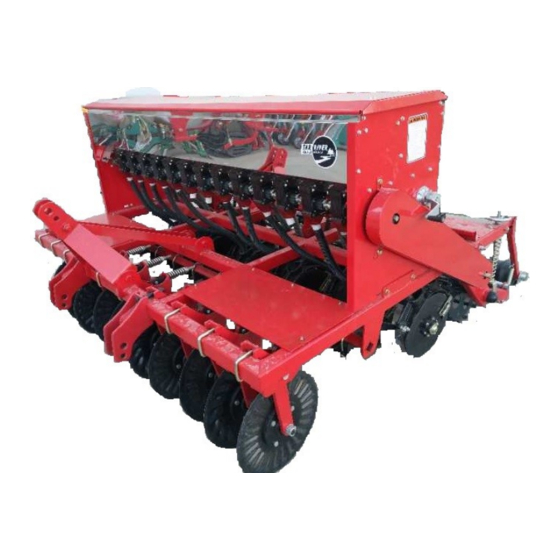
- Page 1 SAYA-507 Operator’s Manual Rev. 9-2019...
-
Page 2: Table Of Contents
TABLE OF CONTENTS INTRODUCTION…………………………………………………………………………………….……….3 TECHNICAL SPECIFICATIONS...…………………………………………………………….……….3 SAFETY ………………………………………………………………………………………………...………. 3 SAFETY SIGNAL WORDS ………………………………………………………………….…………….4 GENERAL SAFETY GUIDELINES …………………………………………………………………..4 SAFETY DECAL CARE ………………………………………………………………………….………….5 BEFORE OPERATION ………………………………………………………………………….………….5 DURING OPERATION …………………………………………………………………………………. ..6 HIGHWAY AND TRANSPORT OPERATION.S ……………………..………………….………...7 ASSEMBLY…………………………………………….………….…….……….……………………………...8 OPERATING INSTRUCTIONS…..……….….………………………………………………………….11 BEFORE BEGINNING…………. …………….……………………………………………………..…….11 ADJUST SEEDCUP OUTPUT…………………………………………………………………………...11 SEEDING/FERTILIZING RATE ADJUSTMENT HANDLE………………………………….12 SEEDCUP SHUTOFF……………………………………………………………………………………….13... -
Page 3: Introduction
INTRODUCTION Thank you for purchasing your SAYA-507 No-Till Drill. The SAYA is designed to be used in LIGHT DUTY no-till or prepared seeding conditions. It is important to properly maintain and keep in place all safety guards and shields that came with your Machine. -
Page 4: Safety Signal Words
SAFETY SIGNAL WORDS TAKE NOTE! THIS SAFETY ALERT SYMBOL FOUND THROUGHOUT THIS MANUAL IS USED TO CALL YOUR ATTENTION TO INSTRUCTIONS INVOLVING YOUR PERSONAL SAFETY AND THE SAFETY OF OTHERS. FAILURE TO FOLLOW THESE INSTRUC- TIONS CAN RESULT IN INJURY OR DEATH. THIS SYMBOL MEANS ATTENTION! BECOME ALERT! -
Page 5: Safety Decal Care
Review the safety instructions with all users annually. This equipment is dangerous to children and persons unfamiliar with its operation. The operator should be a responsible adult familiar with farm machinery and trained in this equipment’s operations. Do not allow persons to operate or assemble this unit until they have read this manual and have developed a thorough understanding of the safety precautions and of how it works. -
Page 6: During Operation
• Don’t hurry the learning process or take the unit for granted. Ease into it and become familiar with your new equipment. • Practice operation of your equipment and its attachments. Completely familiarize yourself and other operators with its operation before using. •... -
Page 7: Highway And Transport Operations
• DO NOT operate near the edge of drop-offs or banks. • DO NOT operate on steep slopes as overturn may result. • Operate up and down (not across) intermediate slopes. Avoid sudden starts and stops. HIGHWAY AND TRANSPORT OPERATIONS •... - Page 8 • Watch for obstructions overhead and to the side while transporting. • Always operate equipment in a position to provide maximum visibility at all times. Make al- lowances for increased length and weight of the equipment when making turns, stopping the unit, etc.
-
Page 9: Assembly
ASSEMBLY Step 1: Carefully uncrate and remove all parts. Ensure the double disc openers and coulters are inline and set at their proper 7 1/2” spacing Step 2: Mount hopper box with the lid opening towards the front. DO NOT TIGHTEN BOLTS AT THIS STEP Step 3: Install Short Sprocket shaft, sprocket and chain. - Page 10 Step 5: Install seed cup bottoms and hoses to cups (23" in back - 28" in front) Use electrical tape (not provided) to secure the tubes to the seed cups or hose clamps. Step 6:Install A frame on inside of mounts Install lower hitch blocks Step 7: Move Handle...
-
Page 11: Operating Instructions
OPERATING INSTRUCTIONS BEFORE BEGINNING WORK Be sure all the seed cups completely close and open the same, so all cups are putting • out the exact amount of seed. If they are not in sync, one cup will put out more that others. -
Page 12: Seeding/Fertilizing Rate Adjustment Handle
SEEDING/FERTILIZING RATE ADJUSTMENT HANDLE To adjust the fertilizer rate, you will need to adjust hand wheels (on each side of hopper). The seed/fertilize rate depends on the seed/fertilizer you want to plant, please refer to your seed/ fer- tilizer supplier’s chart to get the proper seed/fertilize rate. LOCKING NUT Before adjusting the seed rate, return the rate on the Scale to zero by rotating the hand wheel, then check and make sure all seeding/fertilizing wheels are fully closed on all seeding/... -
Page 13: Seedcup Shutoff
SEED CUP SHUTOFF Depending on the crop being planted, it may be necessary to not disburse from all of the seed cups. This is easily done by simply sliding the SEED SHUT OFF FLAP in and out. CLOSED OPEN CLOSED OPEN SEED DEPTH - REAR ROLLER The depth in which the application is done is controlled by... -
Page 14: Lubrication And Maintenance
The top link on the tractor hitch should be properly adjusted to carry the machine level in an operating position. During operation the tractor lift must be fully lowered to allow the machine to follow the contour of the ground. The machine is totally ground driven so proceed with a speed that is most comfortable and safe for existing conditions. -
Page 15: Changing Seeding Discs
1 Hour Check all fasteners and hardware including set screws in sprockets and bearing collars and retighten as necessary. 8 Hours Grease bearings on roller and apply grease to torsion bar wheel mechanism. As needed: Remove any crop residue, grasses, weeds, or debris wrapped around shafts discs or rollers. -
Page 16: Seed Charts
SEED CHARTS Large seed cup 11- 26 Gear Ratio Cup Setting — — — — — — Fescue — — — Wheat — — — Corn — — Gran. Fertilizer 12– 40 Gear Ratio Cup Setting — — Fescue — Wheat —... -
Page 17: Parts Breakdown
Parts Breakdown... - Page 18 SAYA-507 No-Till Seeder DL8001 Adj. Wheel DL8002 Adj. Rod...
- Page 19 SAYA-507 No-Till Seeder Description Item # Part # SA4001-78 Frame SA1003-78 Hopper SA1001-78 Hopper Lid DL5003 Lid Piston DL7001-L Seedcup - Large Seed DL7001-S Seedcup - Small Seed SA10001-78 Hex Seedbox Shaft DL1005 Bearing Assy Drive Shaft B305222 Bearing B305222...
- Page 20 SAYA-507 No-Till Seeder The NS drills have a Small agitator chain it is a 428 / 19 link motorcycle chain.
- Page 21 A Frame - Right SA4003 A Frame- Support (Back) DL8003 Bracket - Roller Arm DL8008 Roller Arm SA9001-78 Drive Roller - Saya-507 SA9006-78 Scraperboard Rod - Says-507 DL11011 Spring-Loaded Scraperboard Assy. BM0812550 Bolt 8 x 1.25 x 50 FW08 Flat Washer 8mm...
-
Page 22: Limited Warranty
LIMITED WARRANTY Belco Resources Equipment Division, LLC warrants to the original purchaser of any new Belco Resources, Inc equipment, purchased from an authorized Belco Resources, Inc dealer, that the equipment be free from defects in material and workmanship for a period of one (1) year for non-commercial, state, and municipalities’...
Need help?
Do you have a question about the SAYA-507 and is the answer not in the manual?
Questions and answers