Table of Contents
Advertisement
Quick Links
Advertisement
Table of Contents

Related Manuals for DeDietrich DOE7560X


Summary of Contents for DeDietrich DOE7560X
- Page 1 EN USER GUIDE OVEN...
-
Page 3: Table Of Contents
CONTENTS 1 / Description of the oven ..............4 The controls and display ..............5 The accessories..................6 Initial settings - using the oven for the first time........8 2 / The cooking modes ..............9 «Expert» mode ..................9 Cooking functions................10 º Drying ....................13 º Favourites (saved cooking) ............14 º... -
Page 4: Description Of The Oven
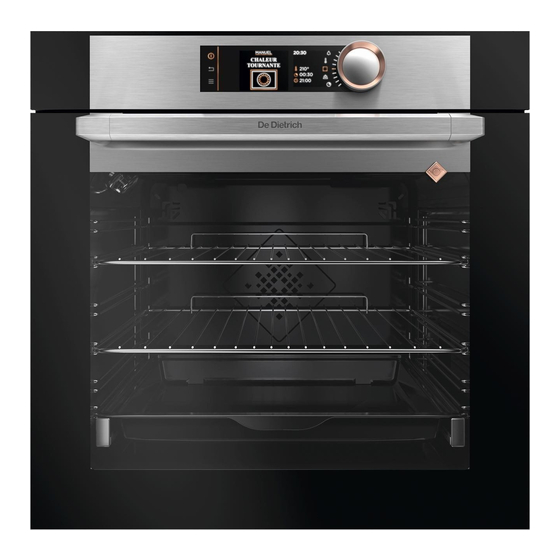
• DESCRIPTION OF THE OVEN DESCRIPTION OF THE OVEN Control panel Lamp Shelf runners (6 heights available) -
Page 5: The Controls And Display
• DESCRIPTION OF THE OVEN THE CONTROLS AND DISPLAY Displays Oven off touch control (press and hold) Rotating knob with central button (cannot be removed): Go back touch control - Choose programmes, increase or (active in programming reduce values by turning it. search, not cooking) - Validate each action by pressing the centre. - Page 6 • DESCRIPTION OF THE OVEN ACCESSORIES (depending on model) - Anti-tip safety rack The rack can be used to support all dishes and moulds containing food for cooking or browning. It can be used for grilling (placed directly on top). Position the anti-tip stop towards the back of the oven.
-
Page 7: The Accessories
• DESCRIPTION OF THE OVEN - Sliding rail system The new sliding rail system makes food more practical and easier to handle as the trays can be effortlessly pulled for simpler handling. The trays can be completely removed, providing full access. Their stability ensures that food can be handled safely, reducing the risk of burns. -
Page 8: Initial Settings - Using The Oven For The First Time
• DESCRIPTION OF THE OVEN - Starting - General menu Press the MENU key key to access the general menu when the oven only displays the time. - Select the language You will access the first cooking mode: The first time you use your oven or after Expert mode. -
Page 9: The Cooking Modes
• COOKING THE COOKING MODES «EXPERT» MODE This mode lets you set the cooking Select one of the following modes parameters yourself: temperature, according to your experience in cooking cooking type, cooking time. your recipe: When the oven is only displaying the ti- me, press the MENU key to access Select “EXPERT”... -
Page 10: Cooking Functions
• COOKING COOKING FUNCTIONS (depending on model) Pre-heat your oven empty before cooking. Position T°C recommended mini - maxi Recommended for keeping white meat, 180°C fish and vegetables moist. For cooking 35°C - 250°C cooking* multiple items on up to three levels. Recommended meat, fish,... - Page 11 • COOKING Position T°C recommended mini - maxi Recommended for letting dough rise for Keep 60°C bread, brioche, kügelhopf. warm 35°C - 100°C Put the mould on the bottom, not exceeding 40°C (plate-warming, defrosting). Ideal for delicate dishes (fruit tarts, Defrost 35°C custard pies, etc.).
- Page 12 • COOKING cooking time, will suggest a cooking time IMMEDIATE COOKING which can be modified depending on the (Expert mode) selected cooking mode. When you have selected and validated The time starts to count down as soon your cooking function, example: Bottom cooking temperature heat ventilated, the oven recommends...
-
Page 13: Drying
• COOKING DRYING FUNCTION Drying is one of the oldest methods of Use shelf level 1 (if you have several grill preserving food. The aim is to remove all pans, put them on levels 1 and 3). or some of the water in the food to Turn the food over several times during preserve foodstuffs and prevent the drying. -
Page 14: Favourites (Saved Cooking)
• COOKING FAVOURITES «RECIPES» MODE (in Expert mode) - Memorise a cooking The «Favourites» function lets you save 3 recipes in «Expert» mode that you make frequently. In Expert mode, first of all select a cooking, its temperature and its time. Then select the symbol by turning the control knob to memorise this... - Page 15 • COOKING LIST OF DISHES THE POULTERER THE PASTRY COOK Chicken Fruit pie Duck Crumble Duck breast Sponge cake vTurkey Cupcakes Crème caramel THE BUTCHER Chocolate cake Rare shoulder of lamb Short bread / Cookies Rare beef Cake Beef medium done Yoghurt cake Well-cooked beef Roast pork...
-
Page 16: Low Temperature" Mode
• COOKING «LOW When cooking is complete, the oven TEMPERATURE” mode switches off automatically and a signal sounds. Press the stop key This cooking mode makes meat fibres tender thanks to slow cooking at low DELAYED START COOKING temperature. Cooking quality is optimal. You can choose a delayed «low temperature»... - Page 17 • COOKING LIST OF DISHES Roast veal (4h00) Roast beef: rare (3h00) well done (4h00) Roast pork (5h00) Lamb: rare (3h00) well done (4h00) Chicken (6h00) Small fish (1h20) Large fish (2h10) Yoghurts (3h00) NOTE: Do not use the grill for the following programmes: small fish - large fish and yoghurts.
-
Page 18: Settings
• SETTINGS SETTINGS FUNCTIONS Lamp management In the general menu, select the «SETTINGS» function by turning the Two setting options are proposed: control knob and confirm. Position ON, the light stays on throughout cooking (except in ECO Different settings are proposed: mode). -
Page 19: Locking The Controls
• SETTINGS LOCKING THE CONTROLS To unlock the keypad, press the back Child safety lock and menu keys at the same time until the padlock symbol disappears from the screen. Press the back and menu keys at the same time until the padlock symbol is displayed on the screen. -
Page 20: Cleaning And Maintenance
• CARE EXTERNAL SURFACE commercial scouring products. Replace the liners when they get too dirty Use a window washing product applied with new liners and fix them to the shelf to a soft cloth. Do not use abrasive runners before putting the shelf runners creams or scouring sponges. - Page 21 • CARE Remove the plastic wedge. Your appliance is now ready for use again. Remove the glass panel. Do not soak the glass panel in water. Rinse with clean water and dry off with a lint-free cloth. After cleaning, reposition the glass panel and fix it into the metal stops, then clip it in with the shiny side facing outwards.
-
Page 22: Replacing The Light Bulb
• • CARE CARE REPLACING THE LIGHT BULB You can replace the bulb yourself. Unscrew the view port and remove the Warning bulb (use a rubber glove, which will make Make sure the appliance is it easier to remove). Insert the new bulb disconnected from the power before and replace the view port. -
Page 23: After-Sales Service
• AFTER-SALES SERVICE SERVICING AND REPAIRS Any repairs to your appliance must be made by a qualified professional accredited to work on the brand. When calling, please provide the full references of your appliance (commercial reference, service reference, serial number), so that we can handle your call better.
Need help?
Do you have a question about the DOE7560X and is the answer not in the manual?
Questions and answers