
Related Manuals for Nordmende HCI901FL


Summary of Contents for Nordmende HCI901FL
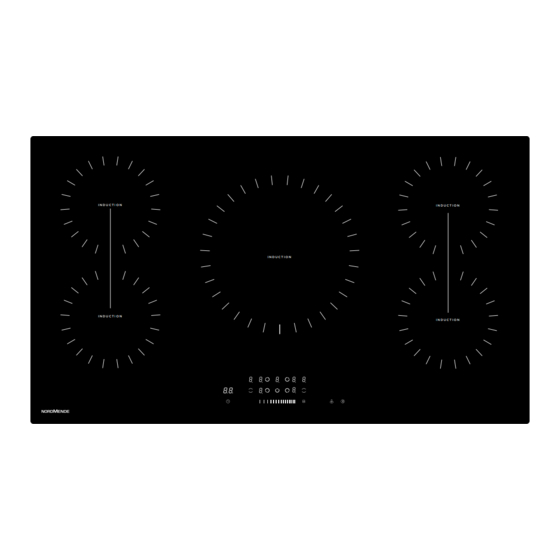
- Page 1 Induction Hob Instruction Manual / Installation Manual MODEL: HCI901FL I N D U C T I O N I N D U C T I O N I N D U C T I O N I N D U C T I O N...
-
Page 2: Table Of Contents
1. Foreword ....................4 1.1 Safety Warnings ................4 1.2 Installation ..................4 1.2.1 Electrical Shock Hazard ..........4 1.2.2 Cut Hazard ..............4 1.2.3 Important safety instructions ........4 1.3 Operation and maintenance ............7 1.3.1 Electrical Shock Hazard ......... 7 1.3.2 Health Hazard ............ - Page 3 4.1.2 Searing steak ............25 4.1.3 For stir-frying............25 4.2 Detection of Small Articles ............26 5 Heat Settings....................26 6 Care and Cleaning ..................27 7 Hints and Tips ....................28 8 Failure Display and Inspection ..............29 9. Installation ....................30 9.1 Selection of installation equipment .........
-
Page 4: Foreword
1. Foreword 1.1 Safety Warnings Your safety is important to us. Please read this information before using your cooktop. 1.2 Installation 1.2.1 Electrical Shock Hazard • Disconnect the appliance from the mains electricity supply before carrying out any work or maintenance on it. •... - Page 5 Please make this information available to the person responsible for installing the appliance as it could reduce your installation costs. In order to avoid a hazard, this appliance must be installed according to these instructions for installation. This appliance is to be properly installed and earthed only by a suitably qualified person.
- Page 6 Warning: If the surface is cracked, switch off the appliance to avoid the possibility of electric shock, for hob surfaces of glass-ceramic or similar material which protect live parts Metallic objects such as knives, forks, spoons and lids should not be placed on the hob surface since they can get hot ...
-
Page 7: Operation And Maintenance
1.3 Operation and maintenance 1.3.1 Electrical Shock Hazard Do not cook on a broken or cracked cooktop. If the cooktop surface should break or crack, switch the appliance off immediately at the mains power supply (wall switch) and contact a qualified technician. ... -
Page 8: Hot Surface Hazard
1.3.3 Hot Surface Hazard During use, accessible parts of this appliance will become hot enough to cause burns. Do not let your body, clothing or any item other than suitable cookware contact the Induction glass until the surface is cool. ... - Page 9 Do not place or leave any magnetisable objects (e.g. credit cards, memory cards) or electronic devices (e.g. computers, MP3 players) near the appliance, as they may be affected by its electromagnetic field. Never use your appliance for warming or heating the room.
- Page 10 Do not repair or replace any part of the appliance unless specifically recommended in the manual. All other servicing should be done by a qualified technician. Do not place or drop heavy objects on your cooktop. Do not stand on your cooktop. ...
-
Page 11: Product Introduction
Congratulations on the purchase of your new Induction Hob. We recommend that you spend some time to read this Instruction / Installation Manual in order to fully understand how to install correctly and operate it. For installation, please read the installation section. Read all the safety instructions carefully before use and keep this Instruction / Installation Manual for future reference. -
Page 12: Working Theory
• Read this guide, taking special note of the ‘Safety Warnings’ section. • Remove any protective film that may still be on your Induction hob. 2.5 Technical Specification Cooking Hob HCI901FL Cooking Zones 5 Zones Supply Voltage 220-240V~ 50Hz or 60Hz... -
Page 13: Operation Of Product
3. Operation of Product 3.1 Touch Controls • The controls respond to touch, so you don’t need to apply any pressure. • Use the ball of your finger, not its tip. • You will hear a beep each time a touch is registered. •... -
Page 14: How To Use
Do not use cookware with jagged edges or a curved base. Make sure that the base of your pan is smooth, sits flat against the glass, and is the same size as the cooking zone. Use pans whose diameter is as large as the graphic of the zone selected.Using a pot a slightly wider energy will be used at its maximum efficiency.If you use smaller pot efficiency could be less than expected.Pot less than 140 mm could be undetected by the hob. - Page 15 2. Place a suitable pan on the cooking zone that you wish to use. • Make sure the bottom of the pan and the surface Of the cooking zone are clean and dry. 3. Touching the heating zone selection control , and a indicator next to the key will flash 4.
-
Page 16: Finish Cooking
3.3.2 Finish cooking 1. Touching the heating zone selection control that you wish to switch off 2. Turn the cooking zone off by touching the slider to ” ”. Make sure the displayshows”0” 3. Turn the whole cooktop off by touching the ON/OFF control. -
Page 17: Using The Boost Function
3.3.3 Using the Boost function Actived the boost function 1. Touching the heating zone selection control 2. Touching the boost control “ ”, the zone indicator show “b” and the power reach Max. Cancel the Boost function 1. Touching the heating zone selection control that you wish to cancel the boost function 2. -
Page 18: Flexible Area
3.3.4 FLEXIBLE AREA • This area can be used as a single zone or as two different zones, accordingly to the cooking needs anytime. • Free area is made of two independent inductors that can be controlled separately. As big zone 1. - Page 19 As two independent zones To use the flexible area as two different zones, you can have two choices of heating. of the (a) Put a pan on the right up side or the right down side flexible zone. of the (b)Put two pans on both sides flexible zone.
-
Page 20: Locking The Controls
3.3.5 Locking the Controls • You can lock the controls to prevent unintended use (for example children accidentally turning the cooking zones on). • When the controls are locked, all the controls except the ON/OFF control are disabled. To lock the controls Touch the keylock control. - Page 21 Note: you can use the minute minder even if you’re not selecting any cooking zone. Touch timer control , the “10” will show in the timer display. and the “0” flashes. 3. Set the time by touching the slider control. (e.g. 5) 4.
- Page 22 b) Setting the timer to turn one or more cooking zones off If the timer is set on one zone: 1. Touching the heating zone selection control that you want to set the timer for. 2. Touch timer control , the “10” will show in the timer display.
- Page 23 NOTE: The red dot next to power level indicator will illuminate indicating that zone is selected. 6. When cooking timer expires, the corresponding cooking zone will be switch off automatically. Other cooking zone will keep operating if they are turned on previously. If the timer is set on more than one zone: 1.
-
Page 24: Default Working Times
Cancelled the timer 1. Touching the heating zone selection control that you want to cancel the timer 2. Touching the timer control, the indicator flash 3. Touch the slider control to set the timer to ”00”, the timer is cancelled 3.3.7 Default working times Auto shut down is a safety protection function for your induction hob. -
Page 25: Simmering, Cooking Rice
4.1.1 Simmering, cooking rice • Simmering occurs below boiling point, at around 85˚C, when bubbles are just rising occasionally to the surface of the cooking liquid. It is the key to delicious soups and tender stews because the flavours develop without overcooking the food. -
Page 26: Detection Of Small Articles
4.2 Detection of Small Articles When an unsuitable size or non-magnetic pan (e.g. aluminium), or some other small item (e.g. knife, fork, key) has been left on the hob, the hob automatically go on to standby in 1 minute. The fan will keep cooking down the induction hob for a further 1 minute. -
Page 27: Care And Cleaning
6 Care and Cleaning What? How? Important! Everyday soiling on 1. Switch the power to the • When the power to the cooktop is glass (fingerprints, cooktop off. switched off, there will be no ‘hot marks, stains left by 2. Apply a cooktop cleaner surface’... -
Page 28: Hints And Tips
7 Hints and Tips Problem Possible causes What to do The induction hob No power. Make sure the induction hob is cannot be turned on. connected to the power supply and that it is switched on. Check whether there is a power outage in your home or area. -
Page 29: Failure Display And Inspection
The induction hob or a Technical fault. Please note down the error cooking zone has letters and numbers, switch turned itself off the power to the induction hob unexpectedly, a tone off at the wall, and contact a sounds and an error qualified technician. -
Page 30: Installation
9. Installation 9.1 Selection of installation equipment Cut out the work surface according to the sizes shown in the drawing. For the purpose of installation and use, a minimum of 5 cm space shall be preserved around the hole. Be sure the thickness of the work surface is at least 30mm. Please select heat-resistant and insulated work surface material (Wood and similar fibrous or hygroscopic material shall not be used as work surface material unless impregnated) to avoid the electrical shock and larger deformation caused by the... - Page 31 Note: The safety distance between the hotplate and the cupboard above the hotplate should be at least 760 mm. A(mm) B(mm) C(mm) 50 min. 20 min. Air intake Air exit 5mm WARNING: Ensuring Adequate Ventilation Make sure the induction cooker hob is well ventilated and that air inlet and outlet are not blocked.
-
Page 32: Before Installing The Hob, Make Sure That
There are ventilation holes around outside of the hob. YOU MUST ensure these holes are not blocked by the worktop when you put the hob into position. Be aware that the glue that join the plastic or wooden material to the furniture, has to resist to temperature not below 150℃, to avoid the unstuck of the paneling. -
Page 33: After Installing The Hob, Make Sure That
9.3 After installing the hob, make sure that The power supply cable is not accessible through cupboard doors or drawers. There is adequate flow of fresh air from outside the cabinetry to the base of the hob. If the hob is installed above a drawer or cupboard space, a thermal protection barrier is installed below the base of the hob. -
Page 34: Cautions
TABLE BRACKET Under any circumstances, the brackets cannot touch with the inner surfaces of the worktop after installation (see picture) 9.6 Cautions 1. The induction hotplate must be installed by qualified personnel or technicians. We have professionals at your service. Please never conduct the operation by yourself. -
Page 35: Connecting The Hob To The Mains Power Supply
9.7 Connecting the hob to the mains power supply This hob must be connected to the mains power supply only by a suitably qualified person. Before connecting the hob to the mains power supply, check that: 1. the domestic wiring system is suitable for the power drawn by the hob. 2. - Page 36 The bottom surface and the power cord of the hob are not accessible after installation. This appliance is labeled in compliance with European directive 2012/19/EU for Waste Electrical and Electronic Equipment (WEEE). By ensuring that this appliance is disposed of correctly, you will help prevent any possible damage to the environment and to human health, which might otherwise be caused if it were disposed of in the...
Need help?
Do you have a question about the HCI901FL and is the answer not in the manual?
Questions and answers