Table of Contents
Advertisement
Quick Links
64
We advise you to read this manual carefully, which contains all the instructions for maintaining the
appliance's aesthetic and functional qualities. For further information on the product: www.smeg.com
PRECAUTIONS
General safety instructions
Risk of personal injury
• ATTENTION: during use, the
appliance and its accessible
parts become very hot.
Children must be kept away
from the appliance.
• ATTENTION: during use, the
appliance and its accessible
parts become very hot. Never
touch the heating elements
during use.
• Protect your hands by wearing
oven gloves when moving food
914779671/D
55
55
59
73
59
59
60
60
60
60
60
61
61
62
62
63
64
64
64
65
65
65
inside the oven.
• Never try to put out a fire or
flames with water: turn off the
appliance and smother the
flames with a fire blanket or
other appropriate cover.
• This appliance may be used by
children aged at least 8 and by
people of reduced physical,
sensory or mental capacity, or
lacking in experience in the use
of electrical appliances,
provided that they are
supervised or instructed by
adults who are responsible for
66
72
75
77
77
77
77
81
82
85
85
85
87
88
88
89
90
94
96
96
96
97
PRECAUTIONS - 55
Advertisement
Table of Contents

Related Manuals for Smeg SOP6102S2PN


Summary of Contents for Smeg SOP6102S2PN
-
Page 1: Table Of Contents
Electrical connection First use Positioning We advise you to read this manual carefully, which contains all the instructions for maintaining the appliance’s aesthetic and functional qualities. For further information on the product: www.smeg.com PRECAUTIONS General safety instructions inside the oven. - Page 2 their safety. • DO NOT USE AEROSOLS IN • Children must not play with the THE VICINITY OF THIS appliance. APPLIANCE WHILST IT IS IN • Keep children under the age of USE. 8 at a safe distance unless they •...
- Page 3 prevent them from being cooking. removed must face downwards • If you wish to use greaseproof and towards the back of the paper, place it so that it will not oven cavity. interfere with the hot air circulation inside the oven cavity.
- Page 4 BE INSTALLED IN A BOAT OR • Before performing any CARAVAN. operation on the appliance, • The appliance must not be switch off the power supply. installed on a pedestal. • ATTENTION: ensure that the • Position the appliance into the appliance is switched off cabinet cut-out with the help of before replacing the bulb, to...
-
Page 5: Appliance Purpose
• For cooking with the Direct when they are still hot. Steam function, take great care • The probe should not be kept not to exceed the maximum inside the appliance. capacity of the tray (250 ml). • Do not use the temperature probe during the pyrolytic Temperature probe (if present) cycle. -
Page 6: Identification Plate
Identification plate the oven. • When cooking several types of food it is The identification plate bears the technical data, recommended to cook the foods one after serial number and brand name of the the other to make the best use of the already appliance. -
Page 7: Description
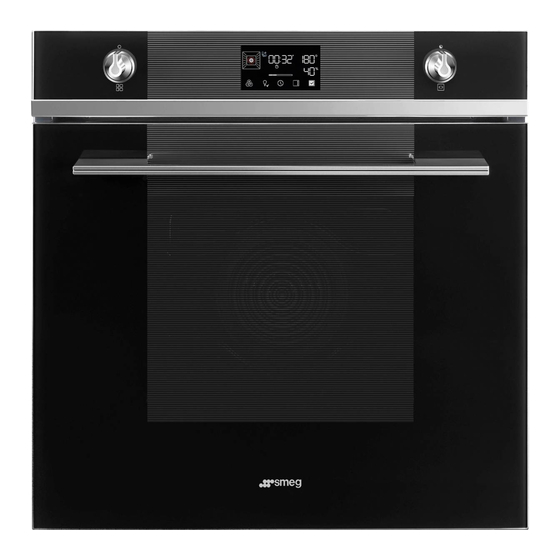
DESCRIPTION General Description 1 Control panel 2 Seal 3 Temperature probe socket (on some models only) 4 Light bulb 5 Door 6 Fan 7 Filling tray Frame shelf 914779671/D DESCRIPTION - 61... -
Page 8: Control Panel
Control panel 1 Function knob Other parts This knob can be used to: Shelves • turn the appliance on and off; The appliance features shelves to position trays • select a function. and racks at different heights. The insertion heights are indicated from the bottom upwards. Turn the Function knob to the position 0 to immediately complete any cooking Cooling fan... -
Page 9: Accessories
Oven lighting desserts and biscuits. The appliance’s interior lighting comes on: Deep tray • when the door is opened; • when any function is selected, apart from the functions (depending on the models). When the door is open, it is not possible to turn off the interior lighting. -
Page 10: Optional Accessories (Can Be Purchased Separately)
Optional accessories (can be AIRFRY (oil-free frying grill) purchased separately) Recommended accessory for air-frying previously breaded, precooked and/or frozen food (chips, potato or meat croquettes, small mozzarella bites...). Advantages of assisted steam cooking The assisted steaming cooking system cooks Useful for containing liquids during filling and any type of food much smoother and faster and emptying of the reservoir. -
Page 11: Using The Accessories
Digital programmer First heating 1. Set a cooking time of at least one hour (see paragraph "Using the oven"). 2. Heat the empty oven compartment at the maximum temperature to burn off any residues left by the manufacturing process. When heating the appliance •... -
Page 12: Using The Oven
Reservoir filling 5. Press the button to set the current time 2. Open the door and pull the filling drawer and go to the selection of minutes. out of its housing. 6. Turn the temperature knob to select the minutes of the current time. 7. - Page 13 3. Turn the temperature knob to set the cooking Do not use distilled water, tap water time (from 1 minute to 13 hours) (e.g. "1 with a high chloride content (> 40 mg/ hour"). l), or other liquids. 5. At the end, remove the funnel and place the filling drawer back in its place.
- Page 14 • the appliance beeps; function • the words and the button flash to indicate that the food can be introduced into the oven cavity. Cooking phase 1. Open the door 2. Place the dish with the food to be cooked into the oven cavity.
- Page 15 FAN-ASSISTED+STEAM-ASSISTED After a long period of inactivity it is The combination of the fan, the recommended to make a reservoir circulaire heating element and the filling and draining cycle to rinse the steam is particularly suitable for steam circuit. preparing roast meats, chicken and baked goods such as bread and 8.
- Page 16 2 Turn the temperature knob to the right or to 4. Check the cooking status of the food by the left to select the wished temperature (for turning on the internal light. example "200°C"). End of cooking 5. To end cooking, turn the function knob to position 0 to exit the function.
- Page 17 To delete a timed cooking 5. Press the button to confirm end-of- 1. Press the button for a few seconds. cooking time. 2. Turn the temperature knob counter- 6. Press the button to start the function. clockwise until the cooking time is reset. The appliance waits for the set start time.
-
Page 18: Cooking Advice
When using the ECO function, avoid 3. Press the button to confirm. opening the door during cooking. 4. At the end of the minute minder timer, an acoustic signal sounds and the indicator In the ECO function cooking times (and light flashes on the display. -
Page 19: Using The Temperature Probe (On Some Models Only)
• To check whether the dessert is cooked right accumulated inside the oven. through: At the end of the cooking time, put • Reduce any opening of the door to a a toothpick into the highest point of the minimum to avoid heat dispersal. dessert. - Page 20 The recommended minimum The indicator light flashes on the display. temperature for cooking with the probe 6. Close the door. is 120°C, with the exception of slow temperature cooking. Setting cooking parameters when using the temperature probe Caution: during use, the accessible parts become very hot.
-
Page 21: Cooking Advice
1. Select a cooking function (for example temperature reaches the target temperature set by the user. "FAN ASSISTED "). Heating elements are deactivated, an acoustic signal sounds and the display shows 2. Turn the temperature knob to set the cooking temperature (for example "190°C"). - Page 22 a toothpick into the highest point of the minimum to avoid heat dispersal. dessert. If the dough does not stick to the • Keep the inside of the appliance clean at all toothpick, the dessert is cooked. times. • If the dessert collapses when it comes out of Advice on using the probe (if fitted) the oven, on the next occasion reduce the The probe can also be used during normal...
-
Page 23: Mini Guide To Accessories
(for the procedure, see the chapter the dedicated page on the www.smeg.com "Using the oven"). website, which can be reached using the QR code on the leaflet supplied with the product. - Page 24 1. After entering the special functions menu, 1. After entering the special functions menu, press the button until the press the button until the function is selected. function is selected. If the indoor temperature is higher than If the indoor temperature is higher than expected, the function is not activated expected, the function is not activated and every time the...
- Page 25 activation with the knob will not activate the 1. After entering the special functions menu, light. press the button until the • The internal fan remains turned off. • Knob illumination and audible prompts function is selected. remain disabled. After activating the Sabbath mode the settings cannot be altered.
- Page 26 1. After entering the special functions menu, 3. Close the door 4. After entering the special functions menu, press the button until the press the button until the function is selected. function is selected. 2. Press the button to confirm. 5.
-
Page 27: Secondary Functions
2. Insert the BBQ accessory into the oven 1. After entering the special functions menu, cavity. press the button until the 3. Close the door function is selected. 4. After entering the special functions menu, press the button until the function is selected. -
Page 28: Settings
1. Press the button on the main menu. The 5. Press the button to set the current time and go to the selection of minutes. 6. Turn the temperature knob to select the minutes of the current time. 7. Press the button to confirm. - Page 29 2. Turn the temperature knob to activate the 1. After entering the setting menu, press the control lock function. button until the show room function is selected. 3. Press the button to go to the next 2. Turn the temperature knob to activate the setting or press the button to confirm.
- Page 30 Water hardness descaling is required is as follows: This mode allows you to set the water Value °dH °dF Hours hardness value in order to optimise the 0 ÷ 11 0 ÷ 20 descaling process. 12 ÷ 17 21 ÷ 30 The appliance is factory set for water of 18 ÷...
-
Page 31: Cleaning And Maintenance
Display brightness 1. After entering the setting menu, press the This mode allows the display brightness button until the sound function is level to be selected. selected. 1. After entering the setting menu, press the button until the display brightness function is selected. - Page 32 To remove the door proceed as follows: 2. Remove the internal glass pane by pulling the rear part gently upwards, following the 1. Open the door completely and insert two movement indicated by the arrows 1. pins into the holes on the hinges indicated in the figure.
-
Page 33: Cleaning The Oven Cavity
6. Insert the front grommets into their seats. The cavity, as this could damage the enamel. feet of the grommets must be facing the Take out all removable parts before cleaning. outer glass For easier cleaning, it is recommended to remove: •... -
Page 34: Special Cleaning Functions
Special cleaning functions Vapor Clean cycle setting • From position 0, turn the function knob to the If the indoor temperature is higher than expected, the function is not activated left by one position. The button flashes. and every time the button is Vapor Clean (on some models only) pressed the appliance sounds an... -
Page 35: Pyrolytic (On Some Models Only)
1. After selecting the Vapor Clean function, • Clean the internal glass pane following the usual cleaning instructions. press button. • Remove any food residues or large spills from previous cooking operations from the The indicator light flashes on the display. inside of the oven. -
Page 36: Descaling
minimum of 2:30 hours to maximum of 3:30 Programmed pyrolytic cycle hours. It is possible to program the Pyrolytic cycle start time like all other cooking functions. Recommended pyrolytic cycle duration: 1. After selecting the Pyrolytic function, press • Light dirt: 2:30. button. - Page 37 of the oven cavity. We recommend performing descaling every time this is indicated on the display in order to keep the boiler in perfect operating condition. The descaling process can be cancelled 3 consecutive times by pressing the button or by turning the function knob.
- Page 38 2. Open the door and pull the filling drawer 5. At the end, remove the funnel and place the out of its housing. filling drawer back in its place. 3. Insert the funnel provided in the filling If there is too much water in the drawer.
- Page 39 2. Place the deep pan on the third shelf from 5. Pour one litre of water using a bottle or a the bottom. Push it against the rear wall of measuring jug. the oven cavity. The overflowing of water inside the 3.
-
Page 40: Cleaning The Reservoir And The Water Circuit
1. Select a combined steam or assisted-steam 21. Wipe off any spillage of water in the function (depending on the model) using the cooking compartment with a cloth or function knob. sponge. 2. Open the door 22. Close the door. 3. - Page 41 2. Open the door and pull the filling drawer 5. At the end, remove the funnel and place the out of its housing. filling drawer back in its place. 3. Insert the funnel provided in the filling If there is too much water in the drawer.
-
Page 42: Extraordinary Maintenance
the drain pipe on the right side of the rear wall Take care not to scratch the enamel of of the oven cavity. the oven cavity wall. 4. Wait for the end of the drain flow. At the end an acoustic signal sounds and the 4. -
Page 43: Positioning
data, serial number and brand name is visibly Cable replacement positioned on the appliance. Power voltage Do not remove this plate for any reason. Danger of electrocution The appliance must be connected to ground using a wire that is at least 20 mm longer than •... - Page 44 Fastening bushings 1. Remove the bushing covers on the front of the appliance. 2. Mount the appliance into the recess. 3. Secure the appliance to the cabinet using screws. 4. Cover the bushings with the previously removed covers. Appliance overall dimensions (mm) 98 - INSTALLATION 914779671/D...
- Page 45 Mounting into a column (mm) Make sure that the cabinet top/rear section has an opening approx. 35-40 mm deep. 914779671/D INSTALLATION - 99...
- Page 46 Mounting under worktops (mm) If the appliance is to be built-in under a worktop, a wooden bar has to be installed order to use the seal that is glued to the back of the front panel to prevent water or other liquids leaking in. A min.
- Page 47 A min. 603 mm B 560 - 564 mm C 583 - 585 mm D 9 - 11 mm E min. 5 mm F 121 - 1105 mm G min. 560 mm H min. 594 mm co Cutout for power cord (min. 6 cm jb Electrical connection box wb Wooden bar (recommended) Mounting under worktops (mm) (pyrolytic...
- Page 48 When using a wooden separator, a wooden bar has to be installed under the worktop in order to use the seal that is glued to the back of the front panel to prevent water or other liquids leaking in. 102 - INSTALLATION 914779671/D...
Need help?
Do you have a question about the SOP6102S2PN and is the answer not in the manual?
Questions and answers