Table of Contents
Advertisement
Quick Links
Advertisement
Table of Contents

Related Manuals for Cotek S600R Series


Summary of Contents for Cotek S600R Series
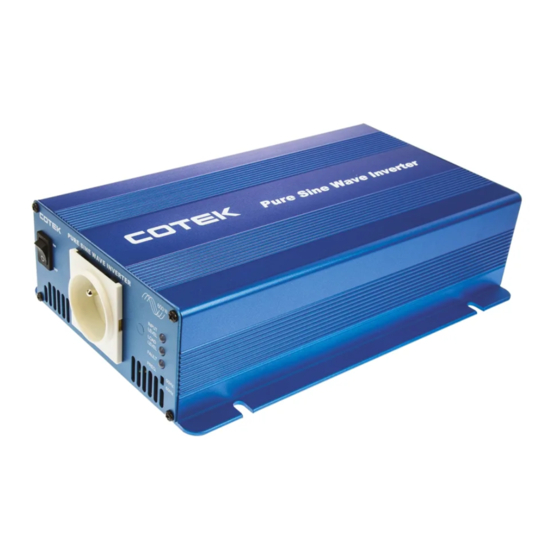
- Page 1 S600,S600R Series Pure Sine Wave Inverter User’s Manual...
-
Page 2: Table Of Contents
FCC (Class B) Declaration of Conformity…………………………… e-mark (e13 020866) Declaration of Conformity…………………… 20~21 UL (UL458) NOTICE OF COMPLETION ©Copyright :This manual is the copyright of COTEK Electronic lnd. Co., Ltd. And may not be reproduced or copied without the express permission of the owner. A0-R603-30001... -
Page 3: Important Safety Instructions
1. Important Safety Instructions WARNING! Before you install and use Your Inverter, be to read and save these safety instructions. 1-1. General Safety Precautions 1-1-1. Do not expose the Inverter to rain, snow, spray, bilge or dust. To reduce risk of hazard, do not cover or obstruct the ventilation openings. -
Page 4: Features
2. Features Pure sine wave output (THD < 3%) Output frequency:50 / 60Hz switch selectable Input & output fully isolation design High efficiency 88~94% Capable of driving highly reactive & capacitive loads at start moment. Tri-Color indicators display input voltage & output load level Loading controlled cooling fan Advanced microprocessor Protection:Input low voltage... -
Page 5: Electrical Performance
2-2. Electrical Performance Model No. Specification Item S600-112 S600-124 S600-148 S600-212 S600-224 S600-248 Continuous Output Power 600W Maximum Output Power (3Min.) 680W Surge Rating 800W Input voltage 100 / 110 / 120V ± 3% 220 / 230 / 240V ± 3% Output Voltage Frequency 50 / 60Hz... -
Page 6: Mechanical Drawings
2-3. Mechanical Drawings P U R E S I N E W A V E I N V E R T E R... -
Page 7: Introduction
3. Introduction This power inverter series is a the member of the most advanced line of mobile AC power systems available. To get the most out of the power inverter, it must be installed and used properly. Please read the instructions in this manual before installation and operation this model. - Page 8 3-1-4. Load Level:Display AC Load Watts LED Status Load Condition Dark 0 ~ 30W Green 30W ~ 200W Orange 200W ~ 450W 450W ~ 580W Red Blink Over 580W 3-1-5. Fault:Display fault status Red LED Conditions Status Blink (Fast) Blink (Slow) "...
-
Page 9: Rear Panel Operations
3-2. Rear Panel Operations: DC INPUT WARNING : REVERSE POLARITY WILL DAMAGE UNIT NEG(-) POS(+) CHASSIS GROUND DC INPUT WARNING : REVERSE POLARITY REMOTE WILL DAMAGE UNIT PORT NEG(-) POS(+) CHASSIS GROUND 3-2-1. Remote ON / OFF switch for S600R model only. 3-2-1-1. - Page 10 3-2-2. Ventilation window: Do not obstruct, allow at least 3 inch for proper air flow. 3-2-3. Input terminals: Connect to 12v / 24V / 48V battery or other 12V / 24V / 48V power source. 【+】is positive,【-】is negative. Reverse polarity connection will blow internal fuse and may damage inverter permanently.
-
Page 11: Installation
3-3. Installation: Where to install. The power inverter should be installed in a location that Meets the following requirements: 3-3-1. Dry – Do not allow water to drip or splash on the inverter. 3-3-2. Cool – Ambient air temperature should be between 0℃ and 33℃, the cooler the better. -
Page 12: Quick Hook - Up And Testing
3-4. Quick hook – up and testing: For a quick hook – up of the power inverter to check its performance before going ahead with installation, please follow these guidelines: 3-4-1. Unpack and inspect the power inverter to check its performance switch in the OFF position. - Page 13 3-4-3. Before proceeding further, carefully check that cable you have connected does tie negative terminal of inverter to the negative output power source. CAUTION ! Reverse polarity connection will blow a fuse in inverter and may permanently damage the inverter. Damage caused by reverse polarity connection is not covered by warranty.
-
Page 14: Ac Safety Grounding
3-5. AC Safety Grounding: During the AC wiring installation, AC input and output ground wires are connected to the inverter. The AC input ground wire must connect to the incoming ground from your AC utility source. The AC output ground wire should go to the grounding point for your loads ( for example, a distribution panel ground bus ). -
Page 15: Making Dc Wiring Connections
UL standards requires us to test and recommend specific GFCI. Cotek has tested the following GFCI – protected 20A receptacles and found that they functioned properly when connected to the output of the Inverter. - Page 16 Increasing your DC cable size will help improve the situation. Cotek recommends the following cables for optimum inverter performance ( apply both 120V and 230V versions ) Model No Wire AWG Inline Fuse S600-112 100A S600-212 100A S600-124 S600-224 Also, use only high quality copper wiring and keep cable length short, a maximum of 3-6 feet.
-
Page 17: Inverter Operation
3-7. Inverter Operation: To operate the power inverter, turn it on using the ON / OFF switch on the Front panel. The power inverter is now ready to deliver AC power to your loads. If you are operating several loads from the power inverter, turn them on separately after the inverter has been turned on. -
Page 18: Troubleshooting Guide
4. Troubleshooting guide: WARNING! Do not open or disassemble the S600 Inverter. Attempting to service the unit yourself may result in a risk of electrical shock or fire. Problems and Symptoms Possible Cause Solutions No output voltage, ”FAULT" LED lights RED. a. -
Page 19: Maintenance
5. Maintenance: Very little maintenance is required to keep your inverter operating properly. You should clean the exterior of the unit periodically with a damp cloth to prevent accumulation of dust and dirt. At the same time, tighten the screws on the DC input terminals. 6. -
Page 20: Appendices
7-1. CE (LVD EN60950) Declaration of Conformity:... -
Page 21: Fcc (Class B) Declaration Of Conformity
7-2. FCC (Class B) Declaration of Conformity:... -
Page 22: E-Mark (E13 020866) Declaration Of Conformity
7-3. e-mark (e13 020866) Declaration of Conformity:... - Page 23 7-3. e-mark (e13 020866) Declaration of Conformity:...
-
Page 24: Ul (Ul458) Notice Of Completion
7-4. UL (UL458) NOTICE OF COMPLETION...
Need help?
Do you have a question about the S600R Series and is the answer not in the manual?
Questions and answers