
Subscribe to Our Youtube Channel
Related Manuals for Cotek SD Series


Summary of Contents for Cotek SD Series
- Page 1 SD Series SD1500/2500/3500 PURE SINE WAVE INVERTER [Page 3] SD1500/2500/3500 [Page 47]...
- Page 2 Any part of this document may not be reproduced in any form for any purpose without the prior written permission of COTEK Electronic IND. CO. For the conditions of the permission to use this manual for publication, contact COTEK Electronic IND. CO., LTD. In all related COTEK product activities, Neither COTEK Electronic IND.
-
Page 3: Table Of Contents
Table of Content 1. IMPORTANT SAFETY INFORMATION 1-1. General Safety Precautions 1-2. Precautions When Working with Batteries 1-3. Installation 2. FUNCTIONAL CHARACTERISTICS 2-1. General Information 2-2. Application 2-3. Electrical Performance 2-4. Mechanical Drawings 3. INTRODUCTION 3-1. Power ON / OFF / REMOTE (Main) switch 3-2. - Page 4 4. DC WIRING CONNECTIONS 4-1. DC Input Terminals 4-2. Hard-wire Installation 5. PARALLEL MODE 5-1. Prepare for Parallel Usage 5-2. Industry Applications 5-3. Wiring for Parallel Usage 5-4. AC Wiring Diagram 5-5. Remote command for the parallel connection 5-6. Remove Parallel Connection 6.
-
Page 5: Important Safety Information
1. Important Safety Information WARNING! Before using the inverter, read and save the safety instructions. 1-1. General Safety Precautions 1-1-1. Do not expose the Inverter to rain, snow, spray, bilge or dust. To reduce risk of hazard, do not cover or obstruct the ventilation openings. Do not install the inverter in a zero-clearance compartment. -
Page 6: Installation
1-3. Installation The power inverter should be installed in a location that meets the following requirements Do not allow water to drip or splash on the inverter. Cool Ambient air temperature should be between -20 and 50 , but he cooler the better. -
Page 7: Functional Characteristics
2. Functional Characteristics 2-1. General Information SD-series is new generation power inverter equipped with N+1 parallel power function , 3-phase capability, and AC transfer switch. SD series is suitable for RV, Marine and Emergency appliances. Features Parallel redundancy design for power expansion... -
Page 8: Electrical Performance
2-3. Electrical Performance 2-3-1. SD1500 Specification MODEL SD1500-112 SD1500-124 SD1500-148 SD1500-212 SD1500-224 SD1500-248 Output Rating Power 1500W (de-rating after 40 , refer to de-rating curve) Peak Power (3Sec.) 1800W Surge Power (<0.2Sec.) 2400W Waveform Pure Sine Wave Efficiency (Max.) Output Voltage (@rated VDC) Output Frequency 0.1%... - Page 9 MODEL SD1500-112 SD1500-124 SD1500-148 SD1500-212 SD1500-224 SD1500-248 Working Temp. SD1500 power de-rating curve Storage Temp. Relative Humidity Max. 90%, non-condensing Safety & EMC Certified UL 458 Safety Standards ---- Certified EN 62368-1 (UL only for hardwire) EMC Standards Certified FCC Class B Certified EN55032, EN55024 E-Mark ----...
- Page 10 2-3-2. SD2500 Specification MODEL SD2500-112 SD2500-124 SD2500-148 SD2500-212 SD2500-224 SD2500-248 Output Rating Power 2500W (de-rating after 40 , refer to de-rating curve) Peak Power (3Sec.) 3000W Surge Power (<0.2Sec.) 4000W Waveform Pure Sine Wave Efficiency (Max.) Output Voltage (@rated VDC) Output Frequency 0.1% <...
- Page 11 MODEL SD2500-112 SD2500-124 SD2500-148 SD2500-212 SD2500-224 SD2500-248 Environment Working Temp. SD2500 power de-rating curve Storage Temp. Relative Humidity Max. 90%, non-condensing Safety & EMC Certified UL 458 Safety Standards ---- Certified EN60950-1 (UL only for hardwire) Certified EN 55014-1, EN 55014-2; EN 61000-3-2, -3-3;...
- Page 12 2-3-3. SD3500 Specification MODEL SD3500-112 SD3500-124 SD3500-148 SD3500-212 SD3500-224 SD3500-248 Output 3500W Rating Power (de-rating after 35 -rating curve for 12V) (de-rating after 40 -rating curve for 24V and 48V) Peak Power (3Sec.) 4500W Surge Power (<0.2Sec.) 6000W Waveform Pure Sine Wave Efficiency (Max.) Output Voltage 200 / 220 / 230 / 240...
- Page 13 MODEL SD3500-112 SD3500-124 SD3500-148 SD3500-212 SD3500-224 SD3500-248 Environment Working Temp. refer SD3500 power de-rating curve Storage Temp. Relative Humidity Max. 90%, non-condensing Safety & EMC Certified UL 458 Safety Standards ---- Certified EN60950-1 (UL only for hardwire) Certified EN 55014-1, EN 55014-2; EN 61000-3-2, -3-3;...
- Page 14 Inverter to utility AC: < 4ms.; Exacting Utility AC to inverter: 16~50ms. Utility AC to inverter: 16~50ms. Inverter to utility AC: 8~10ms.; Online < 4ms Utility AC to inverter: 16~25ms. * Only applicable on SD2500 / SD3500 Table 1. SD series transfer-time...
-
Page 15: Mechanical Drawings
2-4. Mechanical Drawings Figure 4. SD series mechanical drawings Model A (mm) B (mm) C (mm) D (mm) E (mm) F (mm) G (mm) H (mm) SD1500 93.1 268.6 11.5 240.0 95.6 268.6 11.5 SD2500 240.0 125.6 268.6 11.5 SD3500... -
Page 16: Introduction
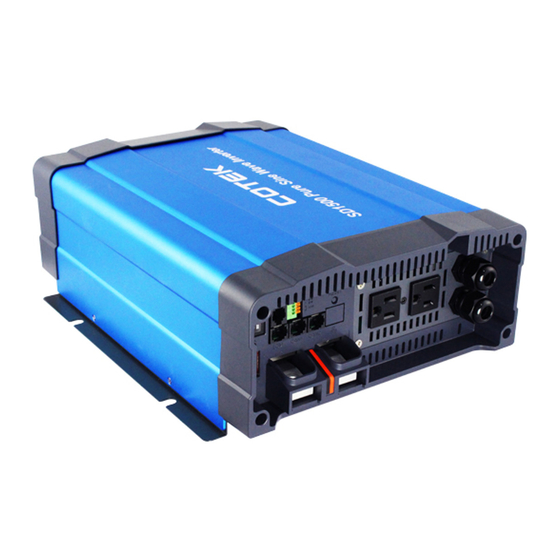
3.Introduction Version 1 General Model Figure 5. SD general model front panel Version 2 UL Model Figure 6. SD UL model front panel Figure 7. SD series rear panel... -
Page 17: Power On / Off / Remote (Main) Switch
Front Panel / Rear Panel Power ON/OFF/REMOTE (Main) switch AC output socket Status LED Reset Button Dip Switch (S1~S8) CAN2 Port (only to be used in parallel mode) DC Input - CAN1 Port (only to be used in parallel mode) LCM Port (Connection for LCD remote control DC Input + panel) -
Page 18: Dip Switch (S1~S8) Assignment
3-3. DIP Switch (S1~S8) Assignment 1=ON/0=OFF Figure 8. DIP switch (S1~S8) PIN# PIN Assignment AC output voltage setting AC output voltage setting AC output frequency setting To set-up 3 Phase output or Energy-saving level To set-up 3 Phase output or Energy-saving level To set-up 3 Phase output or Energy-saving level To set-up DIP Switch S4~S6 for power saving or 3 Phase output To set-up function parameters adjustment via LCM port or DIP switch... -
Page 19: Dc Input - (Please Refer To Dc Wiring Connections
B. Power device leaving saving mode(re-start) Restart threshold = rate power x setting % x 2~3 In case the power over the restart threshold, the power device will re-start and provide the AC power. Scenario Power saving DISABLE Go in power saving mode when output load is under 4% of rating power Go in power saving mode when output load is under 5% of rating power... -
Page 20: Dc Input + (Please Refer To Dc Wiring Connections On P.20)
Figure 9. CAN1 and CAN2 port status is set to ON. 2. Use the RJ-45 line (RJ-45 network cable parallel connection) to link one of the SD Series CAN1 (CAN2) port to the other CAN1 (CAN2) port. PIN# LCM port... -
Page 21: Lcm Port
3-13. LCM Port Connection for LCD remote control panel, you can set and display the SD-series operation status. Figure 10. LCM port Figure 11. LCM cable LCD Remote Control Panel SD Series PIN Num. Signal Description PIN Num. CANH CANL... -
Page 22: Green Terminal (Remote And Parallel Select)
3-14. Green terminal (Remote and Parallel select) Figure 12. Green terminal PIN # PIN Assignment -ENB Parallel Jump Parallel Jump Table 12. Green terminal PIN assignment 3-14-1. Parallel Jump Function (please refer to section 5 for further detailed info.) 1. Before installing the inverter, you need to ensure the main switch is in the OFF position. -
Page 23: Rs-232 Port
Not used Not used Not used Not used Table 13. The connection between SD series and computer The connection between this SD-series and the computer is as follows Figure 16. The connection between SD series and computer 3-16. Fan Ventilation The rear panel must keep the distance at least 1 inch from any surrounding items. -
Page 24: Dc Wiring Connections
# 3/0 350 A Table 15. SD series wiring cable diameter and inline fuse Connect the cables to the power input terminals on the front panel of the inverter. The red terminal is positive (+) and black terminal is negative (-). -
Page 25: Dc Input Terminals
Connect DC input terminals to 12V / 24V / 48V battery or other power sources. [ + ] represents positive, [ - ] represents negative. Reverse polarity connection can blow the internal fuse and may damage the inverter permanently. DC Input Voltage Model Minimum Maximum Table 16. SD series DC input voltage range... -
Page 26: Hard-Wire Installation
4-2. Hard-wire Installation 4-2-1. SD series provides the flexibility of hard-wire connection, and this function will make external control panel wiring easier. Version 1 General model Step 1. Remove the four screws of AC wiring compartment and pull it out with care. - Page 27 The only difference between 110V and 220V is within the AC Input breaker L or N and thus will not affect the wiring configuration. Note In case that user wants to install the earth-leakage circuit breaker, COTEK recommend time delay type. The major specification of the circuit breaker is as following Earth-leakage current 100mA, 300mA, 500mA Time 0.45 second, 1 second, 2 seconds...
- Page 28 Step 3. Use the screwdriver to fix the cover. Figure 24. UL model setting Step 3 4-2-2. Connect AC output and AC input wiring to the SD series terminals. Please take the following information as your reference. Terminal Wire Color...
- Page 29 4-2-3. Neutral Grounding Connection Setting (For SD1500 Only) The default setting is option A: NO ONNECTION BETWEEN NEUTRAL CONDUCTOR (N) OF THE AC OUTPUT AND SAFETY GROUND (PE/GND) CAUTION! It is advised that all the electrical installation should conform to the local electrical codes and should be carried out by a certified technician.
- Page 30 0 V with respect to the earth ground. In this case, touching this terminal will not be a shock hazard. 4-2-4. For AC output and terminals of the SD series, you can use both the front wiring terminal and outlet, as they are connected in parallel.
- Page 31 Note In case the load current over the outlet rated current, please use the hared wire terminal next to the outlets. Note Recommend GFCI connector HUBBELL INC WIRING DEVICE DIV, Type GF20 and GFRST20. Rated 125V, 20A COOPER WIRING DEVICES, Type VGF20 and SGF20. Rated 125V, LEVITON MFG CO INC, Type 7899-W and GFNT2.
-
Page 32: Parallel Mode
5.Parallel Mode 5-1. Prepare for Parallel Usage 1. Before setting, you need to ensure that the main switch is 2. Before using the parallel function, you need to set the parallel jump of the green Figure 26. Parallel jump setting Example If three SD inverters are paralleled, setup green terminal. -
Page 33: Industry Applications
CAN1 and CAN2 port have wiring. Note SD series can be used for N+1 (N 14) redundancy and the ability of enlarge the capacity (Users can install maximum 15 units of inverters together in parallel in order to provide the power expansion). - Page 34 Type 3 4W Waveform Battery Set up Do not support N+1 operation, maximum of three Transfer Switch STS Do not support N+1 SD inverters, THD < 4% module Single < 4ms; N+1 operation, maximum of two Warning & 1P3W & 3P4W < 6ms SD inverters, THD <...
-
Page 35: Wiring For Parallel Usage
5-2-2. 2W Switch Table Auto Master Auto Master Table 22. 2W switch table auto master 5-2-3. 3W Switch Table Master Table 23. 3W switch table 5-2-4. 3 4W Switch Table L1 Master L2 -12 Slave L2 +12 Slave Table 24. 3 4W switch table 5-3. - Page 36 Figure 29. Connection Diagram_2 Figure 30. Connection Diagram_3...
-
Page 37: Ac Wiring Diagram
5-4. AC Wiring Diagram Figure 31. SD series front panel introduction Wiring Diagram Figure 32. 2W parallel AC wiring diagram... - Page 38 2W Auto Master Wiring Diagram Figure 33. 2W parallel AC wiring diagram auto master Note Auto master can be operated under 2W mode. Under 2W auto master mode, please set up the inverter by Ethernet or Remote control CR-10. Note 2W system parallel Max.
- Page 39 Wiring Diagram Figure 34. 3W parallel AC wiring diagram...
- Page 40 3 4W Wiring Diagram Figure 35. 3 4W parallel AC wiring diagram Connection / Model 100V 110V 115V 120V 200V 220V 230V 240V Output VAC L1-to-L2 L2-to-L3 L3-to-L1 SD2500 L1-to-N L2-to-N L3-to-N L1-to-L2 L2-to-L3 L3-to-L1 SD3500 L1-to-N L2-to-N L3-to-N Table 25. Connection & output VAC under...
-
Page 41: Remote Command For The Parallel Connection
5-5. Remote command for the parallel connection There are two ways for parallel connection remote setting 1. RS-232, 2. CAN-Bus. The RS-232 communication protocol not support broadcast function. In case of the remote control use the RS-232 port, please follow the setting steps for the SD setting. -
Page 42: Rs-232 Command
6.RS-232 Command 6-1. RS-232 command introduction 6-1-1. RS-232 command Command format This unit uses high-level language commands with a CR (0DH) and LF (0AH) as the end of the command. The system would interpret and execute the command only after these two characters are received. - Page 43 6-1-3. Command for accessing Setup Menus and adjusting values <Function Code> Setting Menu <Function Code> Setting Menu FUNC0 OVP Setting FUNC10 Shut-down retry FUNC1 OVP Recovery FUNC11 Saving Level FUNC2 UVP Setting FUNC12 Saving Interval FUNC3 UVP Recovery FUNC13 Bypass Relay UV Alarm LCD Contrast FUNC4...
- Page 44 2. OVP Recovery <FUNC1> When the DC input voltage is higher than the OVP setting, the SD-series shuts-down; once the input voltage falls below the set OVP value, the SD-series will automatically restart. Default = 15 VDC @ 12V Model, 30 VDC @ 24V Model, 60 VDC @ 48V Model Model Setting value range...
- Page 45 Note -down without any audible warning. 6. O/P Voltage <FUNC5> Setting the SD-series output voltage on the inverter operation. Default = 110 VAC @ 110 V Model, 230 VAC @ 230 V Model Model Setting value range 110 V 97 VAC ~ 123 VAC 230 V 194 VAC ~ 246 VAC Table 34.
- Page 46 Example2 When user setting value= Disable, the SD- within the range of 47 Hz~63 Hz, the internal transfer relay will close. Default= 7Hz Model Setting value range 110 V 0 ~ 7 Hz 230 V 0 ~ 7 Hz Table 37. Sync Frequency <FUNC8> 10.
- Page 47 13. Saving Interval <FUNC12> When SD-series inverter enters power saving mode, it will detect AC Load periodically. Default = 2.0 Seconds Setting range = 1.0S ~ 2.0S If the AC Load is 3 times higher than Saving Level, inverter will recover and output normally to AC Load.
- Page 48 Online < 4ms Utility AC to inverter: 16~25ms. * Only applicable on SD2500 / SD3500 Table 41. SD series transfer time 15. LCD contrast <FUNC14> Sets the LCD screen contrast. Default = 50% Setting range = 0% ~ 100% Setting Menu Status <value>...
- Page 49 18. Alert Setting <FUNC17> When alert occurs, the internal dry contact relay will open/close. Default = Alert, SHDN Setting range = 0~3 Setting Menu SETT (RS-232) Alert (LCD) Disable SHDN Buzzer Setting Alert Alert , SHDN Table 45. Alert Setting <FUNC17> 19.
-
Page 50: Troubleshooting
We guarantee this product against defects in materials and workmanship for a period of 24 months from the date of purchase. Please contact with your local COTEK authorized distributor for RMA (Return material Authorization) service. Please note that COTEK will ensure our products are operational before delivery and the warranty service is offered technician. - Page 51 Copyrights 2016 COTEK Electronic IND. CO. CO. Pour obtenir Electronic IND. CO., LTD. se r e calcul ou de...
- Page 52 No. 33, Sec. 2, Renhe Rd., Daxi Dist., Taoyuan City 33548, Taiwan Phone +886-3-3891999 FAX +886-3-3802333 http // www.cotek.com.tw 2017.12._A1...
Need help?
Do you have a question about the SD Series and is the answer not in the manual?
Questions and answers