Table of Contents
Advertisement
Quick Links
Page 1 of 22
INSTRUCTION MANUAL
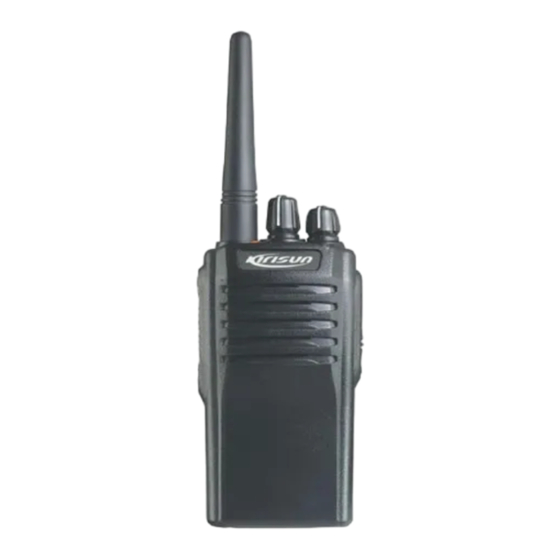
PT4208
Your KIRISUN radio generates RF electromagnetic energy during
transmit mode. This radio is designed for and classified as "Occupational Use Only", meaning it must be
used only during the course of employment by individuals aware of the hazards, and the ways to minimize
such hazards. This radio is NOT intended for use by the "General Population" in an uncontrolled
environment.
This radio has been tested and complies with the FCC RF exposure limits for "Occupational Use Only". In
addition, your KIRISUN radio complies with the following Standards and Guidelines with regard to RF
energy and electromagnetic energy levels and evaluation of such levels for exposure to humans:
FCC OET Bulletin 65 Edition 97-01 Supplement C, Evaluating Compliance with FCC Guidelines for
Human Exposure to Radio Frequency Electromagnetic Fields.
American National Standards Institute (C95.1-1992), IEEE Standard for Safety Levels with Respect to
Human Exposure to Radio Frequency Electromagnetic Fields, 3 kHz to 300 GHz. American National
Standards Institute (C95.3-1992), IEEE Recommended Practice for the Measurement of Potentially
Hazardous Electromagnetic Fields– RF and Microwave.
The following accessories are authorized for use with this product. Use of accessories other than those (listed
in the instruction) specified may result in RF exposure levels exceeding the FCC requirements for wireless
RF exposure.
To ensure that your expose to RF electromagnetic energy is within the
FCC allowable limits for occupational use, always adhere to the following guidelines
DO NOT operate the radio without a proper antenna attached, as this may damaged the radio and may also
cause you to exceed FCC RF exposure limits. A proper antenna is the antenna supplied with this radio by the
manufacturer or antenna specifically authorized by the manufacturer for use with this radio.
DO NOT transmits for more than 50% of total radio use time ("50%duty cycle"). Transmitting more than
50% of the time can cause FCC RF exposure compliance requirements to be exceeded. The radio is
Advertisement
Table of Contents

Related Manuals for Kirisun PT420801


Summary of Contents for Kirisun PT420801
- Page 1 This radio has been tested and complies with the FCC RF exposure limits for “Occupational Use Only”. In addition, your KIRISUN radio complies with the following Standards and Guidelines with regard to RF energy and electromagnetic energy levels and evaluation of such levels for exposure to humans: FCC OET Bulletin 65 Edition 97-01 Supplement C, Evaluating Compliance with FCC Guidelines for Human Exposure to Radio Frequency Electromagnetic Fields.
- Page 2 ALWAYS keep the antenna at least 2.5 cm (1 inch) away from the body when transmitting and only use the KIRISUN belt-clip which is listed in instructions when attaching the radio to your belt, etc., to ensure FCC RF exposure compliance requirements are not exceeded. To provide the recipients of your transmission the best sound quality, hold the antenna at least 5 cm (2 inches) from your mouth, and slightly off to one side.
- Page 3 The use of non-KIRISUN battery。 FCC CAUTION: Changes or modifications to this device, not expressly approved by KIRISUN, could void your authority to operate this transceiver under FCC regulations.
- Page 4 Page 4 of 22 FCC INFORMATION FOR Q5EPT420801 This device compliance with Part 90 of the FCC rules. Operation is subject to the following two conditions: (1) This device may not cause harmful interference, and (2) This device must except any interference received, including interference that may cause undesired operation. FCC ID: Q5EPT420801...
- Page 5 Kirisun Electronics (Shenzhen) Co., Ltd.We believe two-way radio, which always incorporates the latest technology, can bring great convenience to your life and work; we also believe that the quality and function of two-way radio can meet your demands for reliable communication.
- Page 6 Page 6 of 22 PRECAUTIONS lease observe the following precautions to prevent fire,personal injury,and radio damage. Do not operate your radio while taking on fuel,or being charged. Do not expose the radio for a long period to direct sunlight,nor place the radio close to heating appliances.
-
Page 7: Table Of Contents
Page 7 of 22 CONTENTS 1. Package-opened Inspection and Installing 2. Preparation 2.1. Charge the battery 2.2. Install/remove the battery 2.3. Install the antenna 2.4. Install external speaker/MIC 2.5. Install the belt clip 3.Radio Overview 4.Basic Operation 5.Programmable Key Function 6.Auxiliary functions 6.1.TOT timer 6.2.Battery saving... -
Page 8: Preparation
Page 8 of 22 1. Package-opened Inspection Please check the host in the package and the supplied accessories in the following table before using. Any articles are found lost or damaged, please contact the distributor without delay. Supplied Accessories Accessories Quantity Antenna battery... - Page 9 Page 9 of 22 Insert the battery to be charged or the phone in the charger, please switch off the phone before installing it into the charger. Make sure that the terminals of the battery and the charger can contact with each other reliably, when the red LED is on, the charging starts.
-
Page 10: Install/Remove The Battery
Page 10 of 22 Both KB-70A nickel-hydrogen battery and KB-70B Li-polymer battery of the company are applicable to this phone. After being purchased or before the first charging after being laid aside for a long time (2 months), the battery can reach its normal capacity after several times of charging, please ensure to charge the battery for at least once every three months. -
Page 11: Install The Antenna
Page 11 of 22 Remove the battery To remove the battery, slightly press the battery and pull the push button upwards, and then remove the battery from the phone. Note: Please avoid short circuit of terminals of the battery or throw the battery in fire. Do not remove the shell of the battery by yourself. -
Page 12: Install External Speaker/Mic
Page 12 of 22 2.4 Install external speaker/MIC Open the soft rubber cover of external speaker or MIC with your fingernail, insert the pin of matching external speaker or MIC into the pinhole of the phone. 2.5 Install the belt clip Align the guide rail of the support of the belt clip to the guide slot on the back of the battery and push downwards properly;... -
Page 13: Basic Operation
Page 13 of 22 LED INDICATOR Red LED on when transmitting, green LED on when receiving signals. Red LED flashes when low battery. Channel selector knob Turning to select channels 1-16. Power/Volume knob Turn clockwise to turn on the phone, keep turning to adjust the volume. To turn off the phone, just turn the know anticlockwise till a sound of “Ka-Da”... - Page 14 Page 14 of 22 2. Volume: You can press the key programmed to “cancel squelch” to receive background noise and then turn the Power/Volume key to adjust the volume. 3. Channel: Turn the channel selector know to select the required channel. When the correct signal is received, you can hear sounds from the speaker.
-
Page 15: Programmable Key Function
Page 15 of 22 5. Receive: The radio will return to the receiving state after you loosen the PTT key. The distributor may have set the CTCSS/DCS signaling in the programmed radio of your radio. On the channels with CTCS S/DCS are set, you can only hear the call from other radio with the same CTCSS/DCS. -
Page 16: Auxiliary Functions
Page 16 of 22 the scan function and stays at the noise channel. 11. Hi-Low Power Press to switch between high and low power of the sending power of Switch the station Press to disable QT, DQT signaling and release according to the setting 12. -
Page 17: Battery Saving
Page 17 of 22 6.2 battery saving The dealer may set the energy saving modes of the battery by programming. If this function is enabled, the phone will enter the battery saving mode if not receiving any signal or any operation for 10 seconds. The phone will automatically quit the battery saving mode if receiving any signal or operation. - Page 18 Page 18 of 22 DTMF signaling, press corresponding programmable keys “Call 1” “Call2”, the codes can be transmitted. 6.7 Talkaround In the communication network, you can expand communication range through the repeater, but when the mobile radio is out of the communication range, you can connect with other radio in the talkaround method.
- Page 19 Page 19 of 22 Preset channel + current channel: if the phone is at the Scan Staying status, it will transmit signals from the current channel, otherwise, it will transmit signals from the channel where the scan is started. Priority channel: The priority channel preset in the Scan list. Priority channel+ current channel: if the phone is at the Scan Staying status, it will transmit signals from the current channel, otherwise, it will transmit signals from the priority channel.
- Page 20 Page 20 of 22 6.10 Lone worker If Lone worker is set to be enabled, press the key “Lone worker” to enable the Lone Worker Mode. Start the Lone worker timer and when the preset Lone worker time is reached, the station will alarm, after the alarm time, the station will enter the Emergency Alarm Mode and give out the Emergency Alarm.
- Page 21 Page 21 of 22 8. Trouble Shooting Guide Problem Solution Power on Failure A. Unreliable connection between the battery and the phone, please reinstall the batter. B. The protective tube of power cable is burnt out. Please change it. C. Power switch in failure, please change it. D.
- Page 22 Page 22 of 22 Max. frequency deviation ±2.5 KHz (narrowband) /±5 KHz (broadband) Max. audio power ≥1000mW Power DC7.4V...
Need help?
Do you have a question about the PT420801 and is the answer not in the manual?
Questions and answers