Table of Contents
Advertisement
Quick Links
Alarm model:
...........................................................................
Sold on:
...........................................................................
By:
I nstalled on bike
model, number
GEMINI Technologies S.r.l.
Via Luigi Galvani 12 - 21020 Bodio Lomnago (VA) - Italy
Tel. +39 0332 943211 - Fax +39 0332 948080
www.gemini-alarm.com
ISO 9001 Certified company
954N
USER AND INSTALLER
MANUAL
UK
Made in Italy
REV.03 - 03/22
Advertisement
Table of Contents

Related Manuals for Gemini 954N


Summary of Contents for Gemini 954N
- Page 1 I nstalled on bike model, number 954N USER AND INSTALLER MANUAL GEMINI Technologies S.r.l. Via Luigi Galvani 12 - 21020 Bodio Lomnago (VA) - Italy Tel. +39 0332 943211 - Fax +39 0332 948080 www.gemini-alarm.com Made in Italy ISO 9001 Certified company...
-
Page 2: Table Of Contents
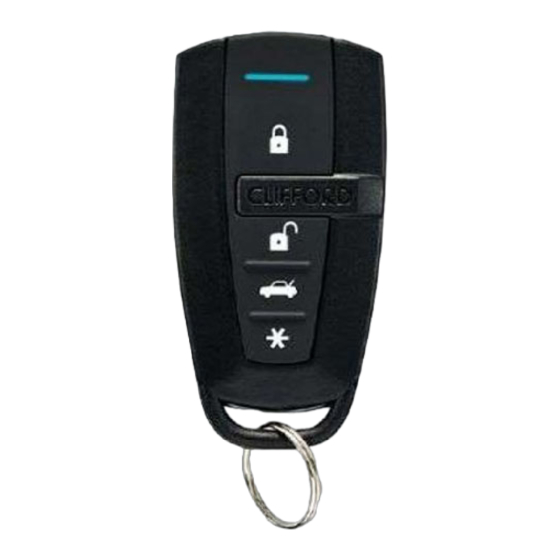
CONTENTS CONTENTS - INTRODUCTORY NOTE INSTALLER MANUAL USER MANUAL 15.0 FITTING INSTRUCTIONS - ALARM SYSTEM CONTROL DEVICES 16.0 - ALARM UNIT SEALING 2.1 - Remote control 17.0 - ALARM UNIT POSITIONING 2.2 - Touch key 18.0 - ACCESSORIES - FITTING - SYSTEM OPERATION - BASIC CONFIGURATION 18.1 - Touch key receptacle 3.1 - Arming... -
Page 3: Introductory Note
When the batteries are low, the LED blink when a button is pressed. Replace the batteries: weak batteries will prevent the remote control from properly operating the alarm system. The 954N alarm system cannot be paired with transponder TAG 908. PAGE 3... -
Page 4: System Operation - Basic Configuration
3.0 - SYSTEM OPERATION - BASIC CONFIGURATION 3.6 - ARMED CONDITION After the 20 sec. arming delay, the system is fully armed and ready to detect 3.1 - ARMING any irregularity. The LED will start flashing to confirm the armed condition. To arm the system, press remote control button “1”... -
Page 5: System Disarming Without Alarm Memory
3.10 - SYSTEM DISARMING WITHOUT ALARM MEMORY 4.1 - OPTICAL/ACOUSTIC SIGNALS To disarm the system, press remote control button “1” or touch the key to its Operations such as arming/disarming, system programming, alarm memory receptacle. The status LED will turn OFF and disarming will be confirmed by 3 and learning new devices are signaled both acoustically and optically (LED Beeps and 3 flashes of the turn indicators. -
Page 6: Self-Rearming
5.0 - SLEEP MODE - ENERGY SAVER FEATURE 4.5 - ANTI-HIJACK FEATURE In order to preserve battery life, the system will automatically revert to sleep To activate the anti-hijack feature while the engine is running, either: mode when the vehicle is sitting idle for a period of time. Press remote control button “1”. -
Page 7: Pin Code Override
8.0 - PIN CODE OVERRIDE EXAMPLE 7.0 - PIN CODE OVERRIDE To help you understand the override procedure by PIN code, here below is a If you cannot disarm the system from the remote control or touch key (because step-by-step example entering PIN code “2-3-4-1”. they are lost or broken or batteries are flat), you will be able to disarm the system by using the PIN override procedure. -
Page 8: Pin Code Customization
9.0 - PIN CODE CUSTOMIZATION Simultaneously press both remote control buttons. The LED will turn OFF Here below is a step-by-step example showing how to customize the factory PIN code. In this case the selected PIN code is 2-3-4-1 isarm the alarm system Open the seat (if protected by a Ground the BROWN-GREEN Turn ignition key “OFF”... -
Page 9: Replacing Remote Control Batteries
Do not use voltages other than the one specified by the manufacturer Protect the alarm from any direct water flow such as high-powered water jets found in a car wash. ATTENTION BATTERIES Gemini Technologies will not be held responsible for any damage caused by improper use. 14.0 - WARRANTY CONDITIONS WARNING Use only CR1616 batteries. -
Page 10: Installer Manual
INSTALLER MANUAL 17.0 - ALARM UNIT POSITIONING Since the alarm system has a built-in high sensitivity triaxial tilt sensor, it can 15.0 - FITTING INSTRUCTIONS be positioned either vertically or horizontally as long as you keep the following in mind Please read all instructions and understand them thoroughly before starting the installation. -
Page 11: Touch Key Receptacle
18.0 - ACCESSORIES CAUTION Alarms are supplied without wiring harnesses. A wide range of specific pin- 18.1 - TOUCH KEY RECEPTACLE to-pin wiring harnesses is available for the most common motorbikes. The receptacle with built-in LED must be installed where it can readily be seen The following tables refer to the generic wiring harness KITCA 417N17. -
Page 12: Wiring Diagram
20.0 - WIRING DIAGRAM 21.0 - IMMOBILIZER WIRING DIAGRAM ENGINE IMMOBILIZER - GROUNDED WIRE For most small 2-stroke motorcycle engines. Touch Key White White/Grey Ground Key switch Receptacle with built-in LED Immobilizer wire Orange Turn indicators Orange (12V) To vehicle engine Seat/topcase ENGINE IMMOBILIZER - CUT WIRE contact switch... -
Page 13: Diode Installation
22.0 - DIODE INSTALLATION Turn ignition key in ON. ! 2 flashes of the turn indicators and 2 confirmation tones (1 Bop and 1 Beep) How to tell if you need to install a diode: will acknowledge the system is in learn mode. Activate one of the turn indicators, turn ignition key OFF and arm the alarm. -
Page 14: Programmable Features
After pressing both buttons simultaneously (step 4), program the features 24.0 - PROGRAMMABLE FEATURES according to your needs. To either enable or disable one of the programmable features, proceed as follows: TO ENABLE TO DISABLE NB: Remember to ALWAYS arm/disarm the system before programming. Press button 1 Press button 2 With the system disarmed, lift the seat... -
Page 15: Programming Example
26.0 - TILT SENSOR ADJUSTMENT 25.0 - PROGRAMMING EXAMPLE Here below is a step-by-step example showing how to program the system The alarm system has a built-in triaxial tilt/shock sensor with 5 levels of with the acoustic signals, the panic alarm and the pre-alarm features enabled. sensitivity adjustment. - Page 16 R&TTE Declaration of Conformity NOTES We, the undersigned, Company GEMINI TECHNOLOGIES S.r.l Address, City Via Luigi Galvani 12, 21020 Bodio Lomnago (VA) Country Italy Phone number +39 0332 943211 Fax number +39 0332 948080 declare under our sole responsibility that the following equipment:...
Need help?
Do you have a question about the 954N and is the answer not in the manual?
Questions and answers