Table of Contents
Advertisement
Quick Links
Advertisement
Table of Contents

Related Manuals for Viking Range RVRF3361SS


Summary of Contents for Viking Range RVRF3361SS
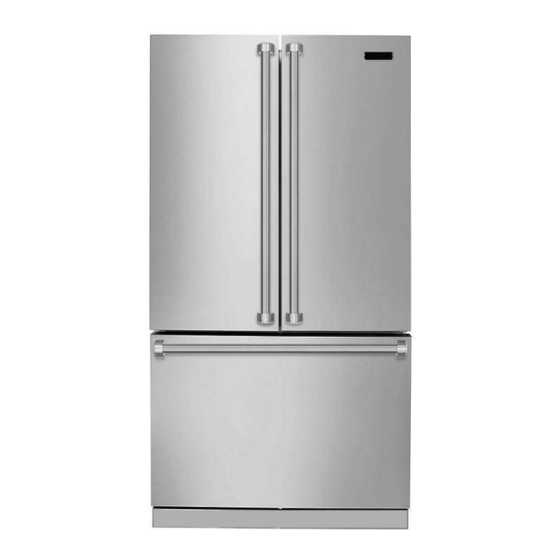
- Page 1 Use / Install Guide Guide Uso / d’installation Guía de d’utilisation / Instalación 3 Series French Door Bottom Freezer/Refrigerator Refrigerador con congelador inferior de puerta doble Réfrigérateur à portes françaises/Congélateur en bas RVRF3361...
-
Page 2: Table Of Contents
Automatic Ice Maker ............15 NOTE Storage Features ..............16 Registering your product with Viking Range, LLC enhances our ability to serve you. You can register online at www. Storing Food and Saving Energy ........20 vikingrange.com or by sending your Product Registration Card in the mail. -
Page 3: Safety
Safety Important safety instructions Child Safety Safety Precautions Do not attempt to install or operate your unit until you have Packing Materials: read the safety precautions in this manual. Safety items • Packing cartons covered with rugs, bedspreads, plastic throughout this manual are labeled with a Danger, Warning, sheets, or stretch wrap may become airtight chambers or Caution based on the risk type. - Page 4 Safety Electrical information IMPORTANT WARNING CFC/HCFC DISPOSAL Your old refrigerator may have a cooling system You must follow these guidelines to ensure that that used CFCs or HCFCs (chlorofl uorocarbons or your refrigerator’s safety mechanisms are operating hydrochlorofl uorocarbons). CFCs and HCFCs are believed correctly.
-
Page 5: Feature Overview
Feature Overview Understanding features and terms Your refrigerator is designed for optimal convenience and storage fl exibility. The illustration below is provided to assist you with familiarizing yourself with product features and terminology. NOTE Features may vary according to model. Model is shown without freezer drawer cover. Water Filter LED Light... -
Page 6: Installation
Installation Required Tools You will need the following tools: Tools Necessary: (OR) Phillips Head " and ¼" Quadrex Head Socket Adjustable " Fixed Screwdriver Allen Wrench Wrench Wrench Wrench • Allow the following clearances for ease of installation, This Use & Care Guide provides general installation and proper air circulation, and plumbing and electrical operating instructions for your model. - Page 7 Installation Level Refrigerator & Adjust Doors To make fi nal door height adjustments: 1. Open freezer drawer to make lower hinge visible. (if necessary) 2. Insert 6mm Allen wrench into the shaft of the lower hinge. 3. Adjust the height by turning clockwise or Guidelines for fi...
- Page 8 Installation Shelf features Reposition the Air Seal (Select Models) (Slide-out Shelves) CAUTION 1. Remove air seal by pushing down on the fl ap with a downward rotation. Shelves must be removed prior to moving the refrigerator. 2. Position the air seal towards the outside end of the shelf to avoid the air tower when shelf is pushed back into place.
-
Page 9: Removing The Doors
Removing the Doors Getting through narrow spaces To remove the refrigerator doors: 1. Trace lightly around the door’s top hinges with a pencil. If your refrigerator will not fi t through an entrance area, This makes reinstallation easier. before installing the door handles, you can remove the doors. - Page 10 Removing the Doors Removal and Installation of lower 4. Unscrew the three lower hinge screws and slide the hinge inwards. Freezer Drawer CAUTION Drawer is heavy. Use caution when lifting Removing Freezer Drawer: 1. Remove (4) hex head drawer screws. 2.
-
Page 11: Installing The Door Handles
Installing the Door Handles 1. There are 6 handle studs on the refrigerator. 2. Slide handle endcaps over door stud. 3. Tighten the set screw. There are 2 set screws per handle assembly. 4. Repeat with all 3 handle assemblies. -
Page 12: Connecting The Water Supply
Viking Range, LLC recommends for homes with existing valves its water line kit 054414-000 (with a 6 ft. Stainless Steel Water Line) and for homes without an existing valve, Viking Range, LLC recommends its water line kit 054415-000 (with a 20 ft. Copper Water Line with self-tapping saddle valve). -
Page 13: Controls
TruTouch Controls An indicator light will be illuminated above most active features. Touch the icon to activate the options below. on off Press and hold for three seconds to turn off the cooling system to clean the refrigerator. It also turns off the ice maker. The temperature displays will read OFF. - Page 14 TruTouch Controls Sabbath Mode NOTE The Sabbath Mode is a feature that disables portions of the Temperature Adjustable Cold Zone Drawer If the refrigerator and its controls in accordance with observance is not turned off prior to putting the unit into Sabbath of the weekly Sabbath and religious holidays within the Mode, it will continue to adjust itself to maintain the set Orthodox Jewish community.
-
Page 15: Automatic Ice Maker
Automatic Ice Maker Ice maker operation & care • The following sounds are normal when the ice maker is operating: After the refrigerator is installed properly, the ice maker can - Motor running produce ice within 24 hours. It can completely fi ll an ice bin in about three days. -
Page 16: Storage Features
Storage Features Shelf features Drawers Your refrigerator includes a variety of storage drawers. These CAUTION drawers are located in fi xed positions at the bottom of the fresh food compartment. To avoid injury from breakage, handle tempered glass shelves carefully. Crispers Crisper drawers are designed for storing fruits, vegetables, and other fresh produce. - Page 17 Storage Features To remove the Crisper Drawer for cleaning: Special items rack 1 Pull the drawer out until it stops. The innovative design of the special items rack allows you to 2 Lift the front slightly and remove the drawer. store four bottles of wine or soft drink bottles.
- Page 18 Storage Features To change the position of an adjustable door bin: IMPORTANT 1. Before adjusting a bin, remove all food. 2. Grip the bin fi rmly with both hands and lift it upward. DO NOT clean the display area of the Custom Temp 3.
- Page 19 Storage Features Freezer Features Clip Pull to Remove Replacing Lower Freezer Basket Instructions 1. Place freezer basket back inside the freezer drawer. Stabilizer 2. Replace clips by sliding them back into the slots. Freezer Baskets To Remove Upper Freezer Basket 1.
-
Page 20: Storing Food And Saving Energy
Storing Food and Saving Energy Ideas for storing foods Ideas for saving energy Fresh food storage Installation • Keep the fresh food compartment between 34°F and • Locate the refrigerator in the coolest part of the room, 40°F with an optimum temperature of 37°F. out of direct sunlight, and away from heating ducts or registers. -
Page 21: Normal Operating Sounds & Sights
Normal Operating Sounds Understanding the sounds you may hear Your new, high-effi ciency refrigerator may introduce NOTE unfamiliar sounds. These sounds normally indicate your refrigerator is operating correctly. Some surfaces on fl oors, Energy effi cient foam in your refrigerator is not a sound walls, and kitchen cabinets may make these sounds more insulator. -
Page 22: Changing The Water And Air Filters
Changing The Water and Air Filters Your refrigerator is equipped with separate water and air To replace your water fi lter fi ltering systems. The water fi lter system fi lters all the water used to produce ice. The air fi lter removes odors and 1 . - Page 23 Changing The Water and Air Filters Air fi lter Ordering replacement fi lters The air fi lter is located under the utility bin. Order new fi lters by calling 888-845-4641, online at www. vikingrange.com, or through the dealer where you bought Replacing your TruAir air fi...
-
Page 24: Care And Cleaning
Care and Cleaning Protecting your investment Keeping your refrigerator clean maintains its appearance and prevents odor build-up. Wipe up any spills immediately and clean the freezer and fresh food compartments at least twice a year. NOTE Do not use abrasive cleaners such as window sprays, scouring cleansers, fl ammable fl uids, cleaning waxes, concentrated detergents, bleaches, or cleansers containing petroleum products on plastic parts, interior doors, gaskets, or cabinet liners. - Page 25 Care and Cleaning Care and cleaning tips Part Cleaning Agents Tips and Precautions Soap and water Use two tablespoons of baking soda in one quart of warm water. Interior & Baking soda and Be sure to wring excess water out of sponge or cloth before cleaning Door Liners water around controls, LED lights or any electrical part.
-
Page 26: Solutions To Common Problems
Solutions to Common Problems Before you call... If you experience a concern with your refrigerator or notice a product behavior or condition that you do not understand, you can usually avoid a call to your service representative by referring to this section for an answer. Beginning with the following table, this information includes concerns, potential causes, and common solutions. - Page 27 Solutions to Common Problems Opening/Closing Of Doors/Drawers Concern Potential Cause Common Solution Door was closed too hard, causing other door Close both doors gently Door(s) will not close. to open slightly Ensure fl oor is level and solid, and can adequately ...
- Page 28 Solutions to Common Problems Temperatures Are Too Warm Concern Potential Cause Common Solution Doors are opened too frequently or too long. Warm air enters the refrigerator whenever the door is Freezer/Refrigerator temperature is too warm. opened. Open the door less often. ...
-
Page 29: Service Information
Clearly describe the problem that you are having. If you are unable to obtain the name of an authorized service agency, or if you continue to have service problems, contact Viking Range at (888) 845-4641 or write to: VIKING RANGE, LLC... -
Page 30: Warranty
(1) year from the date of original retail purchase. Viking Range, LLC, warrantor, agrees to repair or replace, at its option, any part which fails or is found to be defective during the warranty period.
Need help?
Do you have a question about the RVRF3361SS and is the answer not in the manual?
Questions and answers
the outside door handles are loose and come off when I try to open them. Where can I get the key to tighten them up?
You can use a Phillips head screwdriver or a 1/4" Quadrex head screwdriver to tighten the loose door handles on a Viking Range RVRF3361SS.
This answer is automatically generated