Table of Contents
Advertisement
Advertisement
Table of Contents

Related Manuals for Pitney Bowes DI200


Summary of Contents for Pitney Bowes DI200
- Page 1 Operating Guide Folding/ Inserting System...
-
Page 2: Table Of Contents
Contents Page 1. Introduction Safety … … … … … … … … … … … … … … … … … … … … … … … … About your machine … … … … … … … … … … … … … … … … … … … Machine Configurations …... -
Page 3: Introduction
Safety 1. INTRODUCTION Safety In some countries the DI200 is supplied with a moulded mains lead and plug. In other countries, or if the supplied lead is not used, the following information applies: An approved mains lead for the country concerned must be used. -
Page 4: About Your Machine
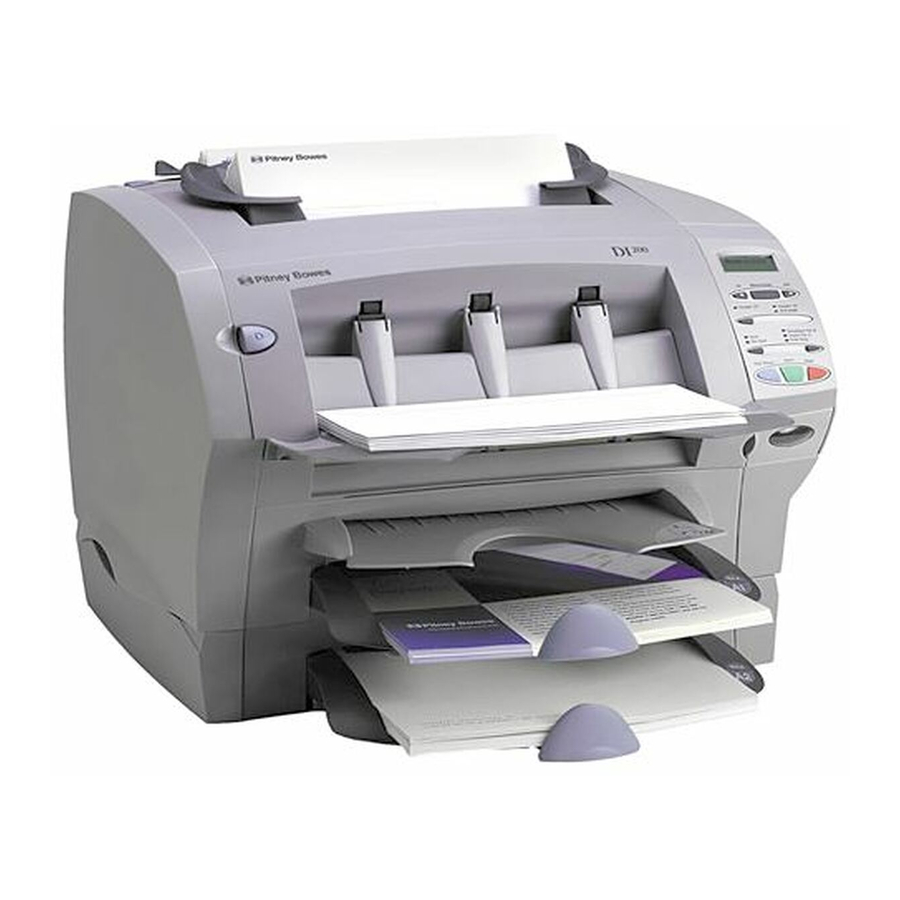
Introduction About your machine Your new DI200 is a compact folding and inserting machine designed to speed the process of mail creation. It has a minimal number of user adjustments and an intuitive, easy to use control panel. This simplifies machine operation and enhances the productivity of your mailing operation. -
Page 5: Machine Identification
Introduction Machine Identification Insert Feeder C (not fitted on all models) Use this feeder to add additional inserts to your envelope. Material fed from this feeder cannot be folded by the inserter. However, this feeder is especially suited to feeding pre-folded or thicker inserts. Insert Cover E Release Button (blue button marked E) Press this button to release the insert area cover if a stoppage occurs in this area of the machine. - Page 6 Lifting Handles (one each side) Always lift the DI200 using these handles. DO NOT lift the machine by any of the feeders or stacker. Standard Sheet Feeder A1 This feeder enables folding and inserting of a sheet into the envelope.
-
Page 7: The Controls
Introduction The Controls Menu / Enter Feeder A2 Feeder A1 2nd Page Envelope Fdr B Insert Fdr C Seal Fold Only No Seal Start Trial Piece Stop Display Shows the current status of the machine and displays prompts/error messages which help you operate the machine. Menu/Enter Press this button to enter the menu options. - Page 8 Introduction Selection Buttons and Indicator Lights Press these buttons to step through the feeders/options that are available on your machine. Depending on your model configuration, some indicator lights and associated feeders may be inoperable. i.e. if your model doesn’t have a second sheet feeder, the indicators associated with this feeder will not light –...
-
Page 9: Preparing And Loading
Loading 2. PREPARING AND LOADING This chapter explains how to connect and load the machine. Once you understand the subjects covered in this chapter, you can quickly setup and use the machine for a variety of jobs using ‘Running Jobs’ on page 13. Before setting up a job, make sure the material meets machine specifications (See ‘Specifications’... -
Page 10: Filling The Moistener
Loading Filling the Moistener Refill the moistener when the fluid level drops below the line on the oval viewing window. Slide the moistener out to the right. IMPORTANT: Never open the moistener while the machine is processing material. Carefully fill the moistener with EZ-Seal® solution or water up to the ‘Max’... -
Page 11: Loading Sheet Feeders (Feeders A1 And A2)
Loading Loading the Sheet Feeders (Feeders A1 and A2) Sheet Feeder A1 is fitted to all models and is located immediately below the Manual Feeder M. Sheet Feeder A2 is an option on all models that allows a second folded sheet to be inserted into an envelope. Both feeders are used for sheets that require folding before inserting. -
Page 12: Loading The Envelope Feeder (Feeder B)
Loading the Envelope Feeder (Feeder B) A note about envelopes: The DI200 needs to use DL Mailing envelopes (also known as ‘machineable’ envelopes). For full details, see ‘Specifications’ on page 39. Suitable envelopes may be ordered from Pitney Bowes (see page 38 for more details). -
Page 13: Loading The Insert Feeder (Feeder C)
Loading Loading the Insert Feeder (Feeder C) The Insert Feeder C is only available on certain model configurations. Use this feeder to add additional inserts to your envelope that do not require folding by the inserter. This feeder is especially suited to feeding pre-folded or thicker inserts such as Business Reply Envelopes or Response Cards, etc. -
Page 14: Running Jobs
DI200 series of machines, and then gives quick steps to setup and run each job. Once you’re familiar with the machine, use this chapter as a quick reference if you have to change a job setup. - Page 15 Running Jobs MODELS with an optional SECOND SHEET FEEDER A2 2 folded sheets 2 folded sheets (collated) envelope envelope see note below JOB 5 Page 20 JOB 6 Page 21 2 folded sheets 2 folded sheets (collated) no envelope (fold only) no envelope (fold only) see note below JOB 7...
-
Page 16: Job 1 - 1 Folded Sheet Into An Envelope
Job 1 1 folded sheet into an envelope 1 folded sheet Model Required: Any DI200 Notes: Models with the optional 2nd sheet feeder A2 envelope can use this feeder instead of sheet feeder A1, as long as it is loaded and selected in steps 1 and 3 below. -
Page 17: Job 2 - 1 Folded Sheet, No Envelope (Fold Only)
Job 2 1 folded sheet, no envelope (fold only) Model Required: Any DI200 1 folded sheet no envelope (fold only) Notes: Models with the optional 2nd sheet feeder A2 can use this feeder instead of sheet feeder A1, as long as it is loaded and selected in steps 1 and 2 below. -
Page 18: Job 3 - 1 Folded Sheet + 1 Insert Into An Envelope
Job 3 1 folded sheet + 1 insert 1 insert into an envelope 1 folded sheet Model The DI200 must have Required: an Insert Feeder C envelope Notes: Inserts are pre-folded sheets or unfolded items such as Business Reply Envelopes, Booklets or Response Cards, etc. -
Page 19: Job 4 - 1 Insert Into An Envelope
Job 3 (continued) Step Action Tips More Details… Press Trial Piece button Trial piece will not Page 6 and check trial piece seal - this is normal Press Start button Stop button will stop Page 6 to run job machine at end of cycle Problems? Refer to the help sections on pages 32 and 35. - Page 20 Job 4 1 insert into an envelope 1 insert Model The DI200 must have Required: an Insert Feeder C Notes: Inserts are pre-folded sheets or unfolded envelope items such as Business Reply Envelopes, Booklets or Response Cards, etc. Step Action Tips More Details…...
-
Page 21: Job 5 - 2 Folded Sheets Into An Envelope
Job 5 2 folded sheets into an envelope 2 folded sheets Model The DI200 must have Required: the optional Sheet Feeder A2 Notes: Run the address bearing document from Sheet Feeder A2 and a second sheet which envelope needs folding from Sheet Feeder A1. -
Page 22: Job 6 - 2 Collated Folded Sheets Into An Envelope
Job 6 2 collated folded sheets into an envelope 2 folded sheets (collated) Model The DI200 must have Required: the optional Sheet Feeder A2 Notes: This job uses the second sheet feeder A2 in 2nd Page mode to feed 2-sheet collated sets. -
Page 23: Job 7 - 2 Folded Sheets, No Envelope (Fold Only)
Job 7 2 folded sheets, no envelope (fold only) Model The DI200 must have Required: the optional Sheet Feeder A2 2 folded sheets no envelope (fold only) Notes: Run the address bearing document from Sheet Feeder A2 and a second sheet which needs folding from Sheet Feeder A1. -
Page 24: Job 8 - 2 Collated Folded Sheets, No Envelope (Fold Only)
Job 8 2 collated folded sheets, no envelope (fold only) 2 folded sheets Model The DI200 must have (collated) Required: the optional Sheet Feeder A2 no envelope (fold only) Notes: This job uses the second sheet feeder A2 in 2nd Page mode to feed 2-sheet collated sets. -
Page 25: Job 9 - 2 Folded Sheets And An Insert Into An Envelope
Job 9 2 folded sheets and an insert 1 insert into an envelope 2 folded sheets Model The DI200 must have an optional Required: Sheet Feeder A2 AND an Insert Feeder C envelope Notes: Run the address bearing document from Sheet Feeder A2 and a second sheet which needs folding from Sheet Feeder A1. - Page 26 Job 9 (continued) Press button to choose Make sure moistener Page 6 Seal or No Seal has EZ-Seal® or water Press Trial Piece button Trial piece will not Page 6 and check trial piece seal - this is normal Press Start button Stop button will stop Page 6 to run job...
-
Page 27: Job 10 - 2 Collated Folded Sheets And An Insert Into An Envelope
2 collated folded sheets and an insert 1 insert into an envelope 2 folded sheets (collated) Model The DI200 must have an optional Required: Sheet Feeder A2 AND an Insert Feeder C envelope Notes: This job uses the second sheet feeder A2 in 2nd Page mode to feed 2-sheet collated sets. - Page 28 Job 10 (continued) Press button to choose Make sure moistener Page 6 Seal or No Seal has EZ-Seal® or water Press Trial Piece button Trial piece will not Page 6 and check trial piece seal - this is normal Press Start button Stop button will stop Page 6 to run job...
-
Page 29: The Manual Feeder M
Manual Feed The Manual Feeder M All DI200 models have a Manual Feeder M which allows you to feed stapled or unstapled sets of up to 3 sheets of 80 g/m maximum. The sets are fed by hand, one set at a time, for processing by the machine. -
Page 30: Advanced Menu Options
The Menu 4. ADVANCED MENU OPTIONS Access the advanced menu options by pressing Menu/Enter. The options allow you to… • Reset the counter • Move the address in the window • Turn sheet double detection on or off • Turn insert double detection on or off •... -
Page 31: Sheet Double Detect On/Off
The Menu Press Menu/Enter repeatedly until the Move address Move address Move address Move address Move address screen displays… In window? In window? In window? In window? In window? Press yes ( ) to enter the function. Shift.. X Shift.. X Shift.. -
Page 32: Insert Double Detect On/Off
The Menu Insert double detect on/off Allows you to turn the insert feeder double detection (Insert DD) on or off. When turned on… The machine stops if it senses a double feed (two inserts feeding when only one should). If you’re running individually addressed inserts, it’s best to turn double detect on. -
Page 33: Reference
Reference 5. REFERENCE Error Messages Message Meaning and Action CANNOT No sheet feeder has been selected in the job setup. The SHIFT display will automatically timeout from this message after two seconds and move on to the turn sheet double detect On/Off ADDRESS menu function. - Page 34 Reference Message Meaning and Action CHECK SHEET Sheet feeder A2 is empty, has failed to feed or a there is a material FEEDER A2 stoppage in this area. Check that there are sheets loaded. If not, reload and restart. If there are sheets, remove the paper in sheet feeder A2, reload and restart.
- Page 35 NVM ERROR This is an unrecoverable error within the system software. CALL SERVICE Call Pitney Bowes service. OPEN COVER E Check for a material stoppage in the area beneath cover E. REMOVE ALL Open insert cover E and remove any material that is in the machine.
-
Page 36: General Troubleshooting
SYSTEM ERROR This is an unrecoverable error within the system software. CALL SERVICE Call Pitney Bowes service. SYSTEM ERROR Turn power to the machine off, wait for a minute and then turn the POWER ON/OFF power back on. - Page 37 Following installation of Sheet Feeder 2, the system doesn’t work Check that the DI200 is correctly located onto Sheet Feeder 2. Turn the machine off, wait a few seconds and then turn back on. Check that no debris (dust, paper, etc.) has fallen into the Sheet Feeder 2...
-
Page 38: Clearing Material Stoppages
Reference Clearing Material Stoppages …from area beneath cover D If the display indicates a stoppage beneath cover D, press the blue button marked D to release the cover. Lift the cover using the finger grips each side of the stacker. Any stalled material can then be carefully removed from the machine. -
Page 39: The Stacker
Service and Supplies A service maintenance contract is available to keep your machine in top condition at nominal cost. Pitney Bowes is also available if you have questions about your DI200, or require service or assistance. EZ-Seal® solution and/or suitable envelopes for the DI200 may also be ordered from Pitney Bowes. -
Page 40: Material Specifications
Reference Material Specifications Sheet Feeders A1 and/or A2 Sheet Size DIN A4 (297mm x 210mm) Paper Weight 75g/m to 90g/m Capacity to Max fill line (approx. 80 sheets of 80g/m Type Suitable for normal copier/laser printer bond paper. Do not run perforated, NCR or coated papers. Insert Feeder C (Optional) Insert Size Width 127mm to 225mm... -
Page 41: Machine Specifications
Up to a maximum of 4,000 cycles per month with an average of 2,000 cycles per month and a maximum life of 120,000 cycles. Compliance: Pitney Bowes certifies that the DI200 series complies with the requirements of the Low Voltage Directive 73/23/EEC and the EMC Directive 89/336/EEC. The products were tested in a typical configuration. - Page 42 FOR SERVICE AND SUPPLIES: The Pinnacles, Harlow, Essex, CM19 5BD, U.K. Form No. SDC486 RevA (10-02) © Pitney Bowes Limited, 2002 Printed in England...
Need help?
Do you have a question about the DI200 and is the answer not in the manual?
Questions and answers